Tamiya 1/32 Spitfire Mk IX. Photos by Brett Green and me.

Tamiya 1/32 Spitfire Mk IX of 453 Squadron RAAF at Hornchurch April 1943.

This aircraft started life as a Mk V and was converted to Mk IX standard by Rolls Royce. It was flown by Wing Commander John Ratten in June 1943.

Wing Commander Ratten was credited with 2 kills, 2 shared, 1 probable and 2 damaged before being killed in action in Feb ’45.
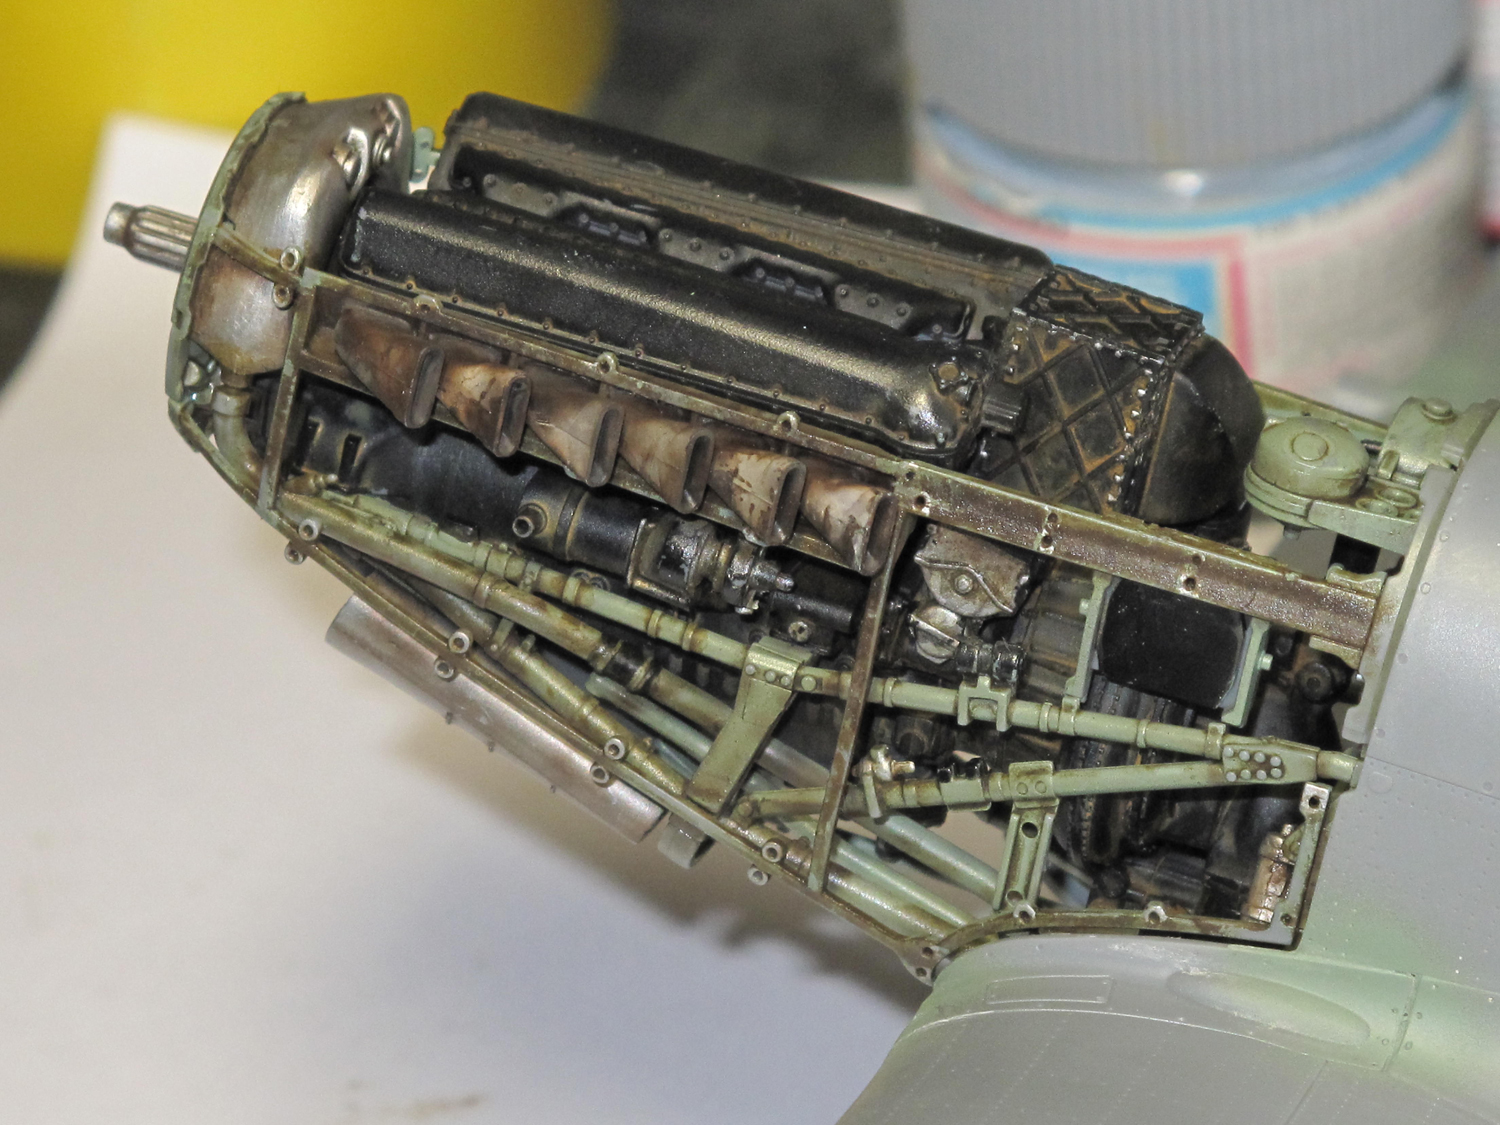
Finished Rolls Royce Merlin engine fitted to the main airframe.
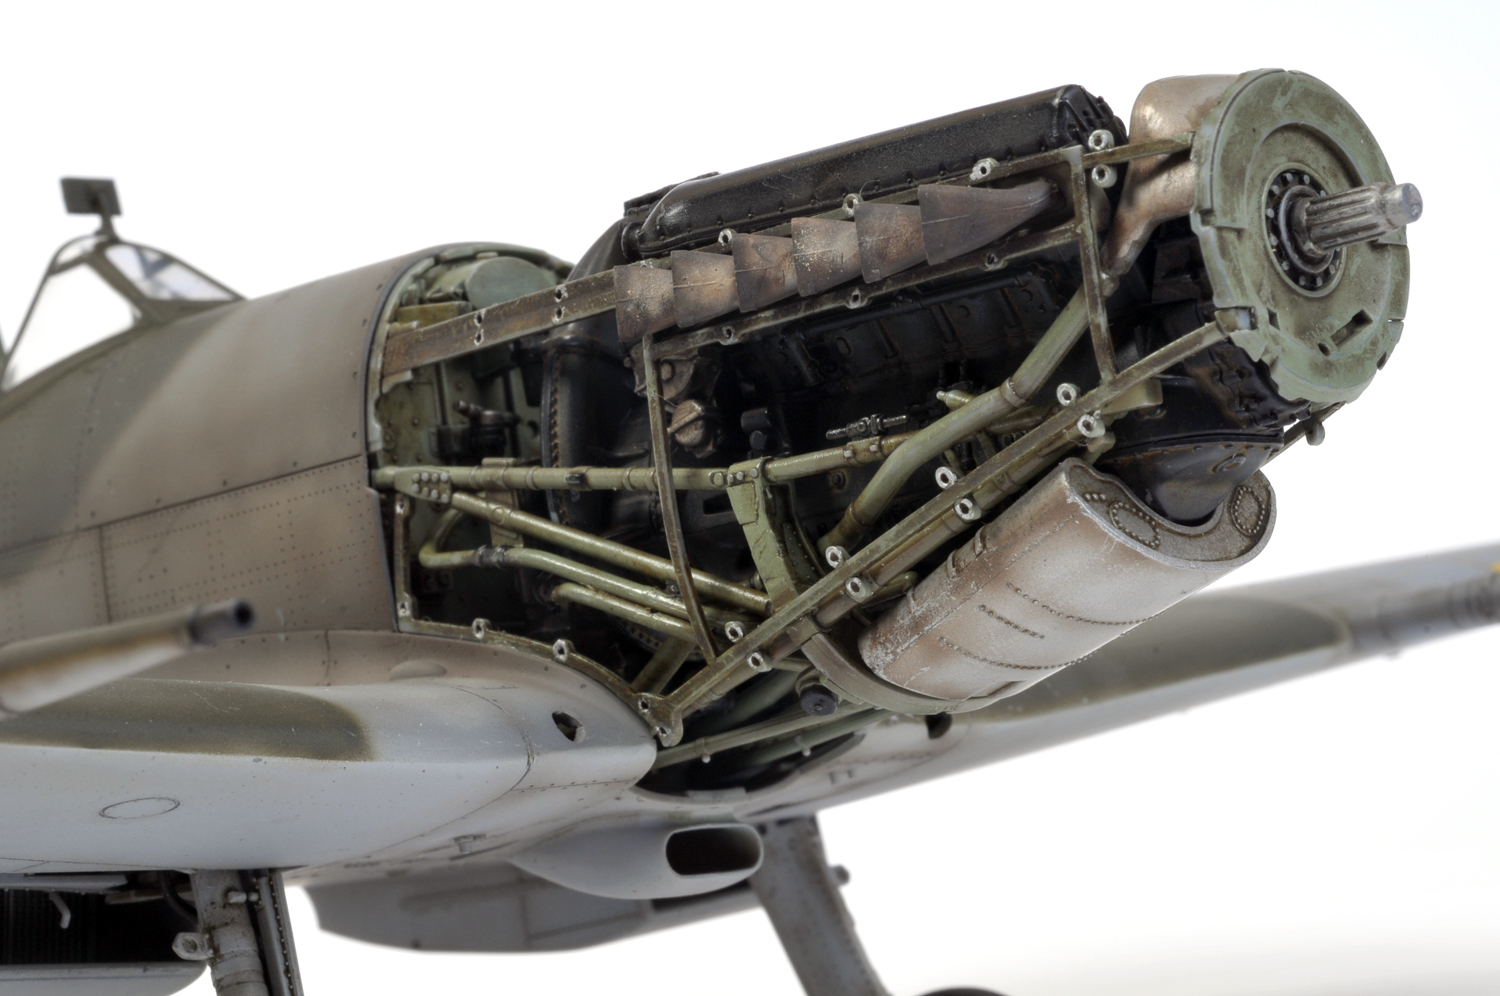
Just waiting for prop and cowling panels to be fitted.

Hello Chris, to more realistic details, your highly sensitive artist once again evident, thanks for sharing, are a reference for any modeler, and congratulations to Brett for the wonderful photos ..!
LikeLike
Thanks again for your very kind words Ben, and you’re right, Brett’s photos are fantastic. I’m heading over to his place tomorrow so he can take some shots of a Hasegawa Typhoon that I’ve just finished. I will post some of these pics here soon.
LikeLike
Hi, Chris. Another fantastic job. Could you share your secret on how you painted the exhaust stacks shown here? I especially like the burn out effect. Very realistic. Is it painted or done with pastels?
LikeLike
Hi Tomasz, there is no secret just good reference. When painting this one I had some very clear photos of this particular aircraft showing the detail, especially, of the exhausts. I copied these photos as closely as I could using only the airbrush and a very fine paintbrush. When I first saw the photos I was surprised at how good they looked.
I’m sorry that there is no secret, just technique.
LikeLike
Well Chris…let me put it this way…’just technique’ in hands of talented and experienced modeler (like yourself) IS the secret! To be precise: I was wondering which colors went first: was it dark brown base and then tan/grey staining over it? Or the other way round – light base (tan or grey) and dark brown staining?
LikeLike
Hi Tomasz,
I first painted each exhaust Tamiya Deck Tan, which is basically a light, warm grey. They were next carefully shaded and stained with a mix of Flat Black and Red Brown using the airbrush. Next a slightly darker mix of the Black/Brown was brush painted to replicate the hard edged stains. Easy!
I hope this answers your question.
Cheers,
Chris.
LikeLike
Yes, this is exactly what I was suspecting based on your photos. Simple yet brilliant! Thanks for sharing! (hope it didn’t sound like AA meeting…:D)
LikeLike
Chris- Your work is some of the most inspiring and realistic modeling I have ever seen! I used your technique to try and paint the exhaust stacks on my Tamiya Spitfire VIII- nowhere near as nice as yours but thank you so much for the photos and explanation. Thank you for sharing your work here!
LikeLike
Frank, the nice thing with these kits is that you can paint each exhaust stack separately and only attach them when you’re satisfied with the result. It took me quite a few attempts before I was happy.
LikeLike
Would you like to sell it? My grandfather was wing commander John Ratten and know it is something my father would love to have as his father died during the war when he was a boy. The accuracy of the model to the photos of his plane is incredible.
LikeLike
Sorry Jaimie but this model was a commission job and is no longer in my possession. I will be seeing this client soon and I will ask wether he is willing to part with it. Keep watching this space.
LikeLike
Hi Chris , being an old modeller ( and figure painter too) , i want to send you my sincere, heartfelt compliments for your amazing works. They are really an example for any modeller. Thank you very much to share with all of us your experiences ! I’ll keep follow you with great interest . Oh, burnt effect on exhausts here is fantastic.
LikeLike
Thanks Natale, your comments are very flattering and I appreciate them very much.
LikeLike
Chris, Would you consider doing an article on the technique you use to paint the exhaust stacks? Simply amazing!
Thanks,
Steve
LikeLike
Hi Chris, just browsing through your works and suddenly a question comes to my mind. What kind of airbrush do you use for the subtle “grime” over the panel lines? You already told me about the highly dilluted paint.
Breathtaking work there btw!
Thanks
Gerardo
LikeLike
Hi Gerardo, I use my Aztec airbrush for everything but the type of brush doesn’t really matter as long as it gives you the option of being able to control it properly.
LikeLike
Thanks! What Aztek model is it? My Badger 100LG is reaching it’s final days🤣 and i want to buy a new one. Perhapsni can che yours on the web and look for some reviews.
Thanks again!
Cheers
LikeLike
Gerardo the model Aztec I use is the A470 which I have owned for about 25 years. But what I have heard recently is that they are no longer manufactured using the same tough plastics and resin and are now susceptible to damage from the stronger solvents such as acetone or lacquer thinners. Because of this, when my Aztecs give up, I will not be replacing them with Aztecs. I think I would give the range of Iwata Eclipse brushes serious consideration.
LikeLike