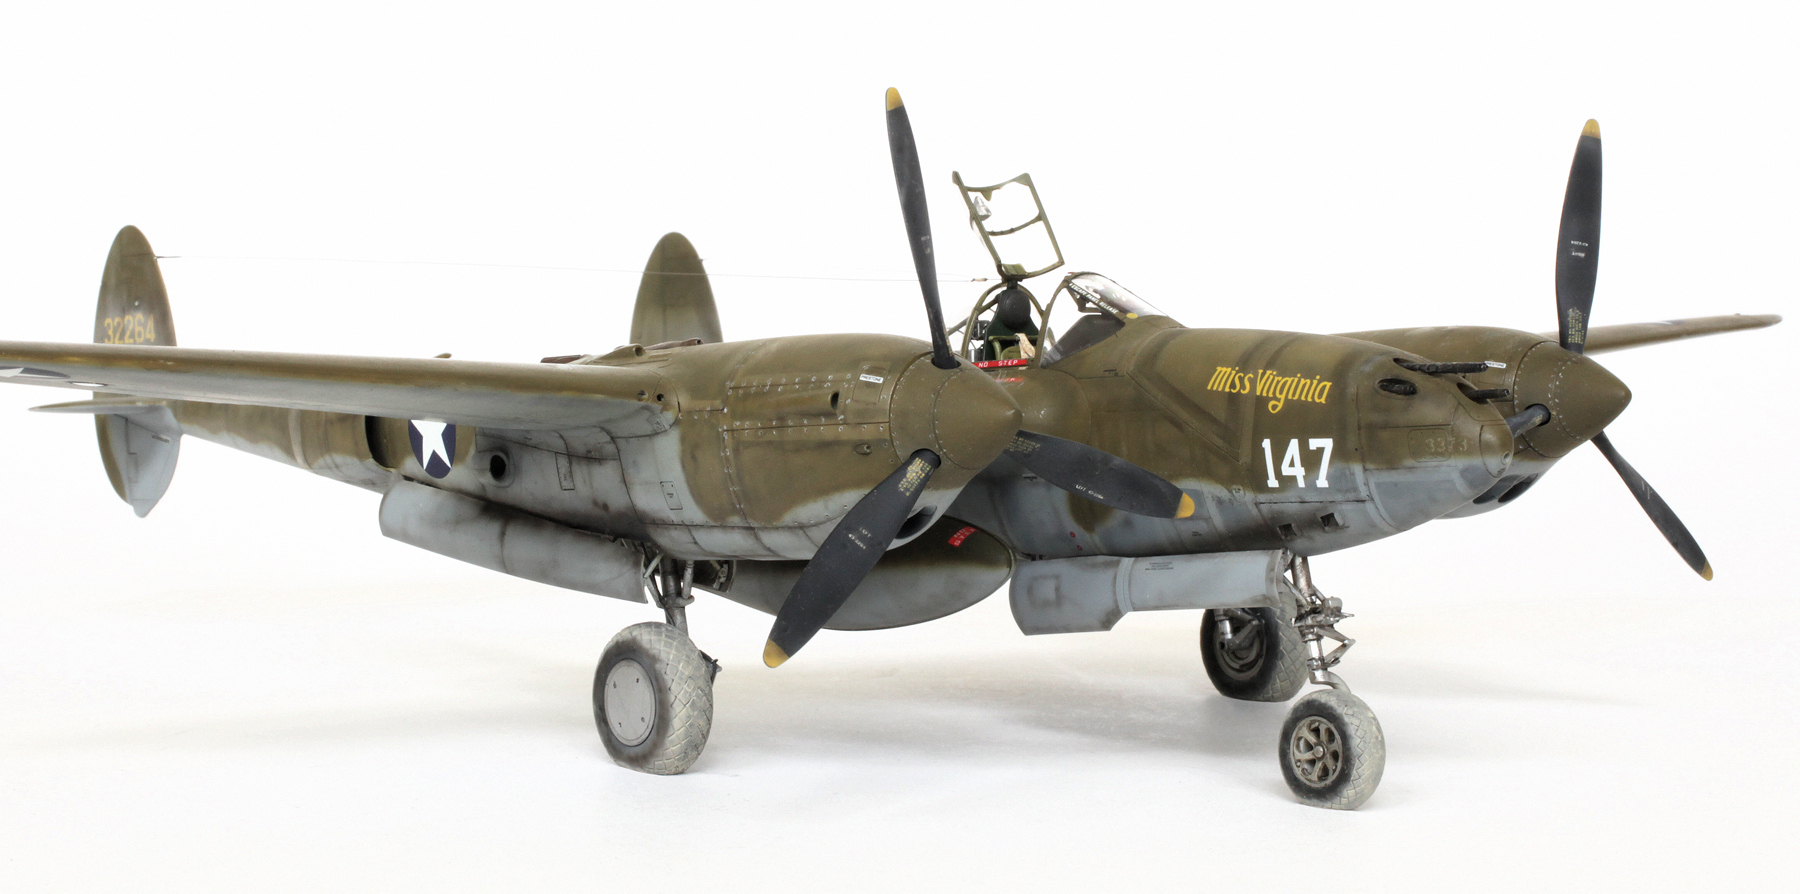
Tamiya 1/48 P-38G Lightning
LOCKHEED P-38G Lightning

This P-38 was assigned to Capt. Bob Petit of the 339th FS/347 FG while operating from Kukum Field on Guadalcanal in 1943. On April 18th of that year Lt. Rex Barber flew this aircraft while taking part in Operation Vengeance. This was the mission to intercept the Japanese flight carrying Admiral Yamamoto. The flight was intercepted over Bougainville Island where Lt. Barber successfully engaged and shot down the G4M ‘Betty’ bomber carrying Yamamoto who was killed in the ensuing crash.

The main assembly of this kit was done by Brett Green. My work started with the painting and addition of wiring to the radio gear using 0.2mm and 0.3mm lead wire.

Red and blue placards were carefully painted on.

In place behind the pilot’s seat.

The super charger/exhaust units. These were first painted silver then sprayed blackish brown. They were then shaded with blacker brown and given a black wash.

Drop tanks painted and weathered.
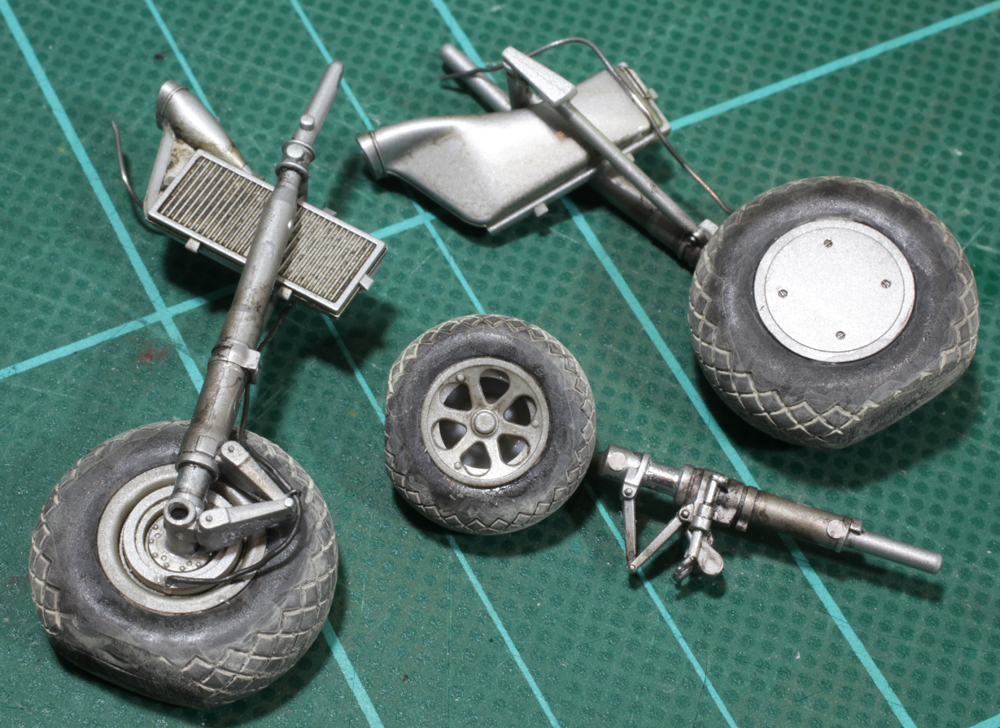
Undercarriage was first painted silver then given a dirty black wash. Careful shading was then applied using the airbrush. Note also the addition of hydraulic brake lines.

Gear doors were painted silver on the interior and neutral grey on the exterior and then given the same treatment as above.

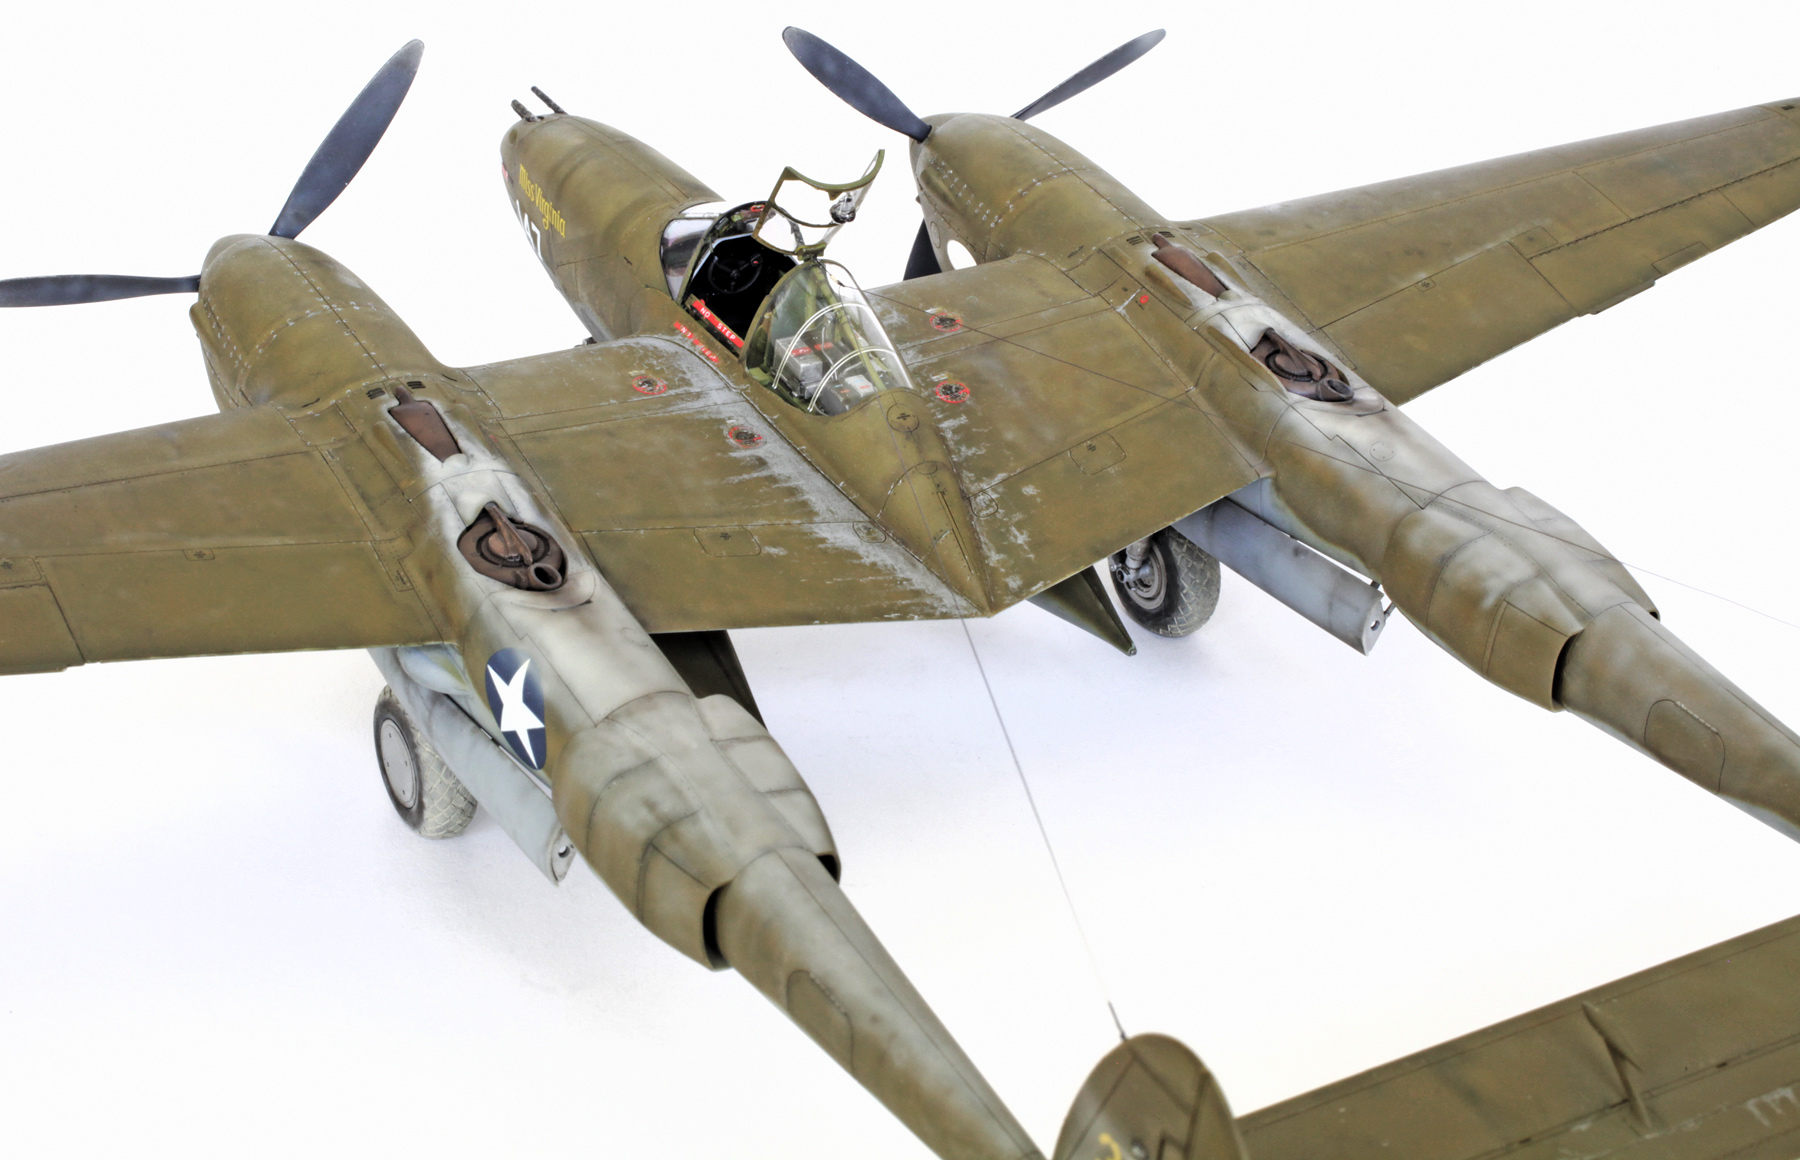
When these aircraft were shipped overseas certain panel lines were sealed with tape. To replicate the effect left after the removal of this sealing tape, the appropriate panel lines were first sprayed with a lighter version of the main cammo colours and then covered with Tamiya’s 2mm flexible masking tape. Various darker versions of these cammo colours were then sprayed along the edges of the tape.

When the tape was removed the resulting effect was pretty close to my reference pics.
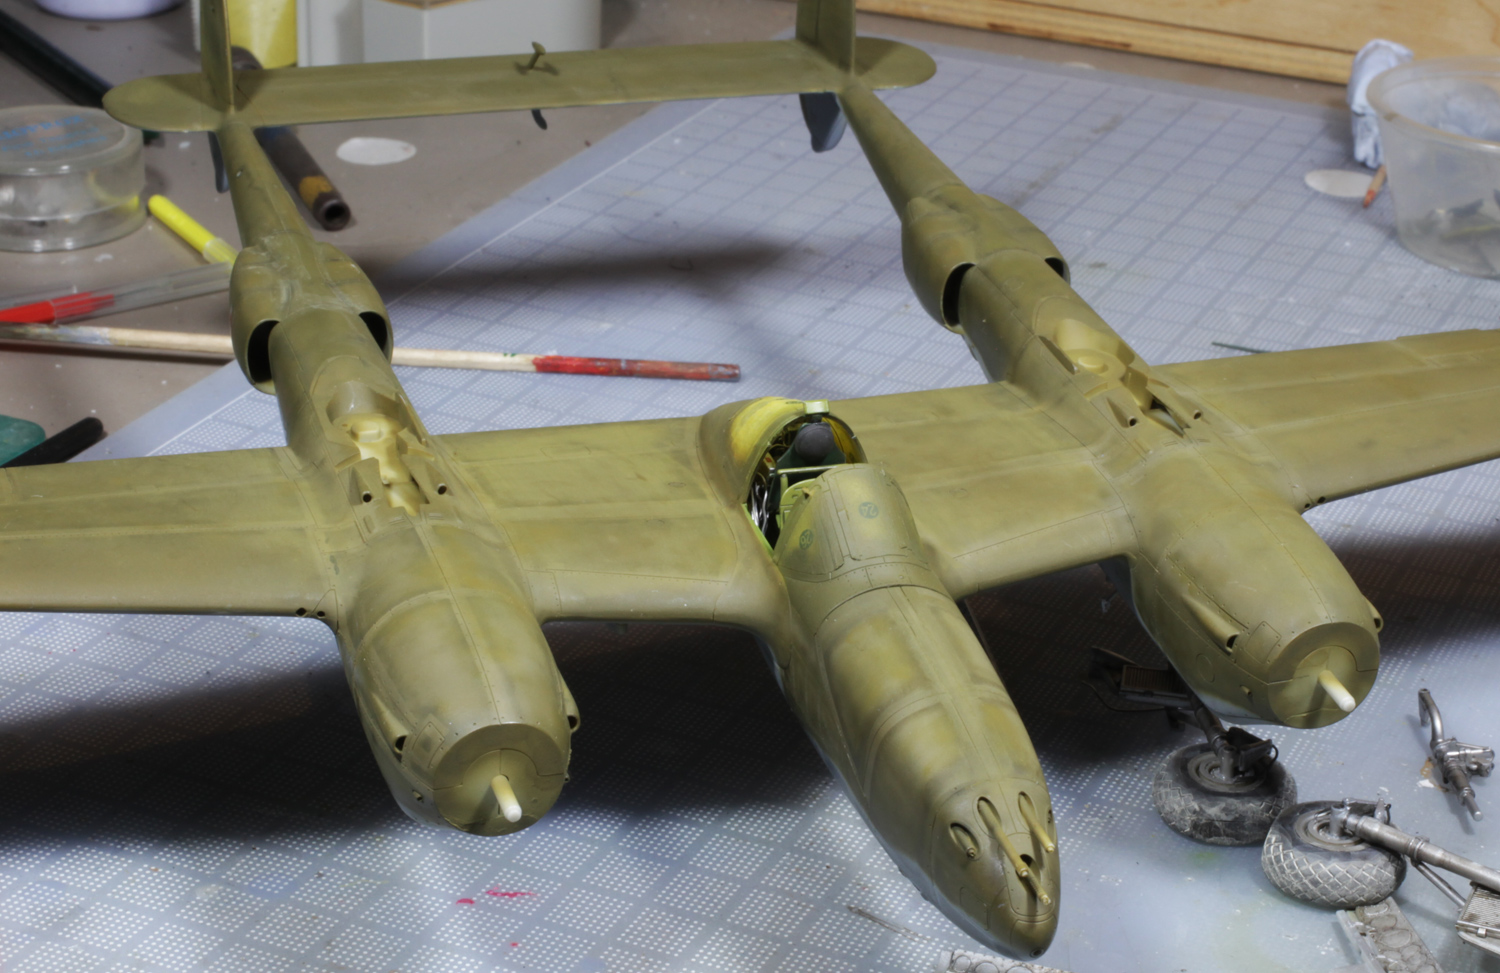
The main colours were then mottled with varying shades of themselves and my black/brown mix.
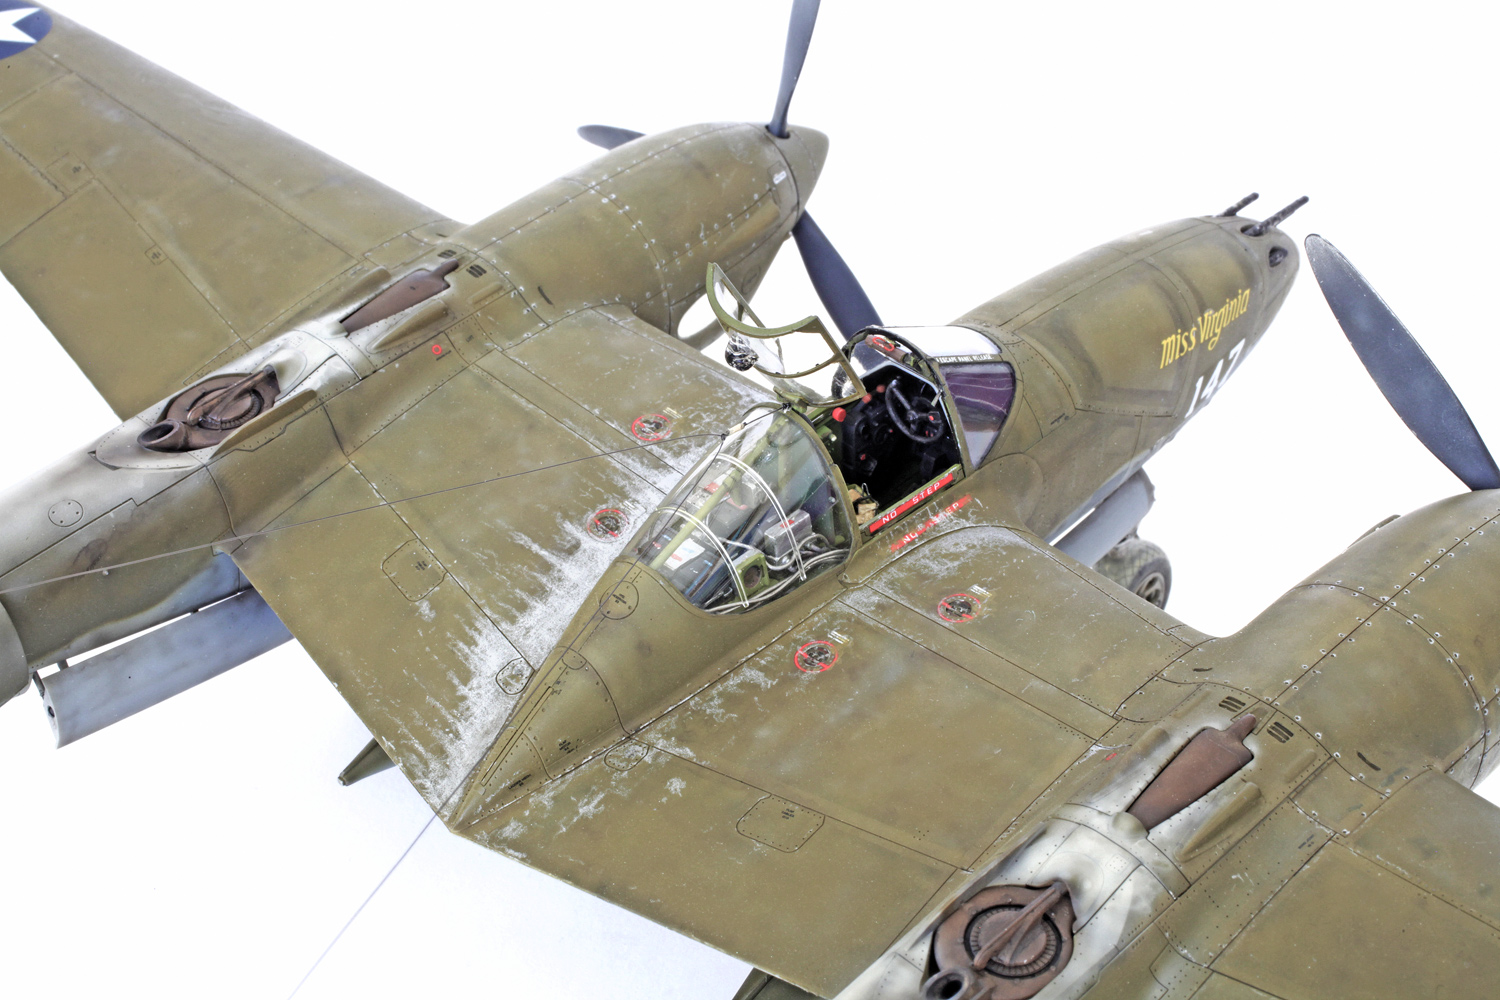
This and the next shot show various weathering effects including lean exhaust staining, paint mottling and chipping.

The paint used for the exhaust stains is Tamiya XF-55 Deck Tan. The paint chipping was achieved using a very sharp Prismacolor silver pencil.
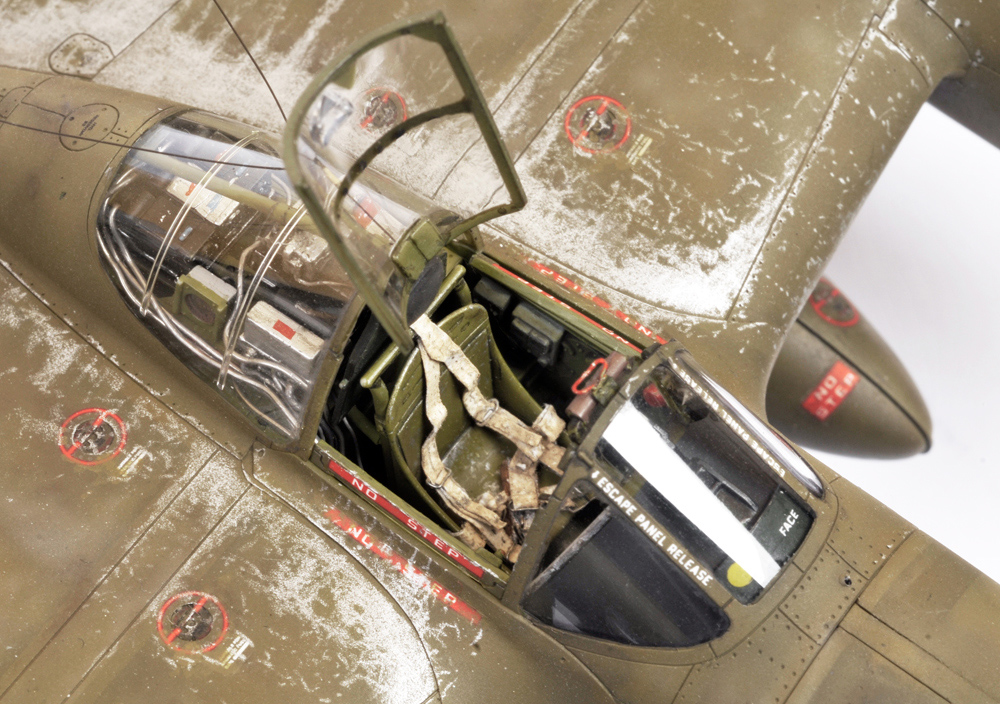
This shot shows my scratch-built safety harness made using lead foil and fine wire. Also seen attached to the top of the windscreen frame is a small red handle. This was made from the same fine wire as the safety harness buckles and, I think, in reality it was used to adjust the rear view mirror when the canopy was closed. Or I could be completely wrong.

Sealing tape, gun dust and paint chipping effects can be seen in this shot.

Exhaust staining on the tail fins.

Brett’s fantastic compilation shot. Ready for Operation Vengeance.
GALLERY


Hi Chris, I was waiting for this post since your first message showing this model on FB. Great build as usual. How’s the overall impression on this Tamiya release?
Cheers, Tomasz
LikeLike
Hi Tomasz, Brett Green actually did the main build on this one and from his account and from the little bit of construction that I did I would have to say that this is one of the best engineered kits that I have seen.
LikeLike
So good seeing another one of your masterpieces Chris!:) thanks for posting. Love the attention to detail like the little water droplet marks on the propeller blades, etc. very cool. Great work on scratch-building the tiny seatbelts too.
The photos are “not bad” also, especially the Photoshop work on the one with the landscape background, looks super real. Bret = amazing:)
LikeLike
Chris, may I ask what you usually ‘thin’ your paints with to get such a smooth finish? Do you pretty much use Tamiya and Gunze paints? Also, you do the chipping with the Prismacolor pencil so well!!! Do you mat coat your model with something so that the silver pencil has something to grip on to? My Prismacolor pencil experiment hasn’t been very successful yet, lol, but your work inspires me to keeps trying!:)
LikeLike
Hi Anton, I always thin my paint with Isopropyl alcohol (IPA). Yes I basically use only Tamiya and Gunze water based acrylics unless I’m doing metallic, then I usually use lacquer base paint. As for the silver pencil, I find that it always applies better to a matt surface. So if the base colour is not matt then yes I give it a flat coat first and usually after as well.
Cheers and keep trying,
Chris.
LikeLike
You are my absolute favourite modeller-to-follow! Your builds are amazing and final look is always outstanding.
My deepest compliment.
LikeLike
Gee Wiz, that Tamiya P-38 is amazing. The comp photo is great with the Tiger Moth in the background and makes a great photo essay. Just wondering if the access ladder at the trailing edge of the main wing is included with the kit?
.
LikeLike
Yes of course it’s included but for some reason Brett made it with the ladder retracted.
LikeLike
Nice job!
LikeLike
Hi Chris, very nice weathering job which perfectly captures the conditions these aircraft operated under. The P-38 is one sleek bird and the model looks stunning from every angle.
Cheers, Adrian
LikeLike
This is outstanding work Chris. An inspiration to me for definite!
LikeLike
Lovely stuff Mr Wauchop!
LikeLike
Talking about the… Tamiya 1/48 P-38G Lightning…MARVELOUS…¡¡¡ Just…one more from…T A M I Y A…¡¡¡ I´m 81 years old and…”TAMIYA”…I love you…¡¡¡ Enrique…¡¡¡
LikeLike
…as always, great job…
Congratulations!!
LikeLike
Incredible work!
LikeLike
Amazing and inspirational work once again Chris. I wasn’t aware Tamiya was releasing a P38, I just ordered the Academy kit and now wish I held off. Oh well, I guess I’ll have two on the shelf now 🙂
Was all the chipping near the wing root done with your usual silver pencil? Geeez that’s well done, very realistic.
LikeLike
Sorry- I reread your notes in between the pictures and I see you already answered my question. You are a magician with that silver pencil ✏️
LikeLike
Wow! This has to be one of your best paintjobs yet. The twelft picture from the top is unbelievable. The chipping is exquisite! My hat is off to you Chris! (Again)
LikeLike
Chris- glad you’re back with another inspiration! One very small correction: the red handle was indeed there on top of the windscreen, however I believe it was used by the pilot to help pull himself out of the cockpit, since he was sitting somewhat down in a “pit”. Beautiful model! cheers, Steve Rewey
LikeLike
Correction on what I just said… upon further inspection, I’d say its for emergency canopy release.
LikeLike
I’d say you are completely correct Steve.
LikeLike
Were the Tamiya difficult to work with?
LikeLike
Oops I meant to say Tamiya DECALS.
LikeLike
Gene, the decals worked fine except for silvering on some of the smaller stencils, but I’m sure that this was caused by me not using enough gloss coat before application. A sin I am guilty of more than not.
LikeLike
Reblogged this on My Forgotten Hobby II and commented:
Awesome!
LikeLike
Great model, Chris! As always 🙂
Happy New Year!
Zigmeister
LikeLike
Flawless build. I am impressed.
LikeLike
Amazing finish. I’ve been watching the pre-shading vs. black-basing debate. Did you use one or the other or some combination? Something else? Because it works. Curt
LikeLike
Hi Curt, I use neither of these. I have been using the post shading method ever since I have been using an airbrush which is over 45 years. I have described my method many times including here on my blog and on Facebook but you will probably have to search a bit to find it.
LikeLike
Excellent, thanks Chris!
LikeLike
I finally bought it!
LikeLike
You won’t regret it!
LikeLike
I still can’t believe how incredible you have rendered it.
LikeLiked by 1 person
Hello Chris,
I was wondering what the base paints you used for this aircraft were? Was it Gunze H52 or a Tamiya OD mix?
LikeLike
Hi Jonathan, my usual method for doing OD schemes starts with a base coat of Tamiya XF49 Khaki followed by detail and selective shading with Tamiya XF62 Olive Drab. Takes a bit of practice but the results look pretty good, well to my eye anyway.
LikeLike
Thanks Chris,
You’re widely regarded as one of the best, so if you say it looks good, it certainly is good.
Cheers,
LikeLike
Great build, however I’ve read elsewhere that at least one of the drop tanks was customized carry more fuel
LikeLike
You’re right Tom. Check Brett’s compilation pic before the gallery and you’ll see that the two different sized tanks have been fitted ready for the big mission.
LikeLike