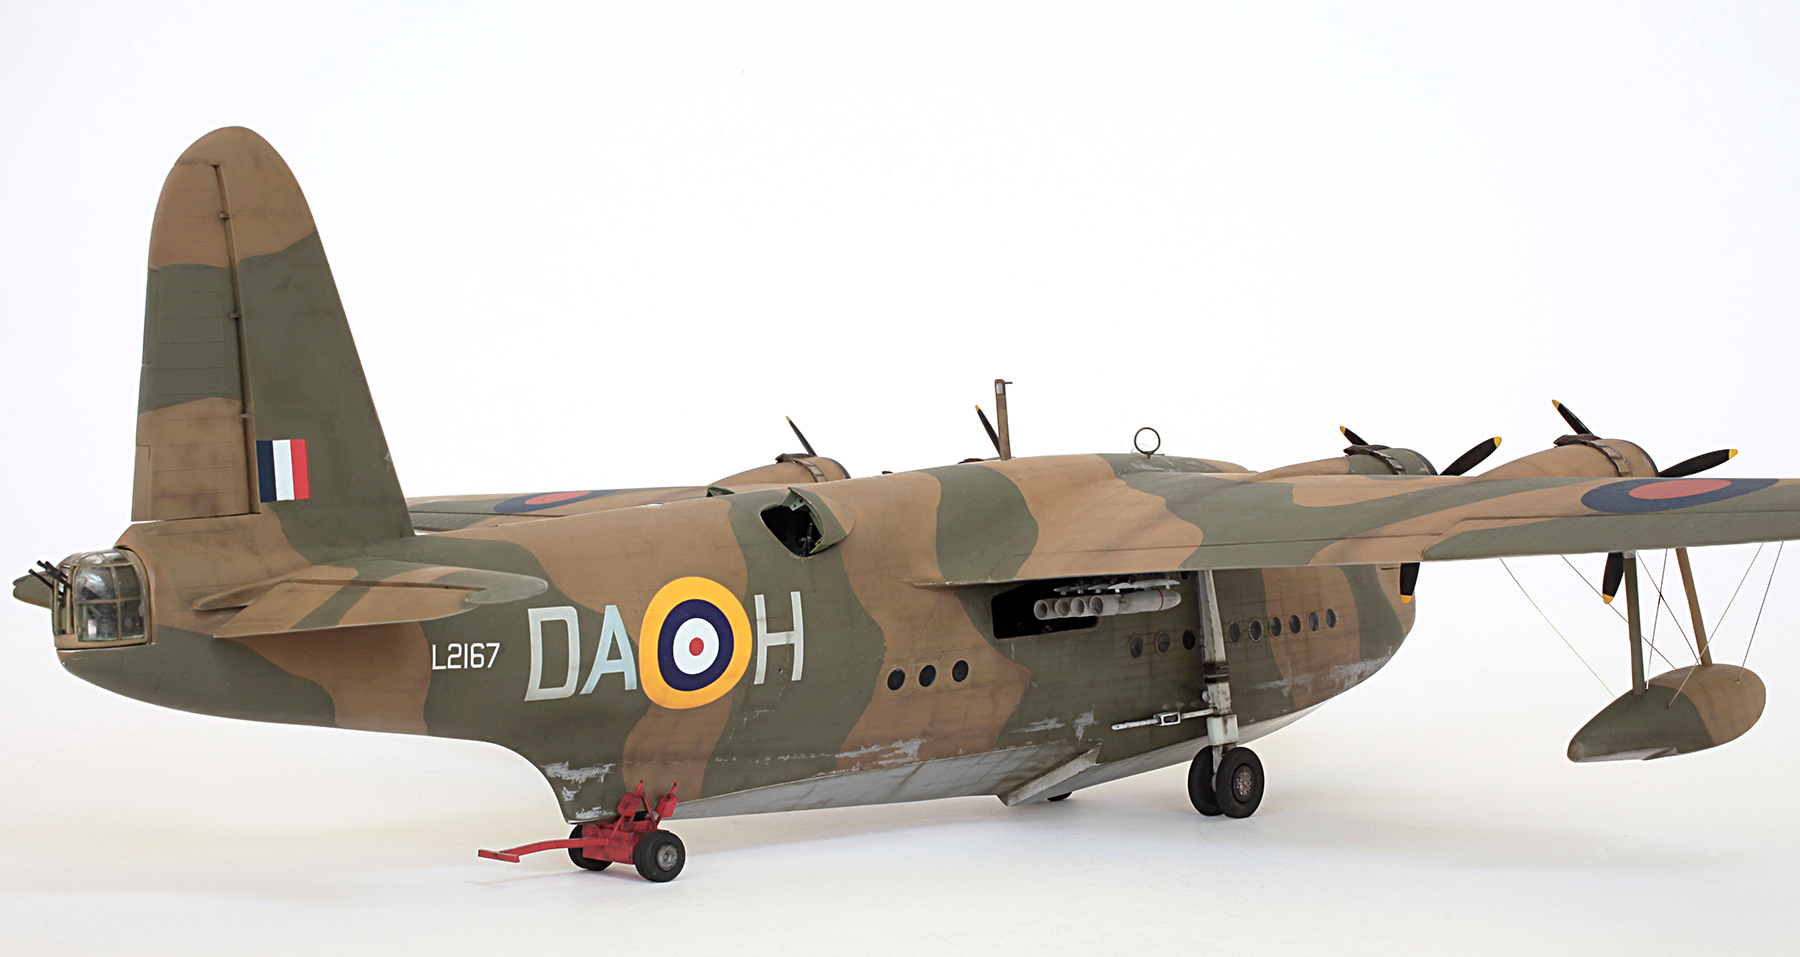
Airfix 1/72 Short Sunderland Mk. III (converted to a Mk. I)
SHORT SUNDERLAND Mk. I

On the afternoon of April 9th 1940 this aircraft from No. 210 Squadron RAF took off from Invergordon, Scotland to make a reconnaissance flight over the Oslo area of Norway to gather information on German movements after their recent attack. They were quickly spotted by the Germans at the captured Fornebu Airport, near Oslo, and from there two Messerschmitt Bf 110’s of 1./ZG 76 were scrambled to intercept. The pilots of the 110’s were Staffelkapitän Werner Hansen and Leutnant Helmut Lent. Lent later became a highly successful night fighter ace. The two shot down the Sunderland with Hansen receiving credit for the victory. All but one of the Sunderland’s crew were lost in the action which sadly included my best friend Bill Young’s uncle, Sgt Pilot Jack Clifford Carpenter. Bill has made a documentary called ‘A Very Short War’ about this event which has been screened several times over the years on Australian television and is really worth a look if you get the chance.
I have done a little bit of photoshopping to this pic. I’ve made the props look as though they’re spinning and, if you look closely, you can just see Uncle Cliff having a quick look at us from the navigator’s astrodome.
The conversion from a Mk. III to a Mk. I
The first step in this conversion was to backdate the later smoother planing hull bottom to the earlier stepped design. Unfortunately I was so consumed when carrying out this work that I forgot to take any W.I.P. photos. All I can say is that it turned out to be easier than I thought thanks to the thickness of this old kit’s plastic and after a fair bit of cutting, filing and sanding only a few areas needed filling with plastic card and a bit of putty. This was all done before the fuselage halves were glued together but they were frequently dry fitted through the process to assure the proper alignment of my work. Well, near enough anyway. I did do it all by eye.

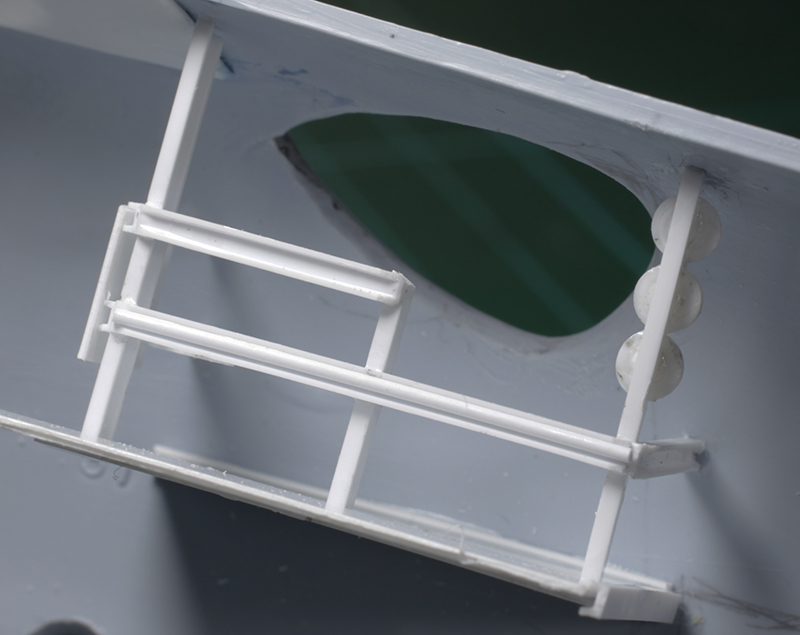
Next step was to cut the two teardrop-shaped holes for the mid upper gun positions. Some internal detail was added using Evergreen plastic rod, card and shapes. There is some really good photographic reference of this detail if you wanted to go nuts but I chose to keep it fairly simple.
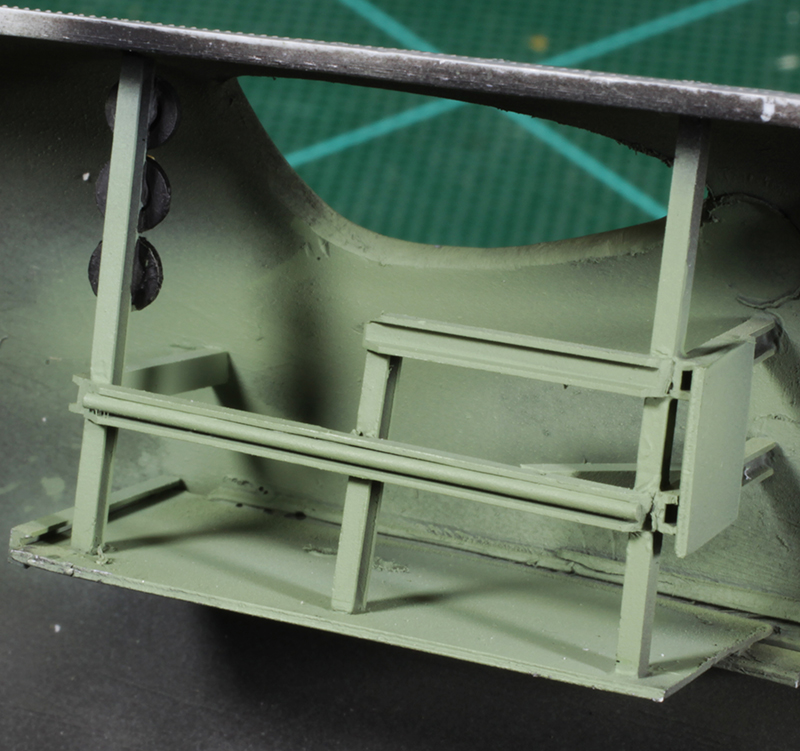

Painted interior green with the spare K gun mags painted metallic black.

Some detail added to the cockpit side walls again using Evergreen rod and strip and some fine solder wire. Also note that plastic strip has been added to the top of the mounting rails for the cockpit floor. This was done to raise the main interior to a more accurate level.

This detail will never be seen but I know it’s there and now so do you.

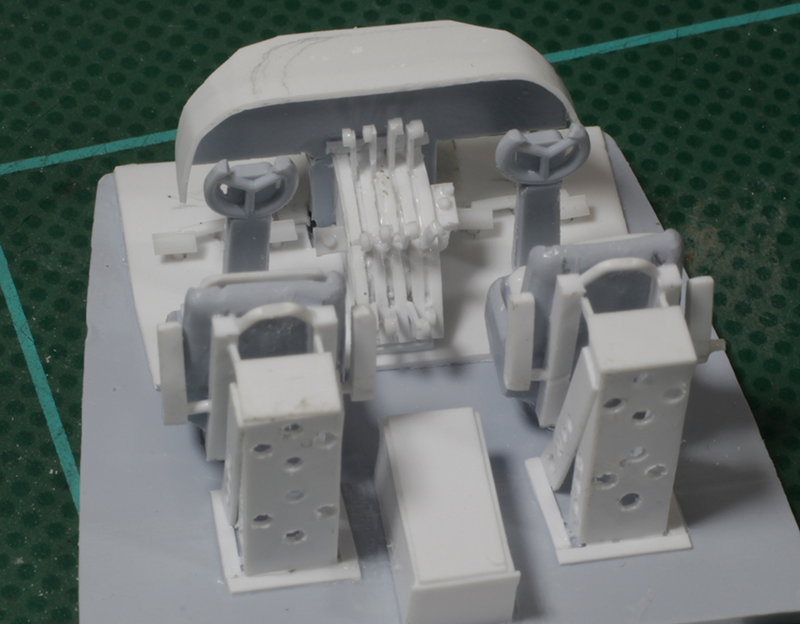
I did go a bit overboard with the main cockpit detail but it was quite a lot of fun to do.

Instrument panel and throttle quadrant. The instruments are from an old 1/72 P51 decal sheet with multiple sets of markings. Decals for two panels were cut up to fit the space.


Painted with safety harnesses added. The Sutton harnesses were cut from 0.13 Evergreen plastic sheet which is quite malleable as long as it’s not too old.

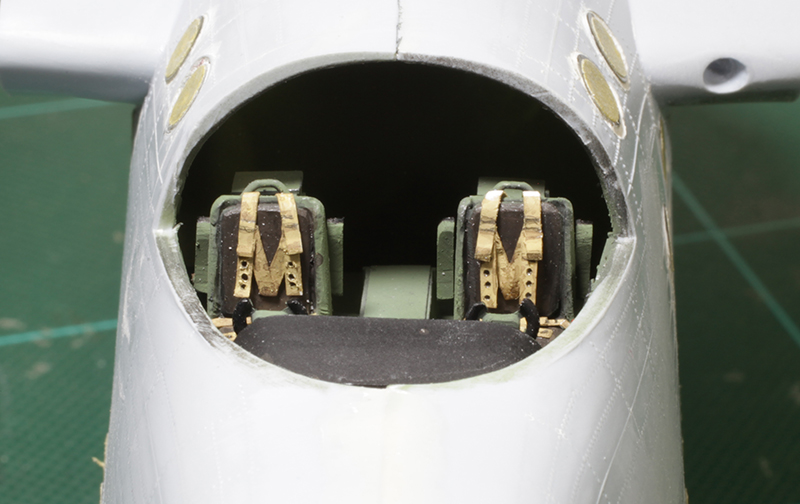
Installed.
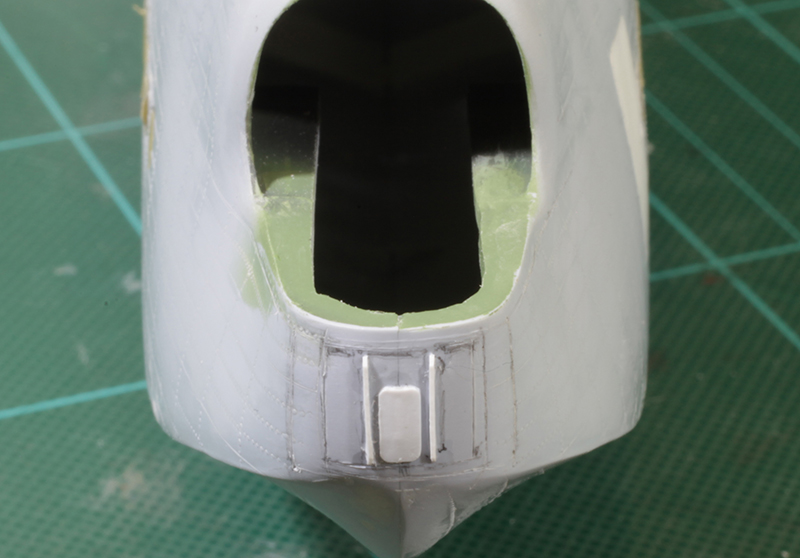
Bomb aimer’s window. The rectangle of white plastic should be clear. I’ll paint it to look that way later.

A new front door was cut from plastic card and glued over the very faintly moulded kit detail. This shot also shows the round Tamiya tape masks covering all the hull windows. The kit windows are too large so the masks were cut about 0.5 mm smaller in diameter. I think they should be even a bit smaller than that.

The dorsal cut-outs and the top turret hole filled. Also note the small, round observation windows cut into the spine. These were painted black and a corresponding disc of clear acetate was added after the main paint job was done.
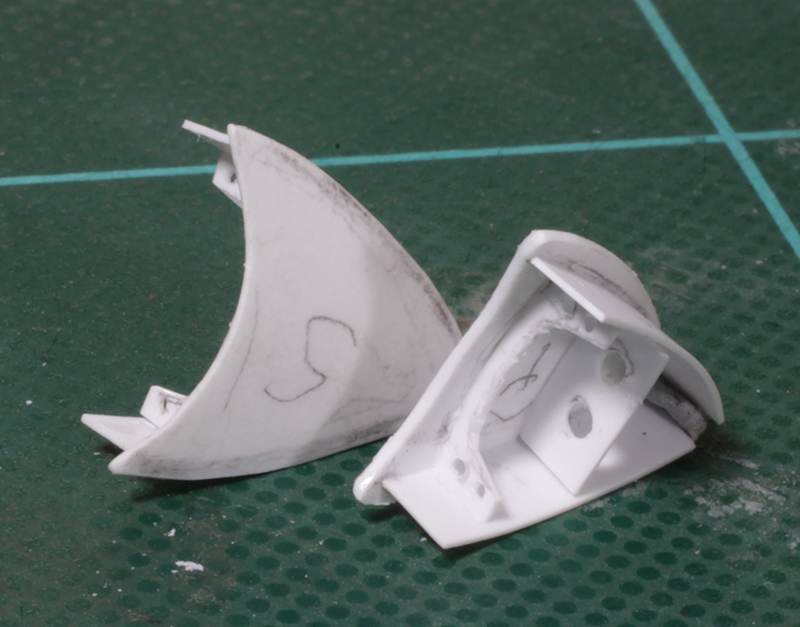
The covers for the dorsal gun positions cut from 0.25 mm plastic card.
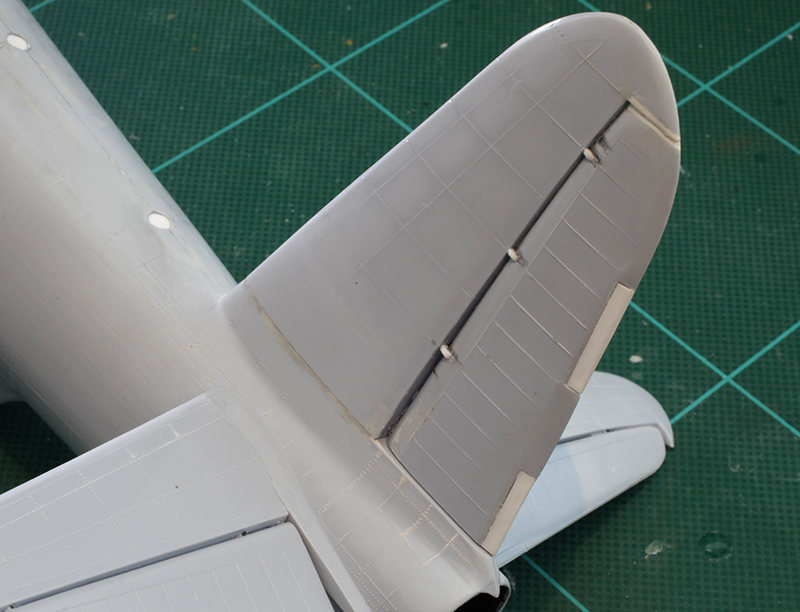
Some hinge and trim tab detail was added to the rudder.

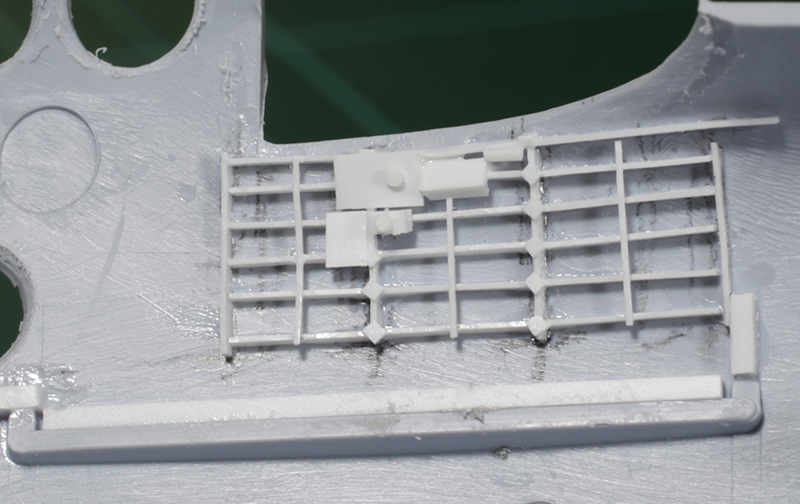
The nose turret needed beefing up. This was done by covering the entire kit part with 0.5 mm plastic card and sanding it to the right shape.

These are the two Vickers K guns for the upper fuselage cutouts. They are made from various bits of Evergreen rod and strip with gun sights made from very fine wire. They are very small.

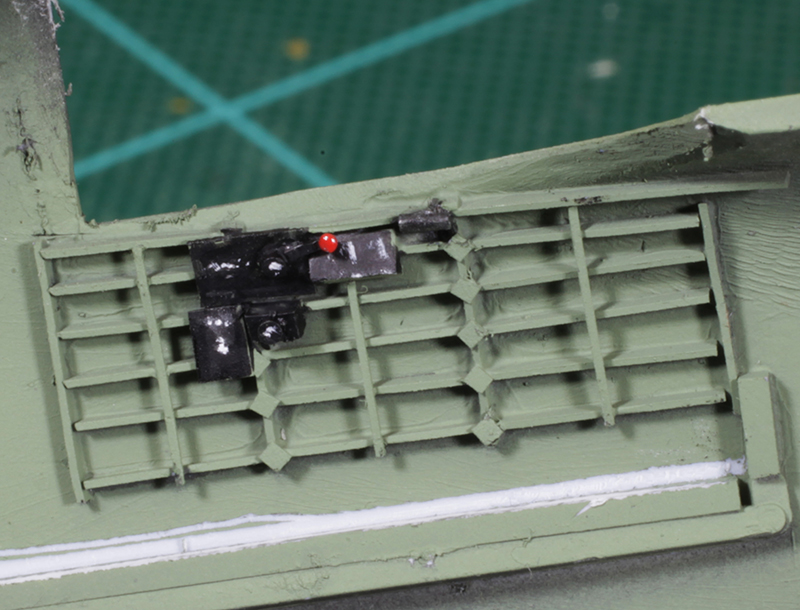
The quad Browning for the tail turret and the single Vickers for the nose. I did manage to snap the barrel off the Vickers gun pretty early on, so I replaced it with a much sturdier metal version.

The metal version.

Guns and covers in place and a bit of the interior is just visible.
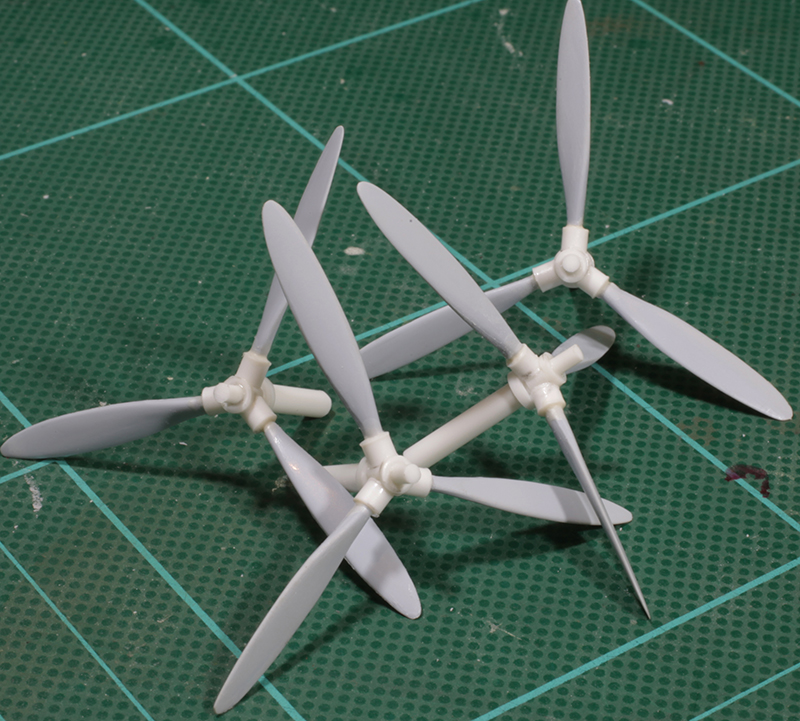
The kit’s prop blades were added to new, more accurate hubs and much stronger shafts.
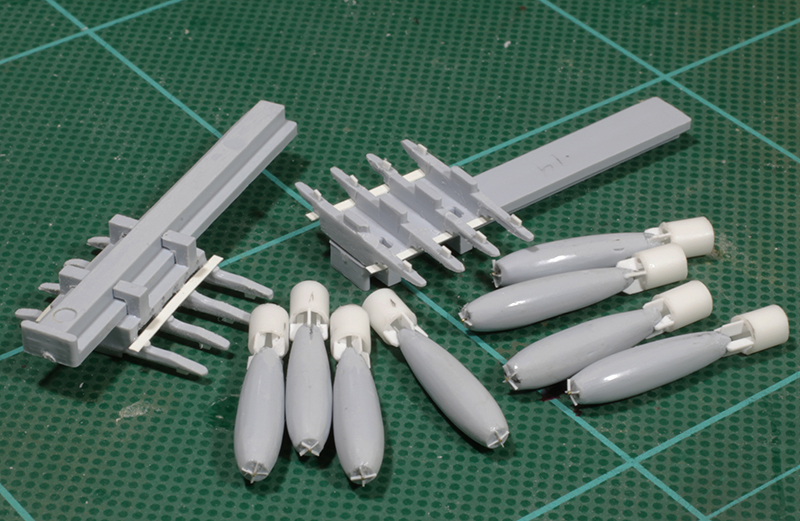
The bombs and bomb racks with a bit of extra detail added.

Bombs painted and ready to be attached to their bomb racks.

The tail’s beaching trolley with a bit of extra detail added.
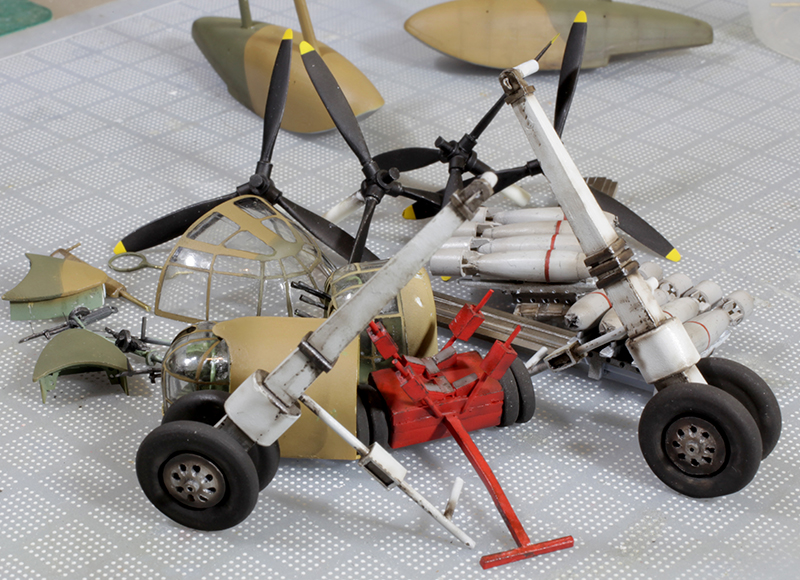
Most of the fiddly bits painted, weathered and ready for installation.

Painted, weathered and waiting for decals (thanks Brett). This shot also shows the more accurate early engine exhausts which I made using 2.5 mm plastic rod. It was at about this point of the build that I realised the kit did not include the Pegasus engines’ supercharger intakes. So I made four by cutting up a row of 1/32 Me 109 exhaust stacks that I found in my spares box. I reshaped them a bit, attached one under each engine cowl and painted them silver. Looks a lot better than nothing.
GALLERY


Hi Chris, good to have you back! Very interesting subject and (no surprises here!) excellent build.
Cheers,
Tomasz
LikeLike
Thanks Tom. There were lots of surprises!
LikeLike
Nicely done Mr Wauchop!
LikeLike
Thanks Roger. This one has worn me out a bit though. It’s taken over six months to finish.
LikeLike
One more question Chris…Did you use mask for the camouflage on the upper wings/fuselage?
LikeLike
Tomasz, I first drew the cammo demarcation lines with lead pencil as a guide. Then I used Tamiya’s flexible, white masking tape along these lines with their yellow 15mm tape behind this.
LikeLike
Awesome as always Chris. I’m doing a 1/48 B17G for someone and MGs from scratch on that are a battle let alone at 1/72. But I’ll keep battling on with the 58 year old eyes. Brett was just kind enough to post my He111 on hyperscale but that’s in 1/32 and definitely easier. Stunning work mate
LikeLike
Good luck Craig. The 1/72 guns were small but at least they didn’t have perforated cooling jackets!
LikeLike
Awesome as always Chris. I’m doing a 1/48 B17G for someone and the MGs on that are fiddly enough from scratch let alone at 1:72! Brett was kind enough to post my He11 on Hyperscale a few days ago but that was in 1/32 that’s easier but 1/24 is easier still🤣🤓🤓🤓. But I’ll keep battling on with the old 59 year old eyes. Brilliant to have you back posting. Gives me new stuff to try to emulate
LikeLike
Thanks again Craig.
LikeLike
Very nice job on that venerable old kit…Ol Chap!
LikeLike
Thanks Jim. Yes, it certainly was a wizard prang.
LikeLike
Absolutely fantastic job. I can’t take my eyes off of it. What paints did you use for the Dark Earth, Dark Green, and undersides?
LikeLike
Thanks Scott. The paint s used were Gunze Sangyo H72 Dark Earth and Tamiya XF-81 Dark Green 2 (RAF). I added a few drops of Tamiya XF-60 Dark Yellow to each of them to scale them back a bit.
LikeLike
Excellent as always Mr. Wauchop! And also a interesting background story.
LikeLike
Absolutely wonderful job. I have learnt so much about what my uncle was flying. Huge thanks Chris.
LikeLike
What a marvellous job, you have done there. Brain surgery lost an important surgeon when you decided to take up modifying aircraft kits!! Such skill !!
LikeLike
Chris, how do you glue painted parts to each other? I don’t think you can use plastic solvent adhesive because it messes the paint. Do you use epoxy? Thanks for your help
LikeLike
Zane, when gluing pre-painted parts together I still use plastic cement but I carefully scrape the paint off the contact areas to be glued.
LikeLike
Well done Chris, excellent job on a pig of a kit!!!
May I ask what Interior grey green you used? Seems to be spot on!
Thanks!
Alex
LikeLike
Hi Alex, not that much of a pig just really old. It was quite good fun adding the details if not a bit time consuming. The interior green colour I used was Tamiya XF-71 Interior Green which, for this scale, I did lightened a little with a dash of white.
Hope this is of help.
Cheers, Chris.
LikeLike
I wouldn’t have guessed! Thanks very much for the reply!
Cheers, Alex
LikeLike