DAS WERK 1/16 Sd.Kfz. 251/22 ‘Pakwagen’
DAS WERK 1/16 Sd.Kfz. 251/22 ‘Pakwagen’
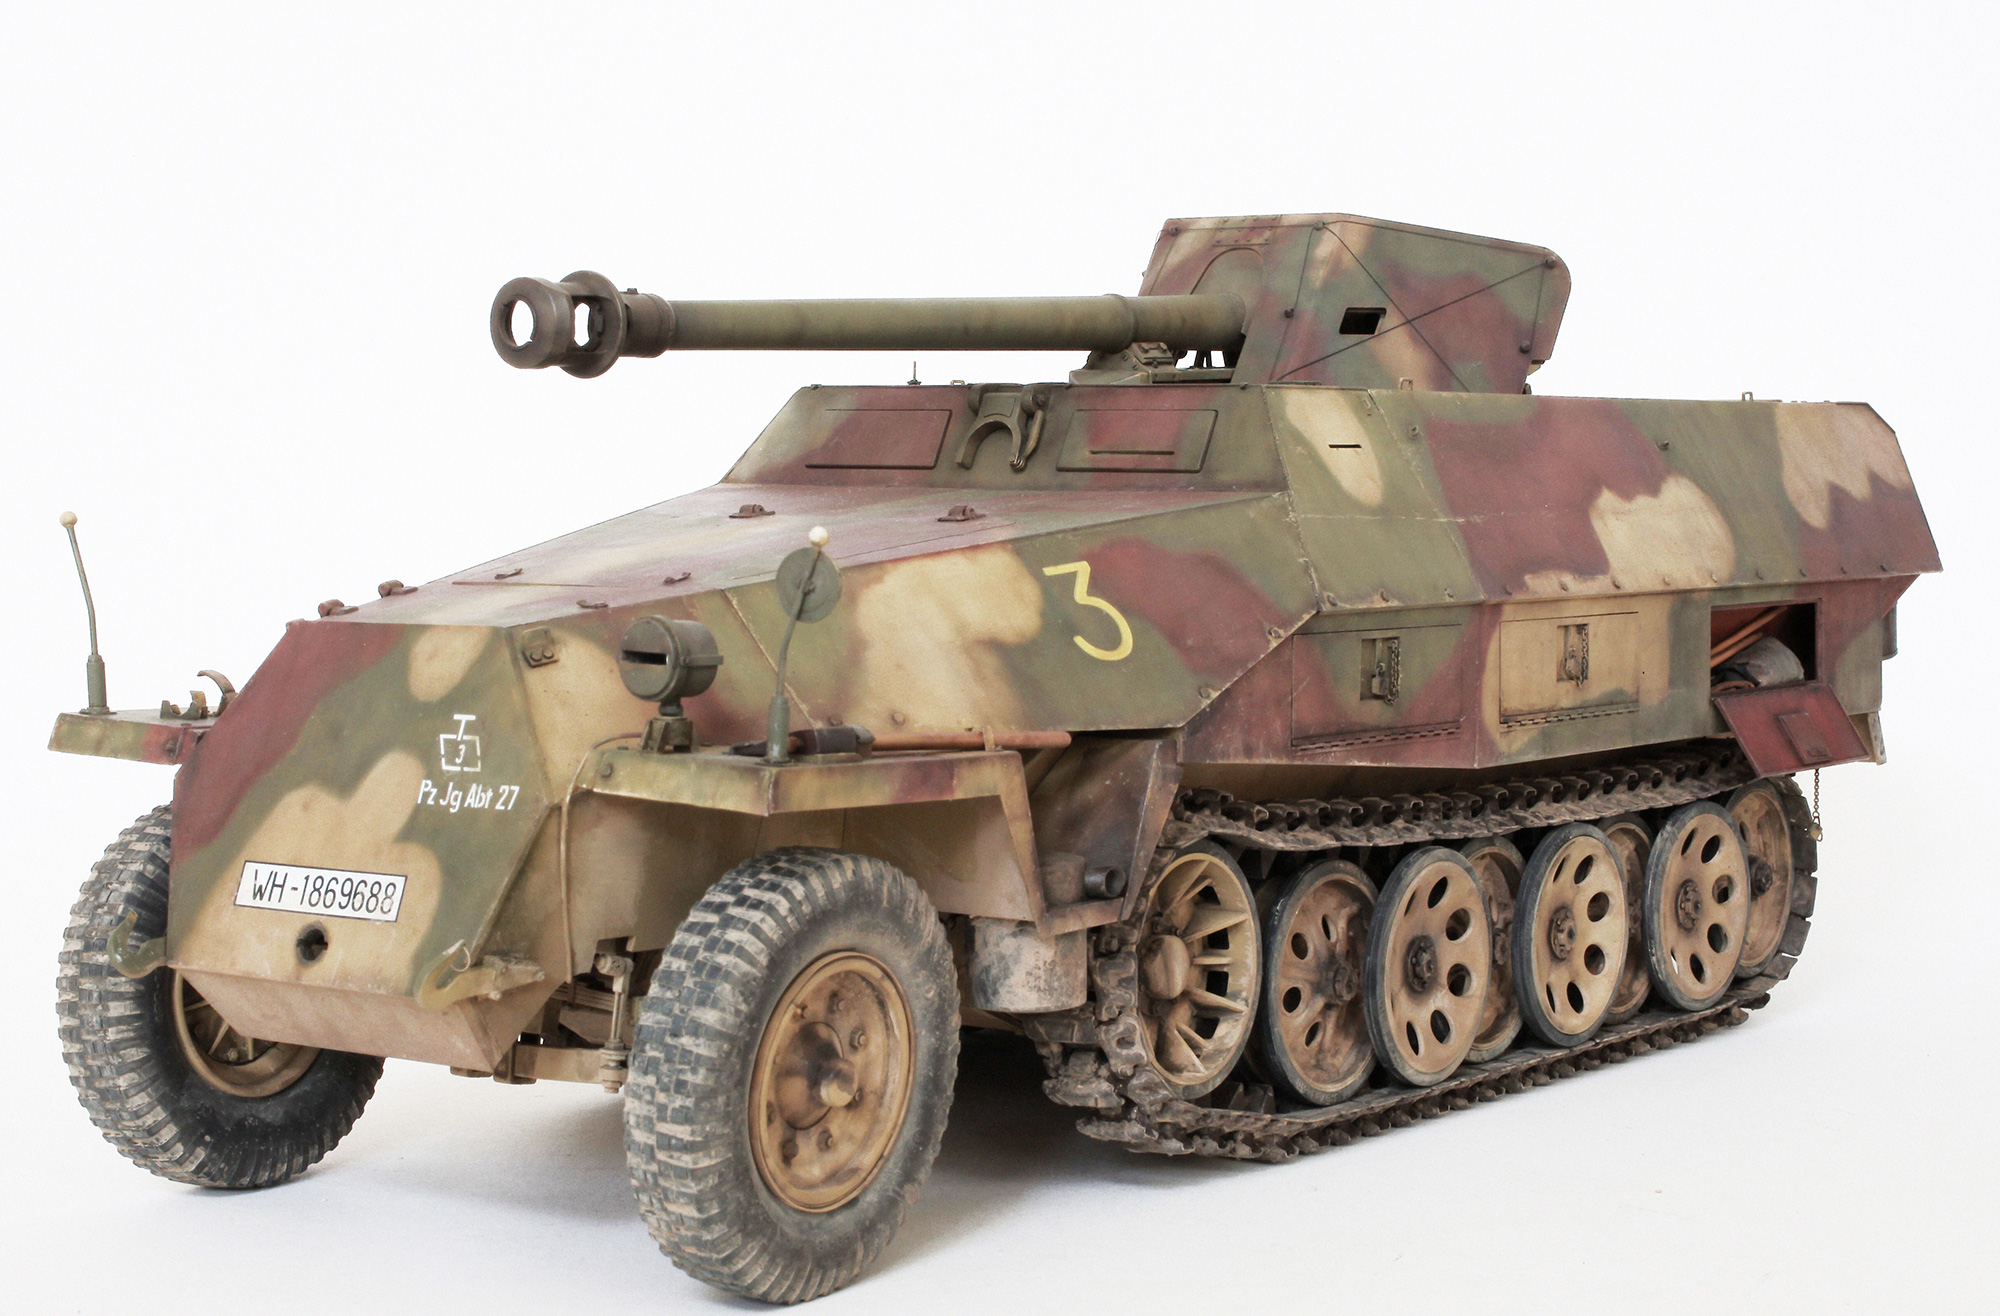
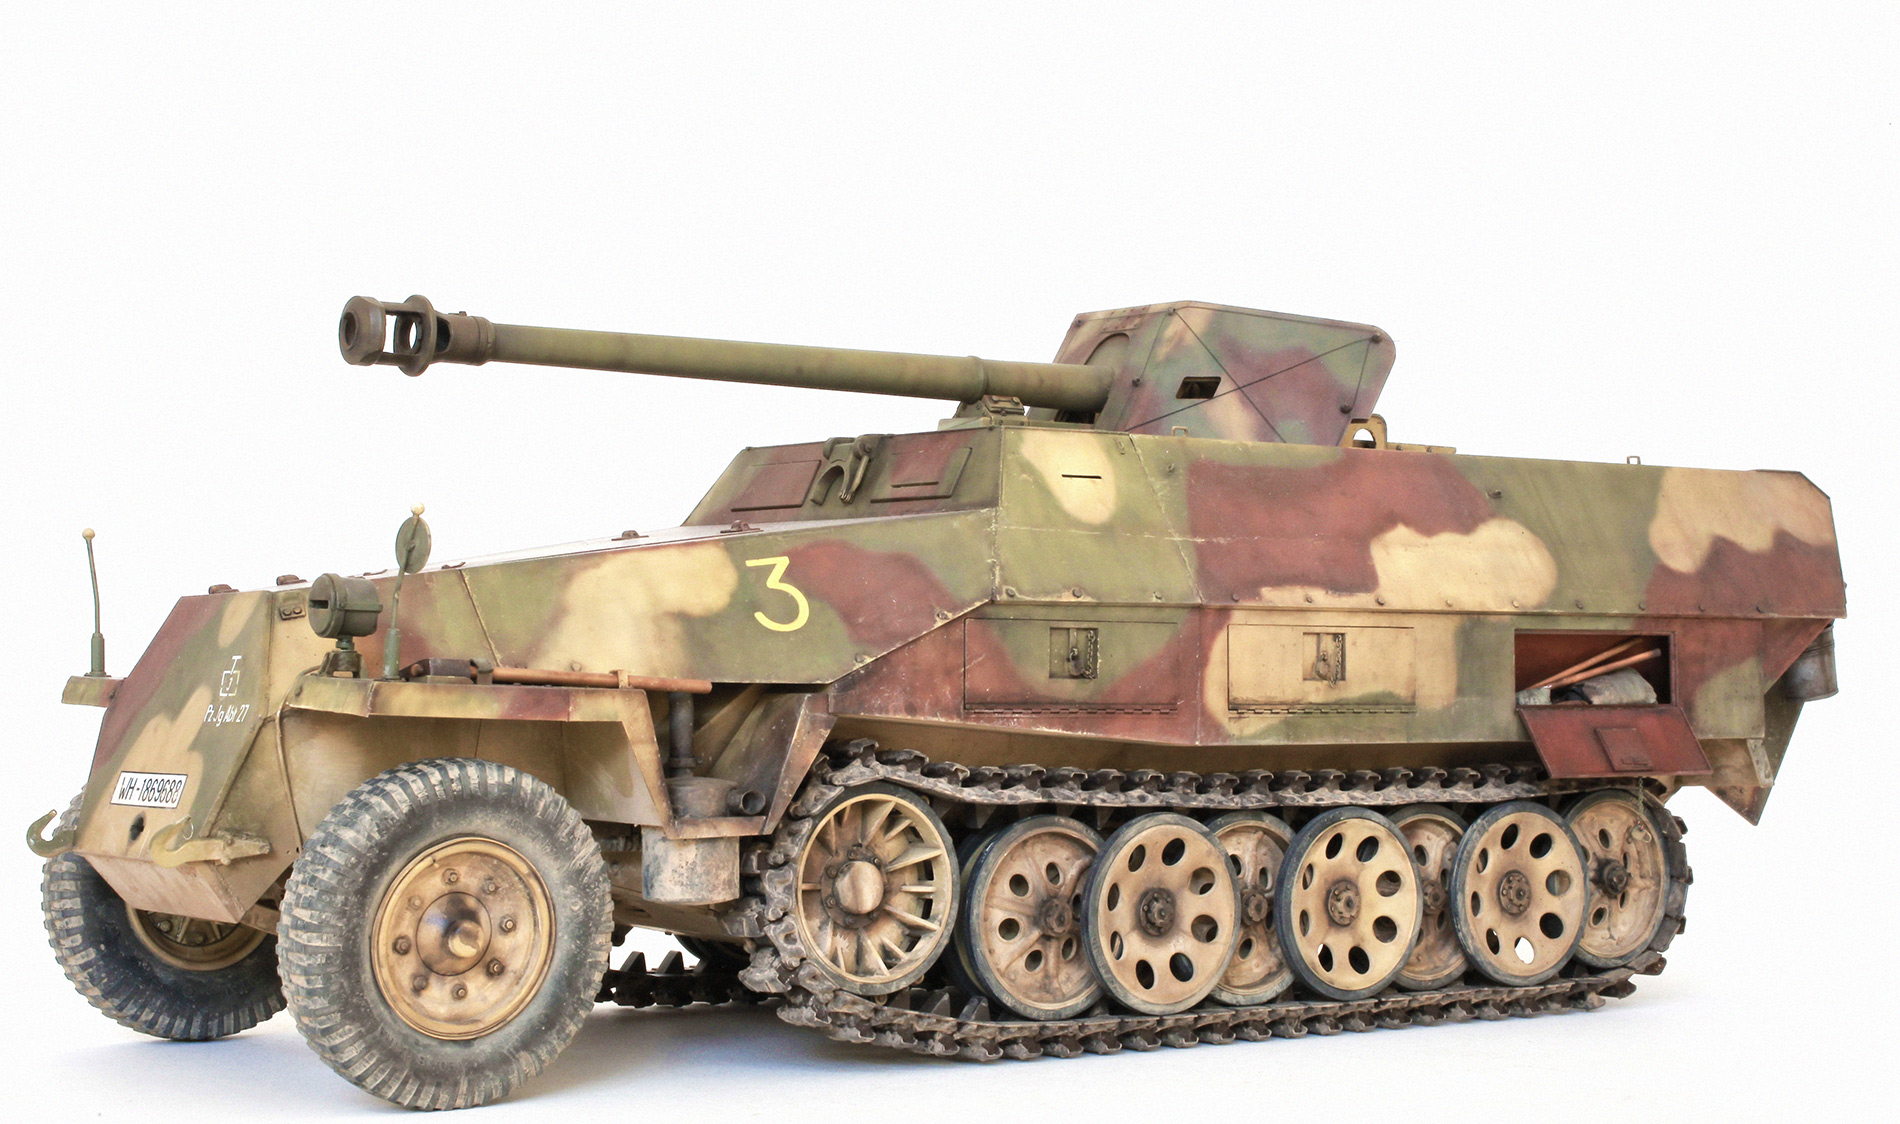
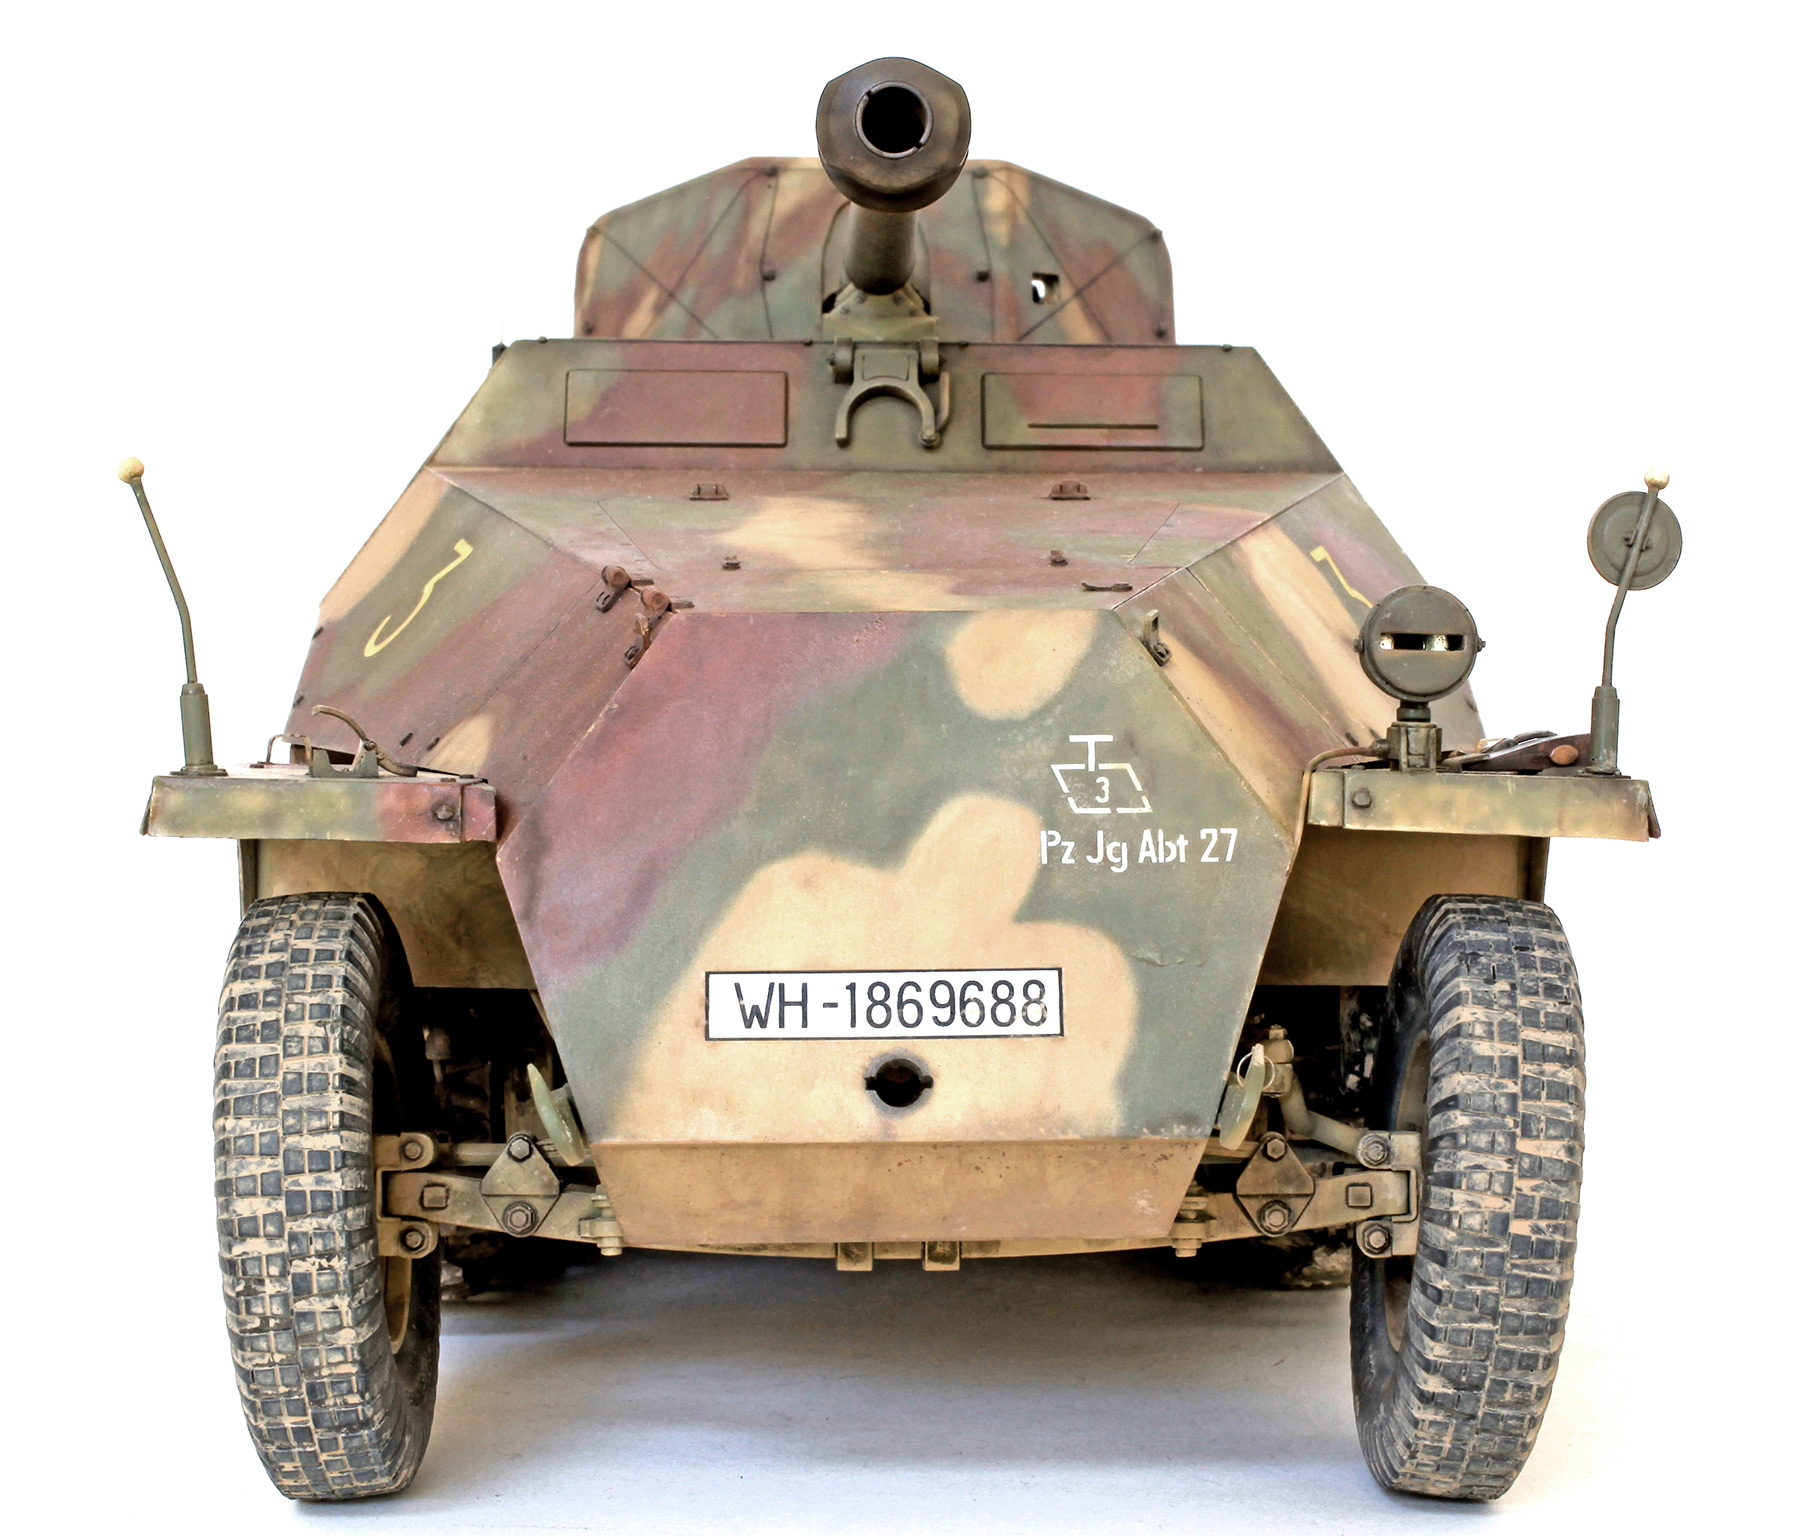
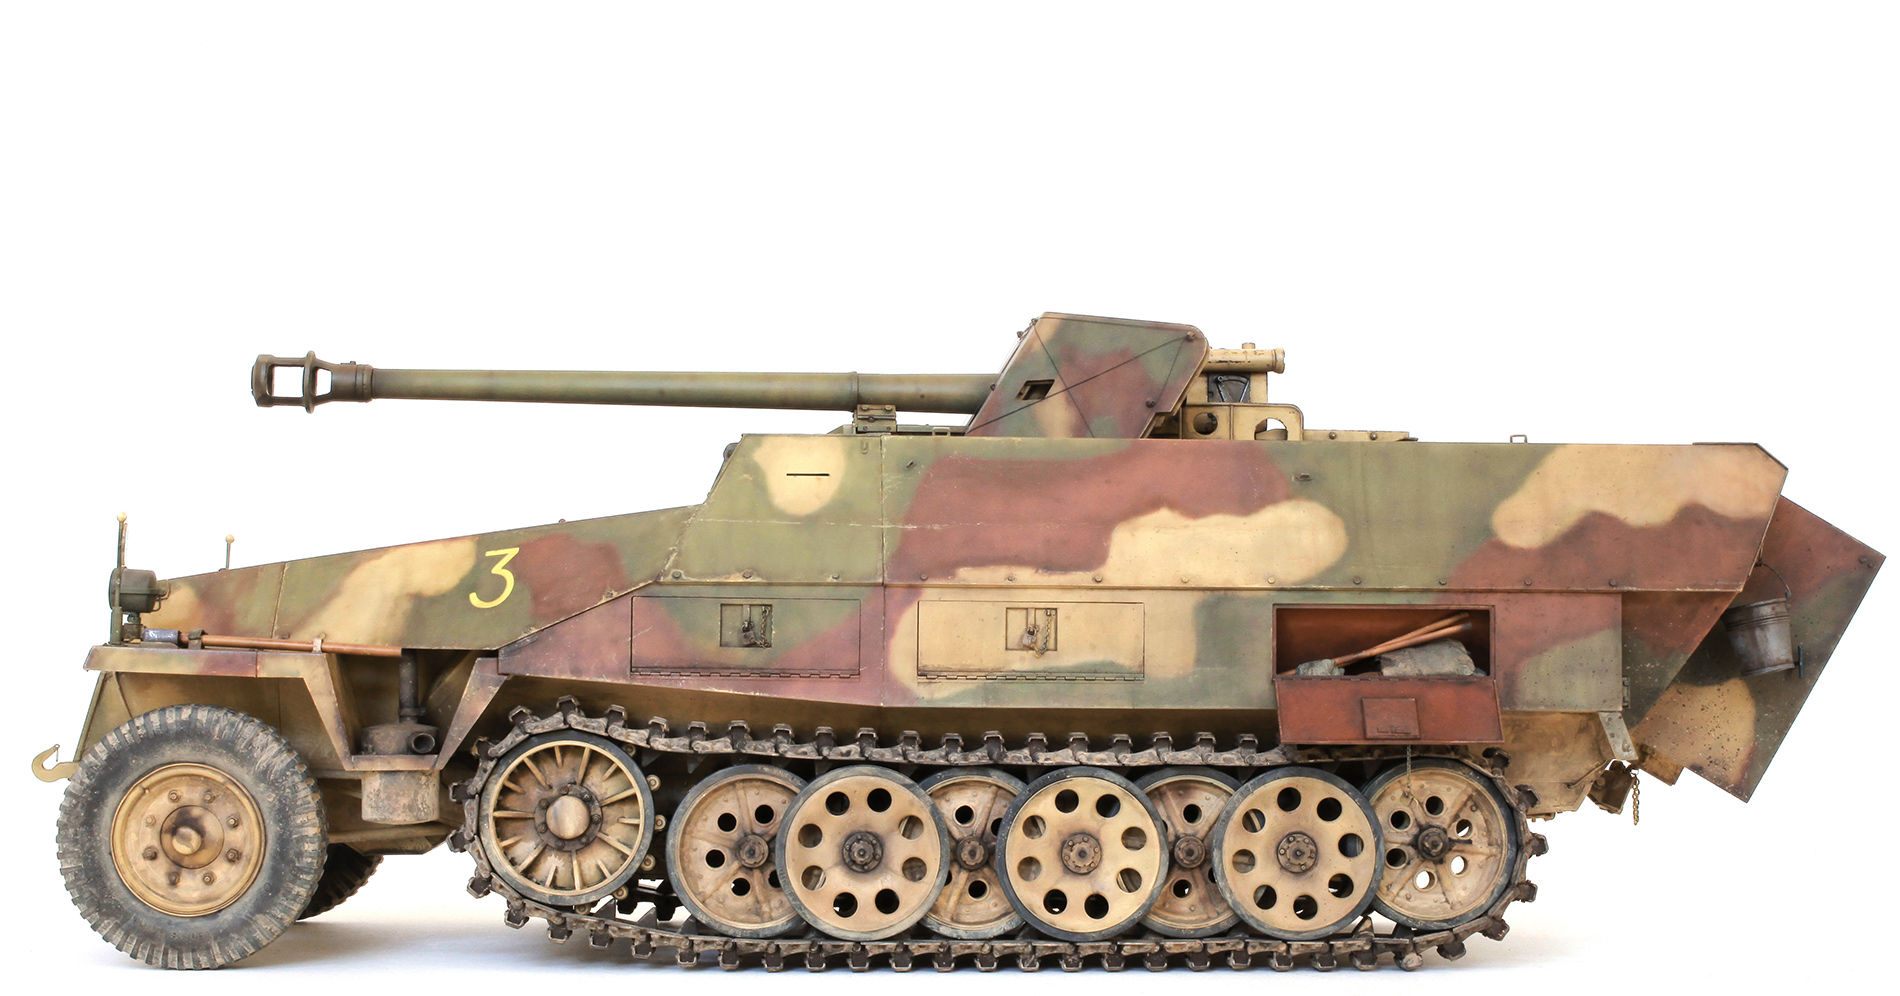
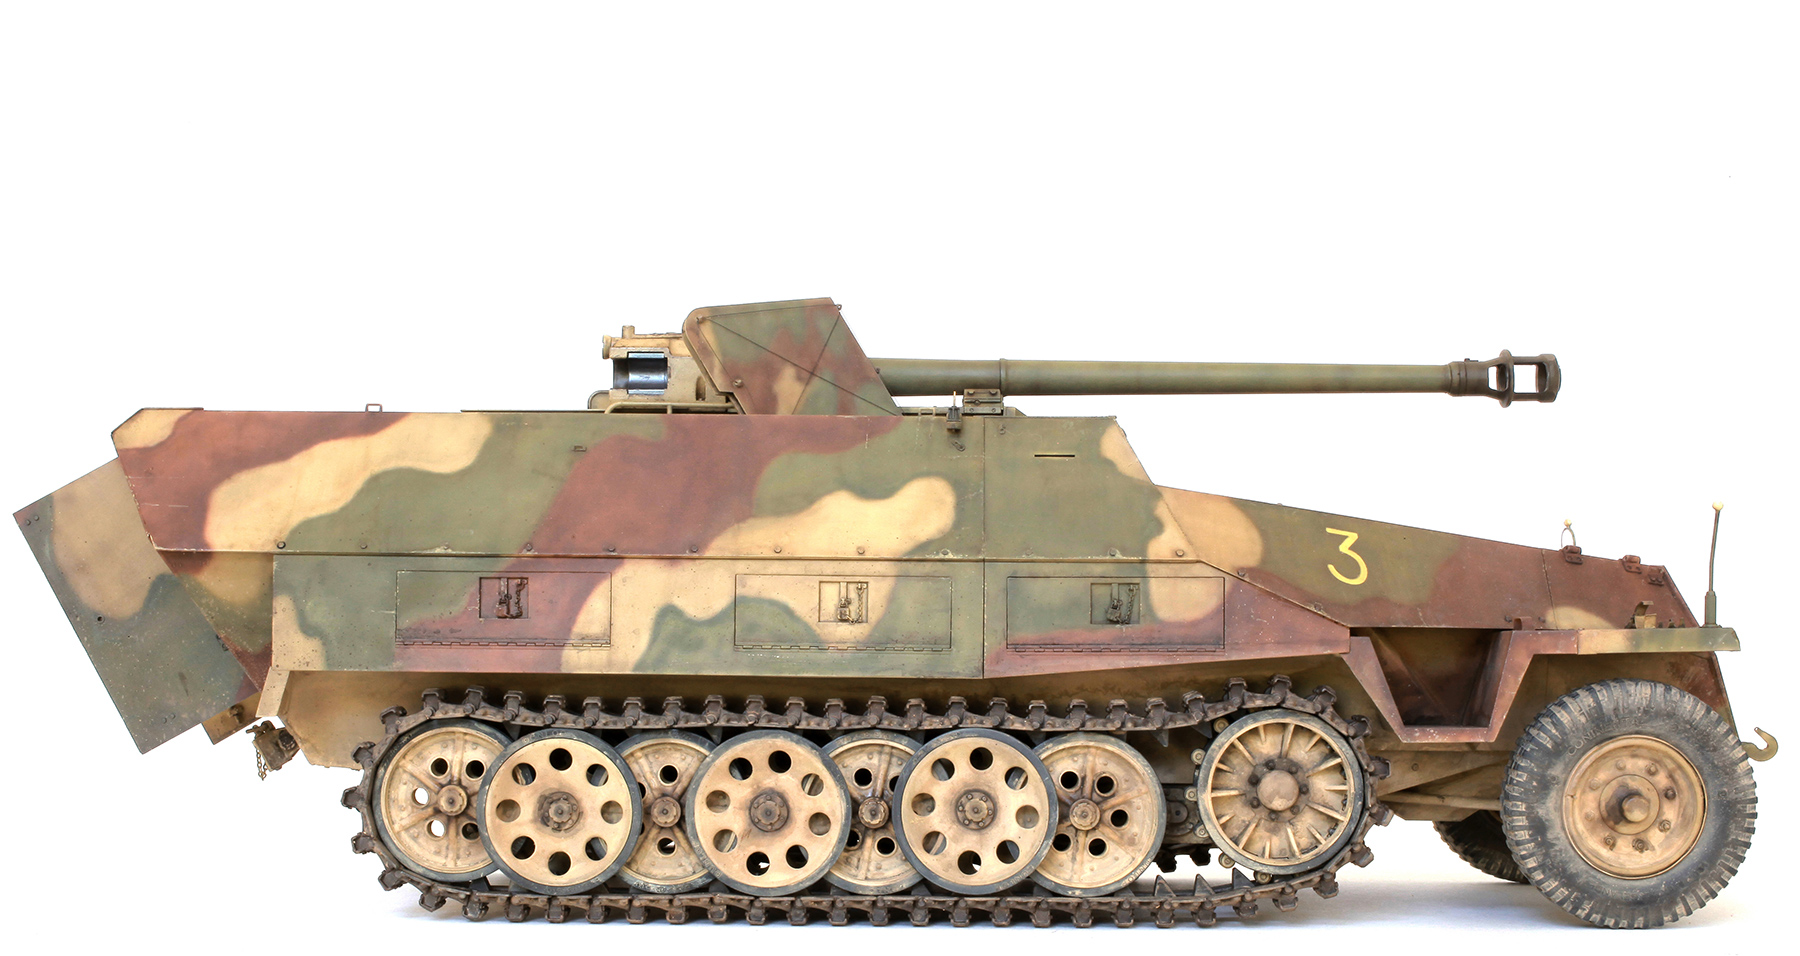
Sd.Kfz. 251/22 Ausf. D [Late] of 17.Pz.Jg.Abt.27, April 1945, Steinau/Oder, Lower Silesia.
I want to say from the start that this large kit may not be for the beginner. An impressive but ultimately inaccurate model may be achieved by building this kit straight out of the box but I don’t think a serious modeller would be totally satisfied with that result. I have spent at least six, very enjoyable months building this model and it has taken just about every ounce of the modelling skill that I possess to achieve the far from perfect result that you see here. Below you will see many photos of most, but not all of the changes and additions that I made. I am sure that the experts will spot many faults and omissions that they think need to be corrected and added. This does not detract in the slightest from the pleasure I derived from building this big model of probably my favourite AFV subject. I would highly recommend that any modeller interested in the subject give it a go and If you take your time I guarantee you won’t be disappointed.

Engine and radiator drained of fluids and ready for installation.

Torsion bar and axle tubes installed and primed.
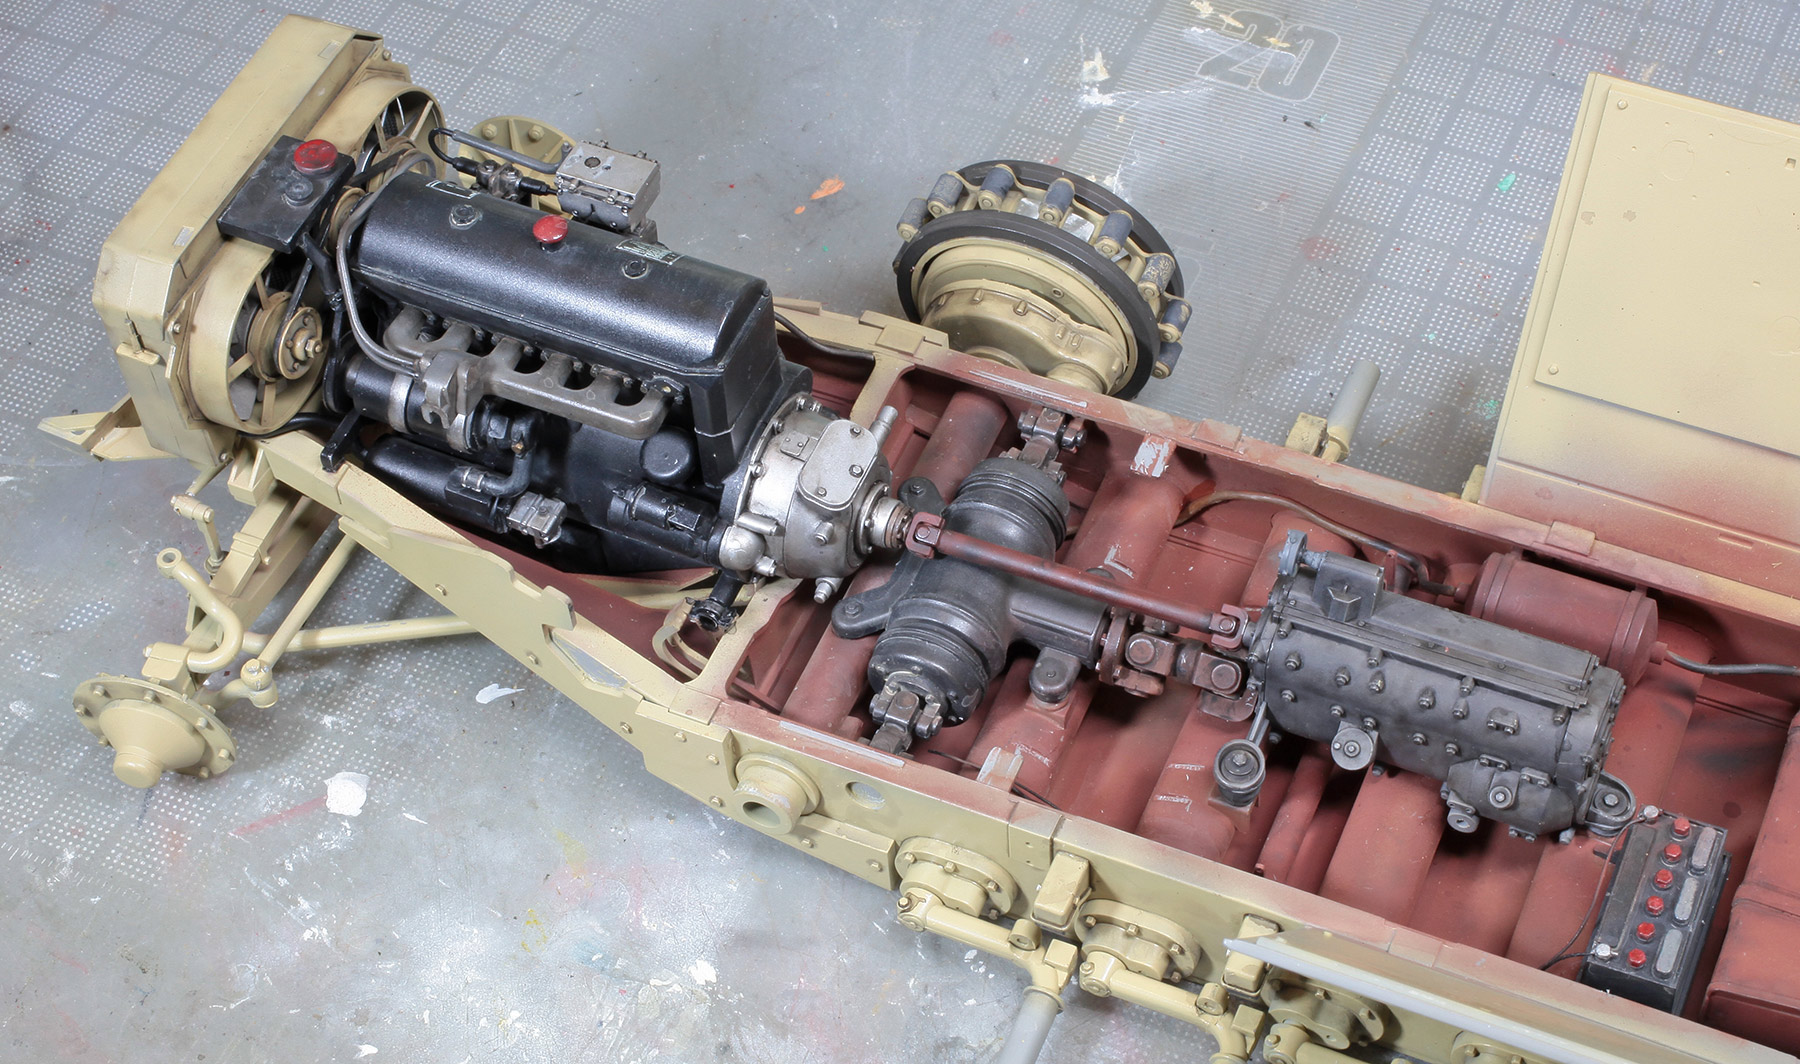
Radiator, engine, dif, gear box and battery.

From the other side.
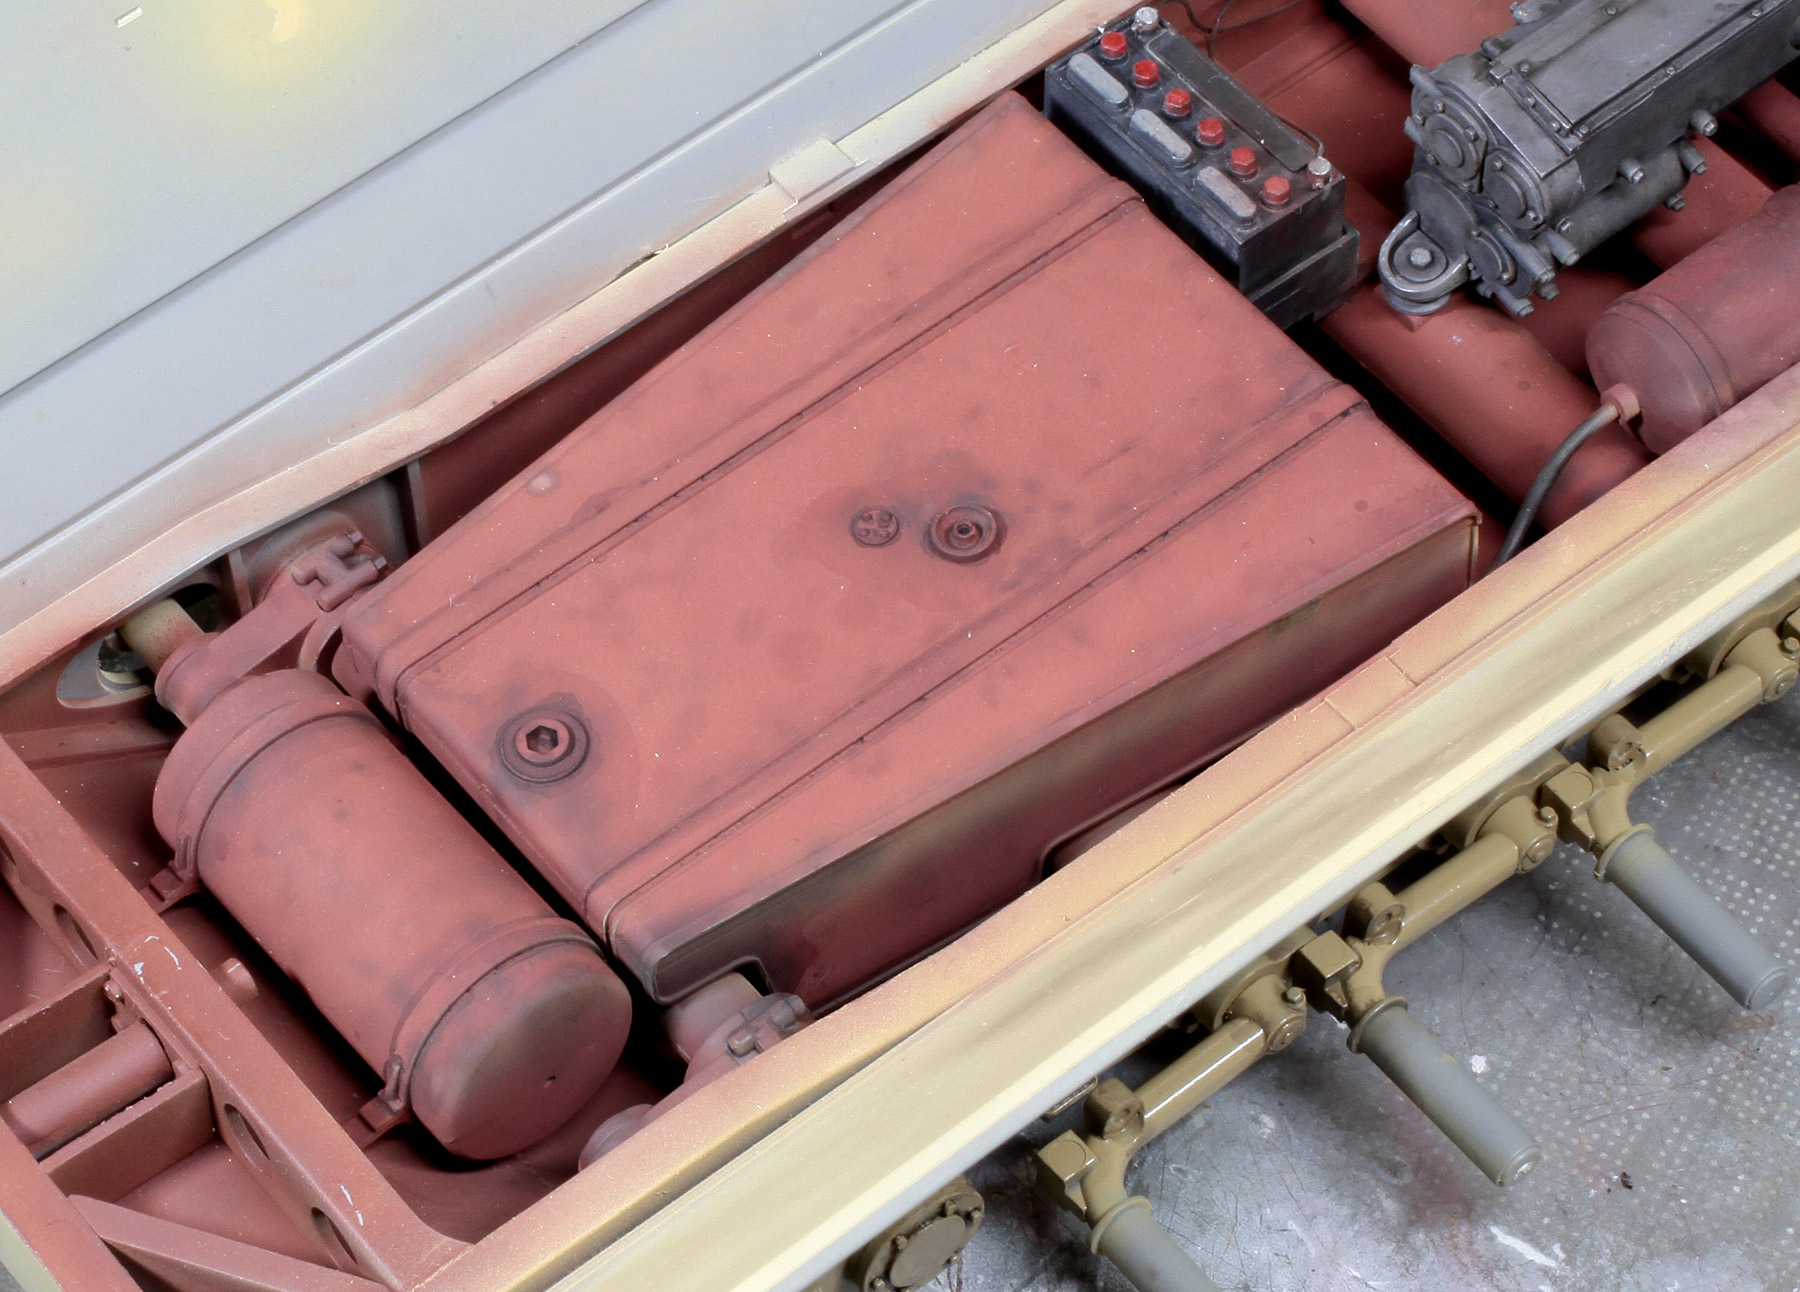
Fuel and oil tanks in, with a little grime added. None of this detail will ever be seen after the model is complete but I know it’s there and now so do you.
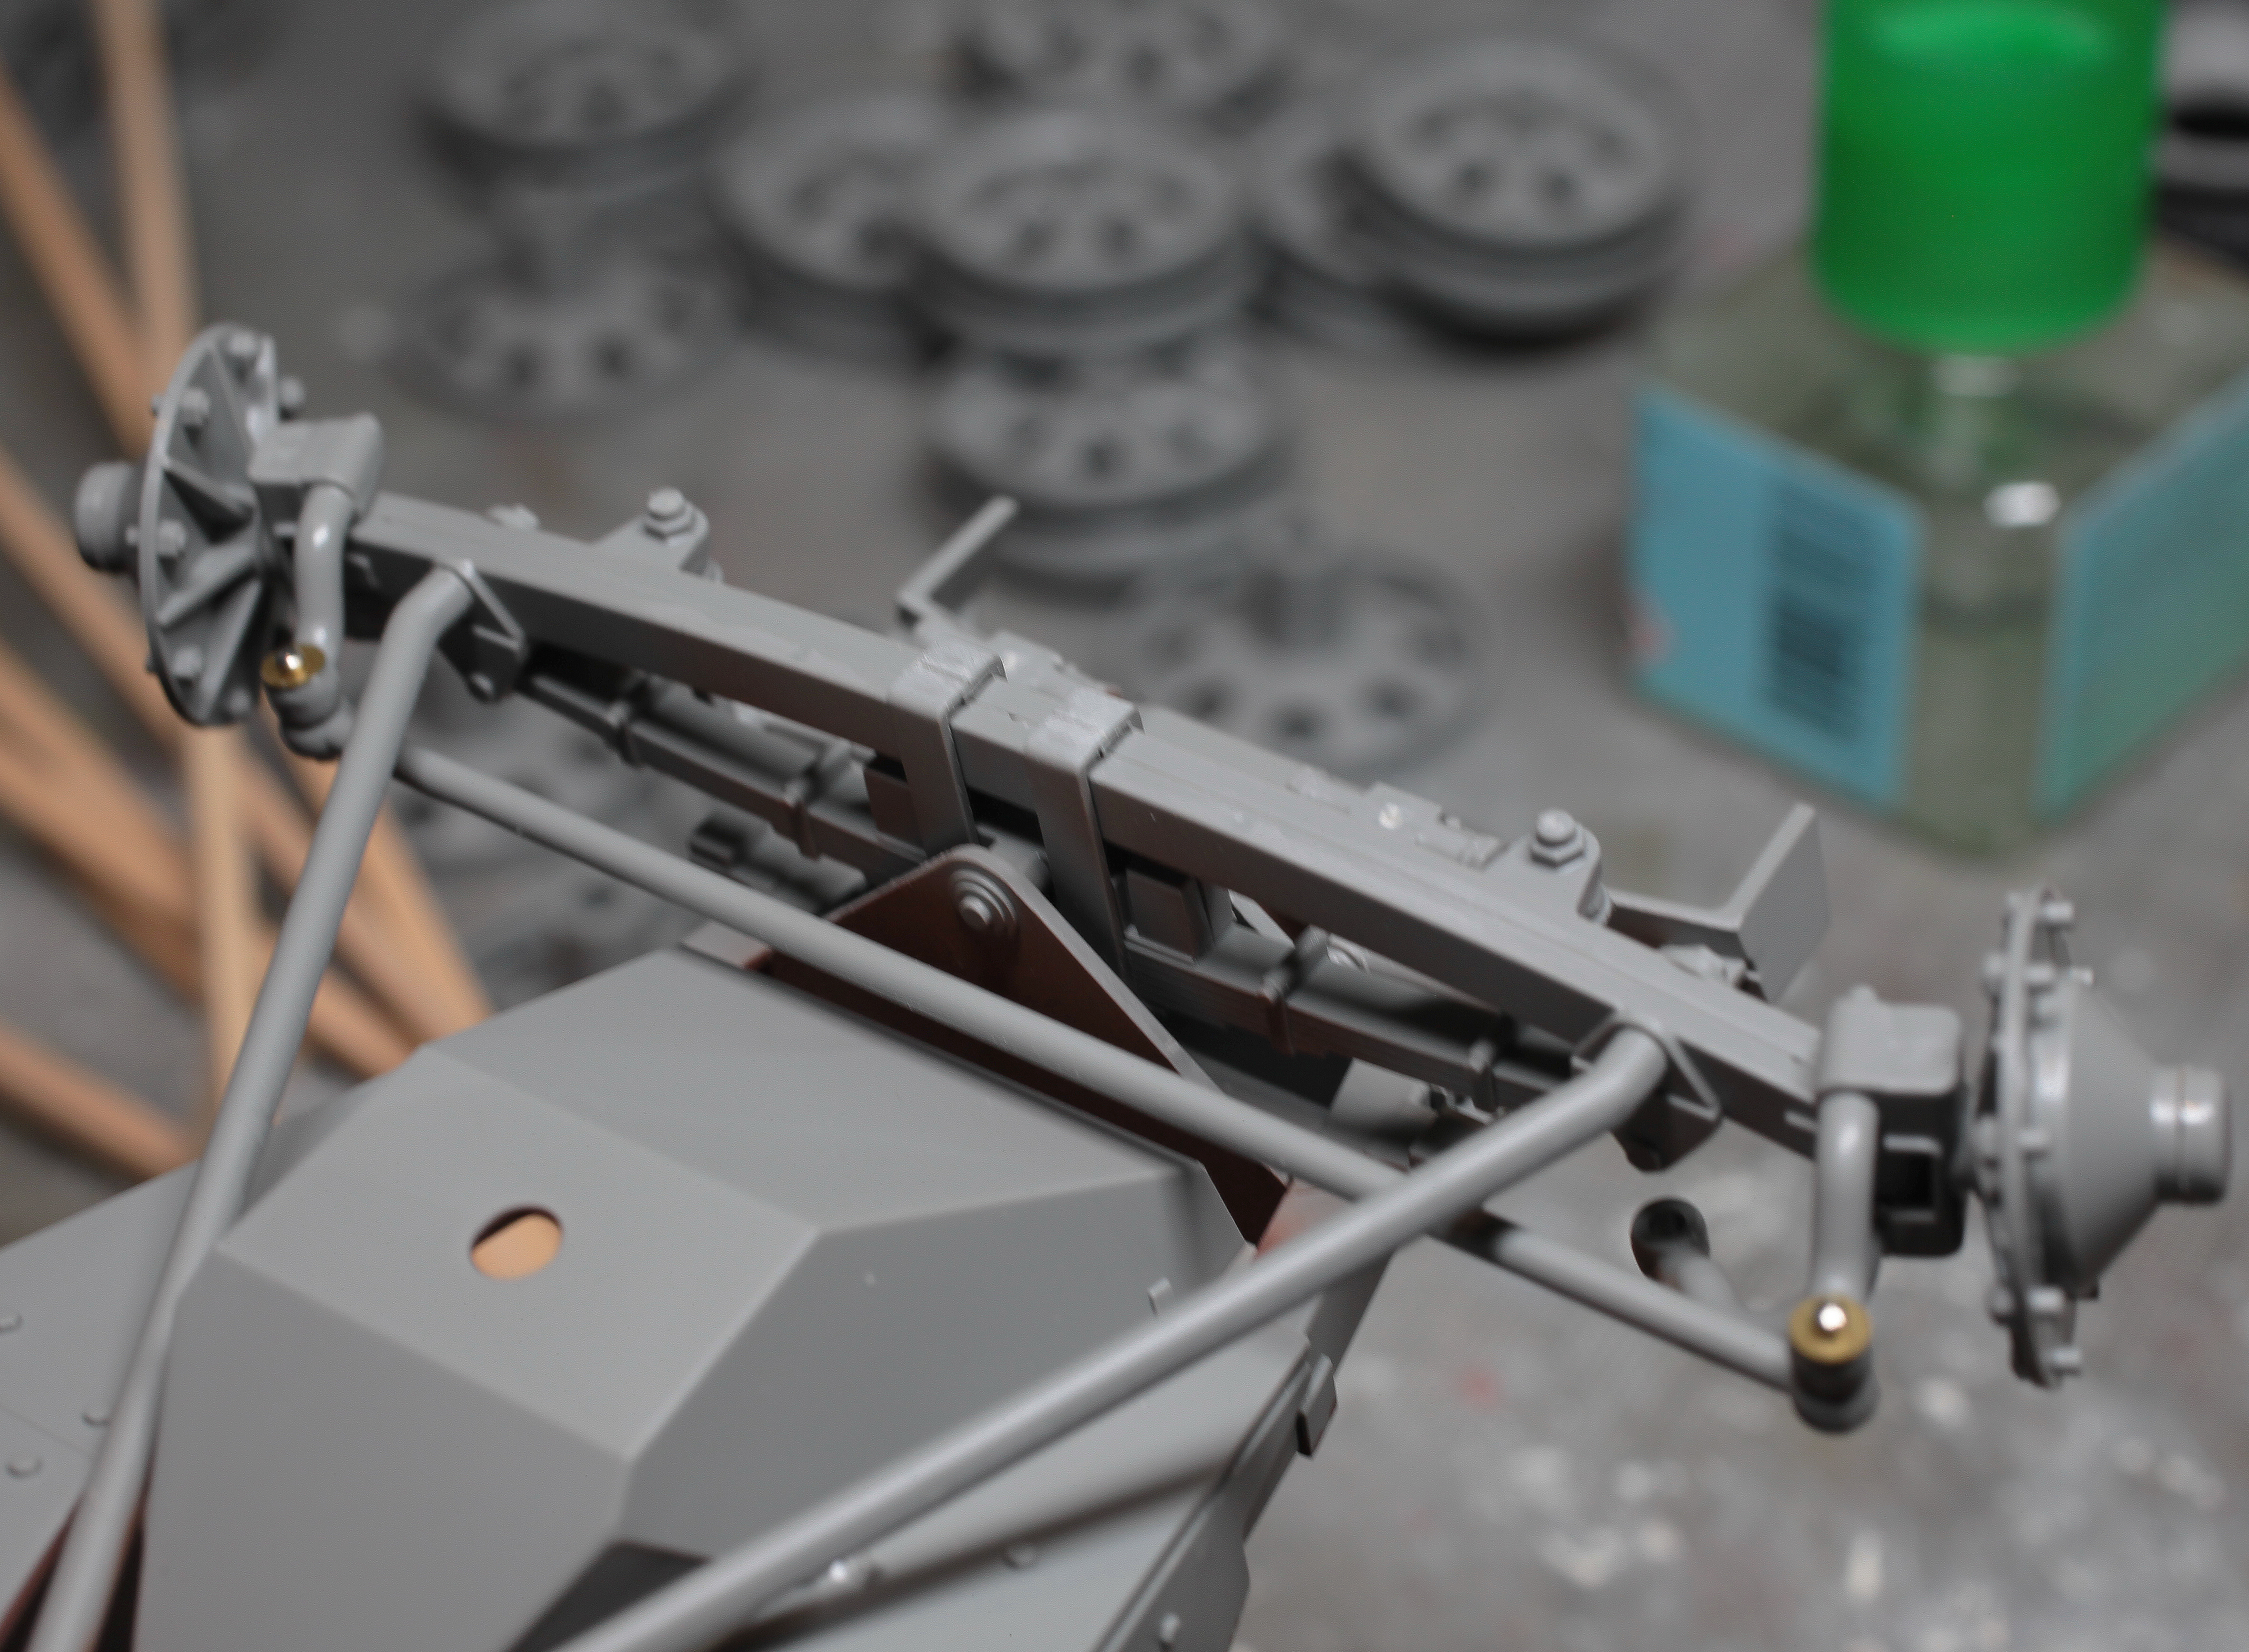
Front steering and suspension. Note brass washers and cut-down sewing pins used to enable front wheels to steer.
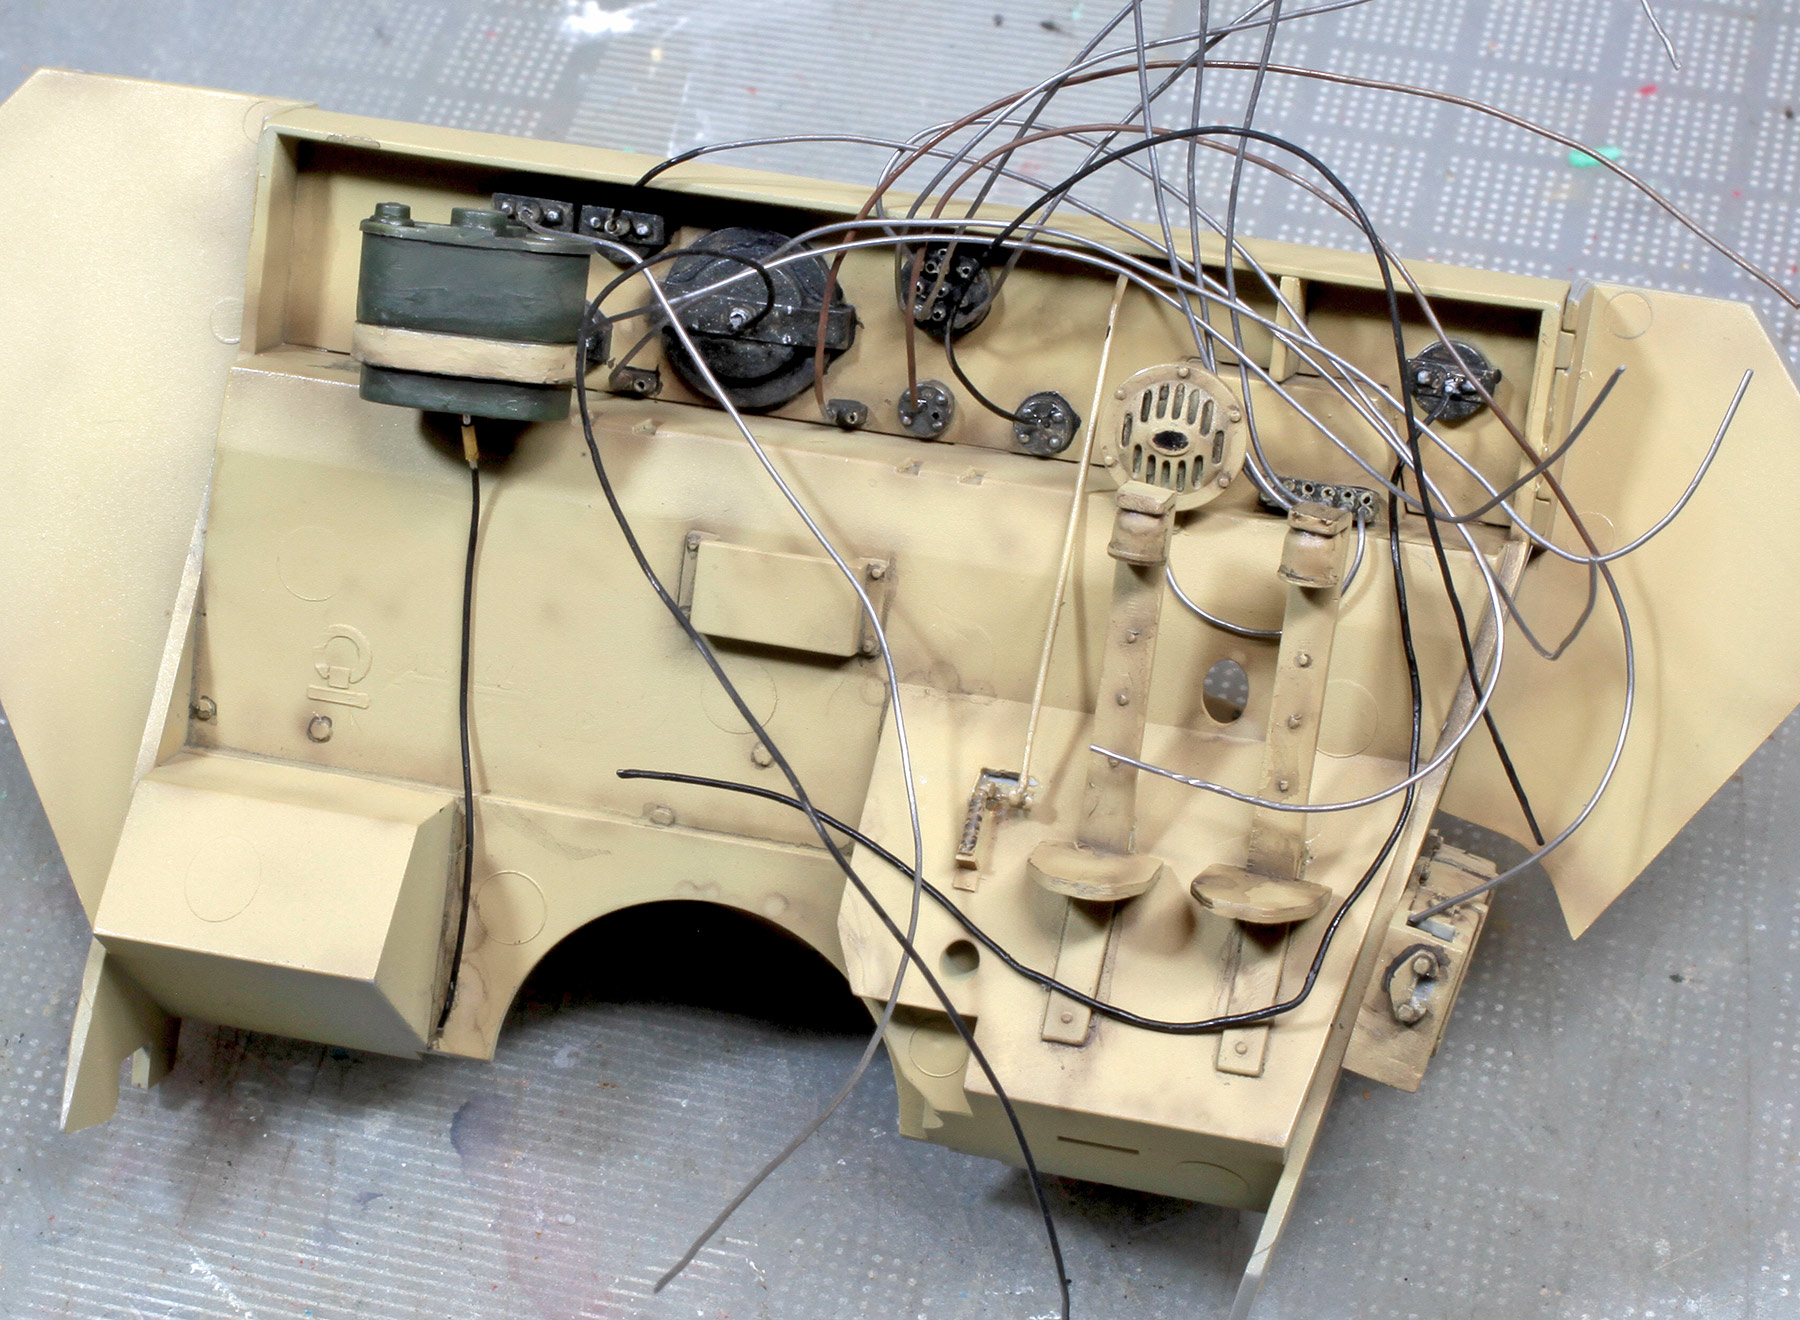
Wiring added to the back of the instrument bezels.

Dashboard instrument dials and various controls, levers and linkages.

Busy engine bay.
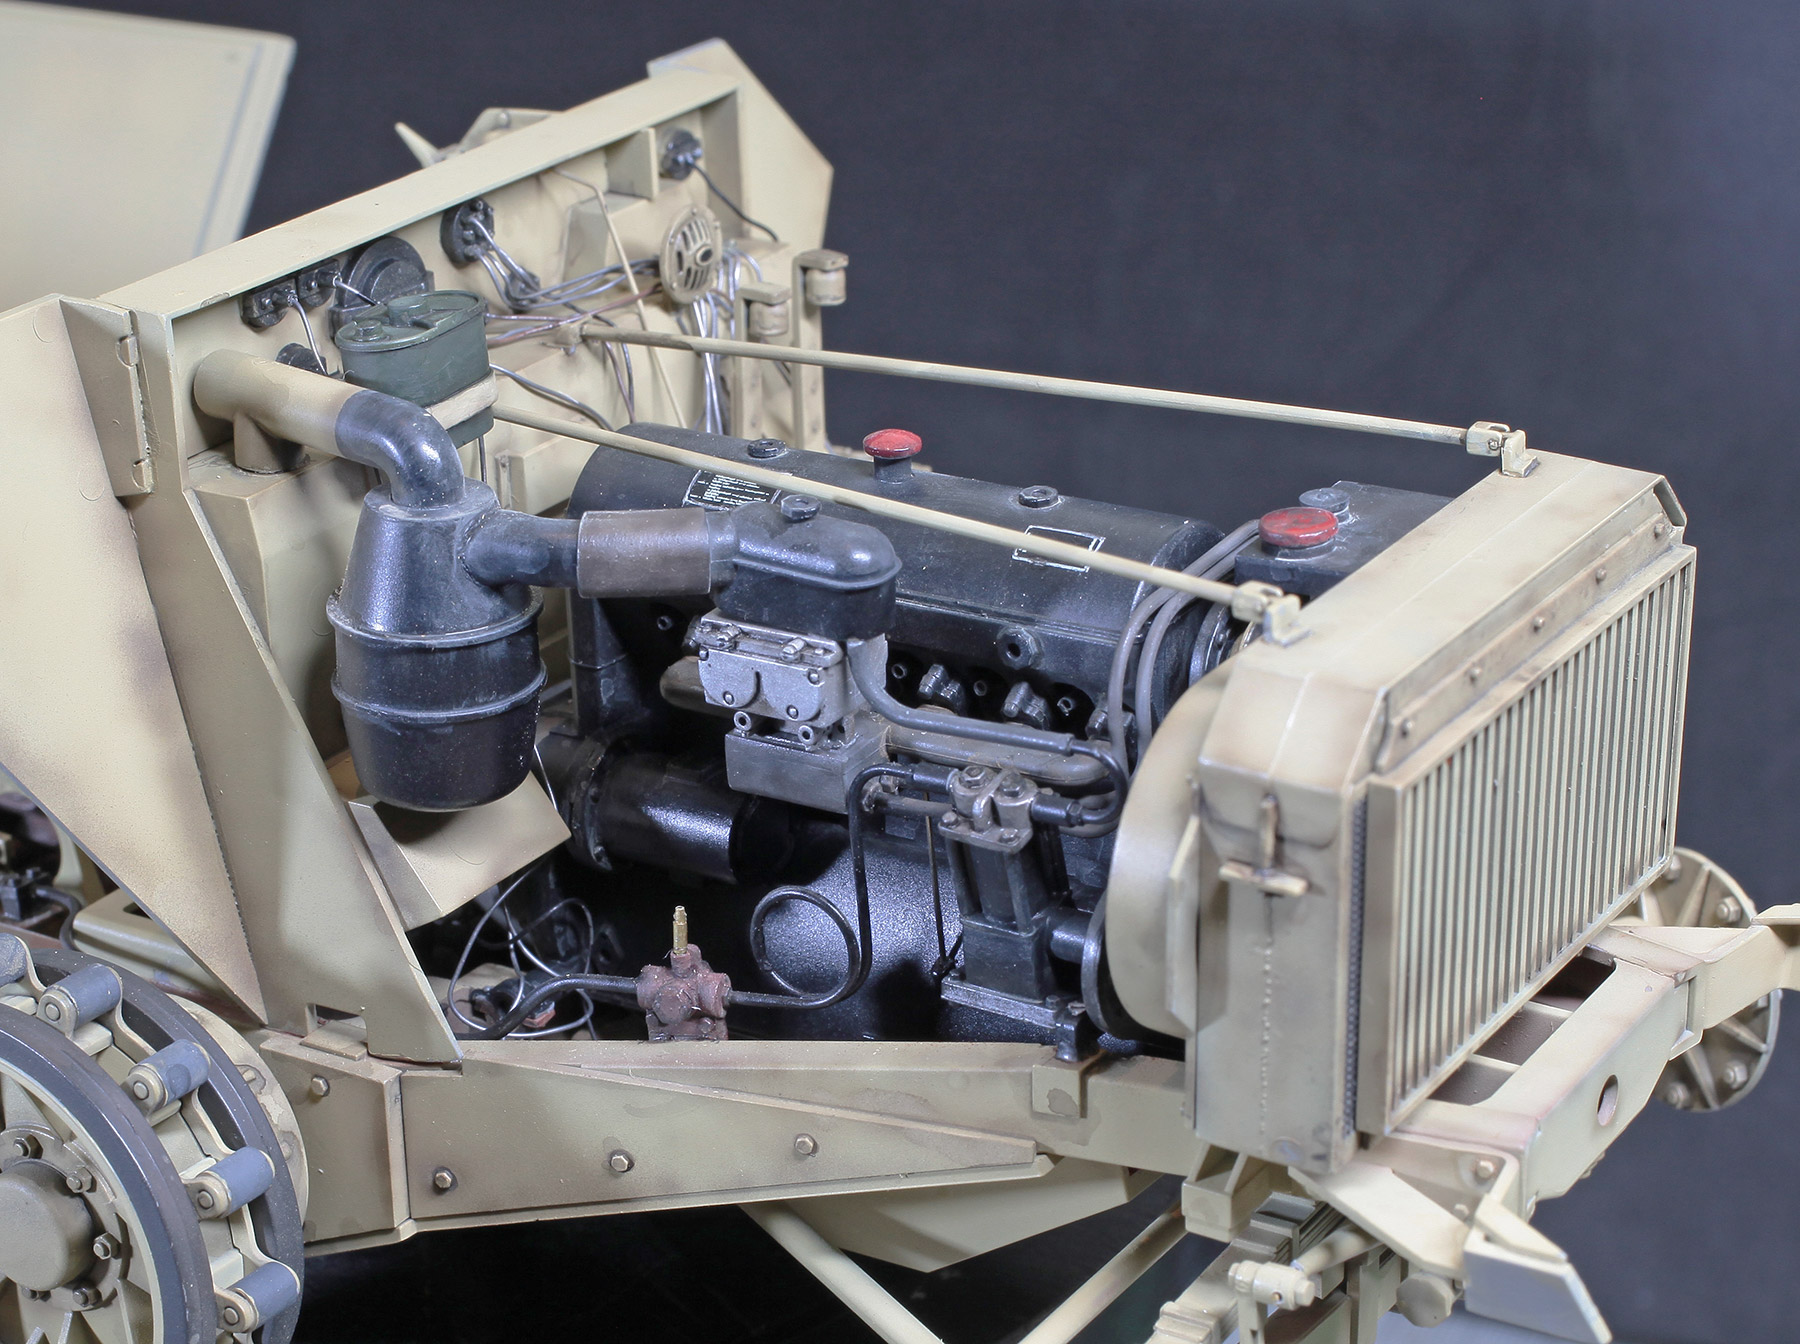
Other side.
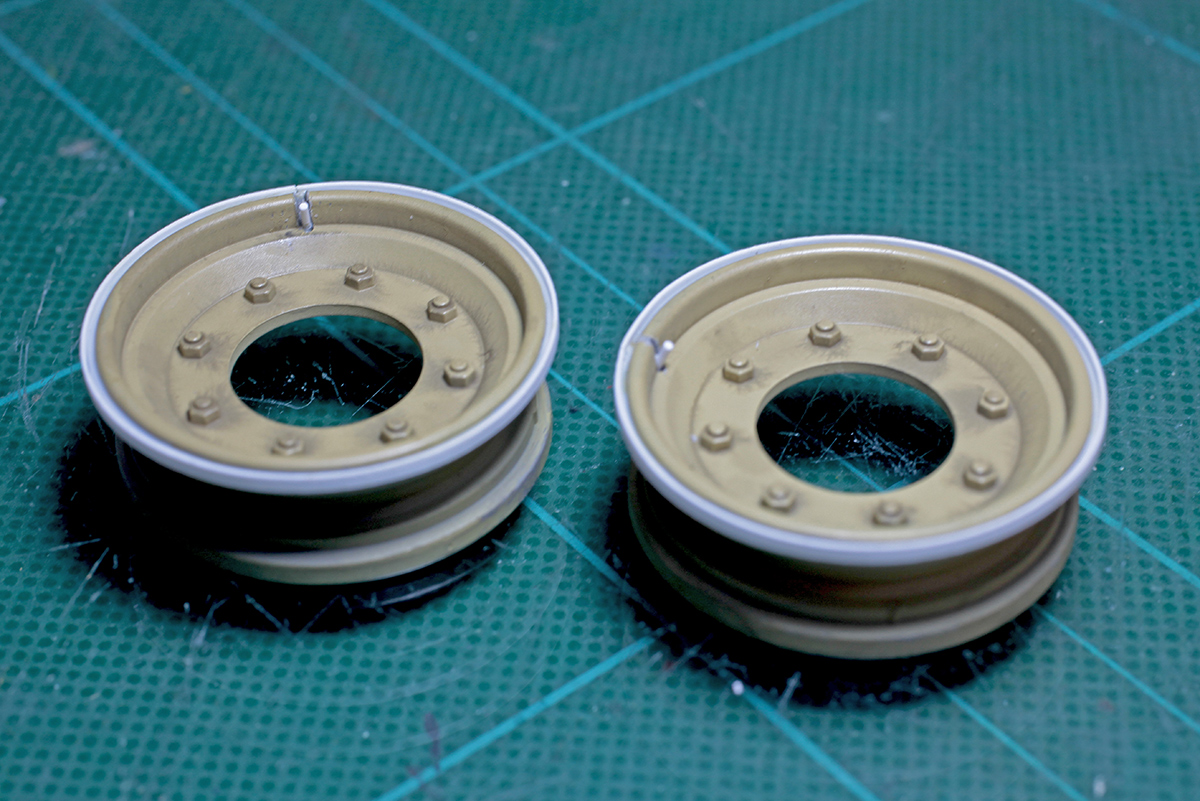
Extra detail was added to the front tyre rims using Evergreen plastic strip and rod.

A new engine bay hood was cut from 0.5 mm plastic sheet to replace the overly thick kit part. The kits moulded-on upper and lower hinge parts were drilled to accommodate hinge pins. The kit’s hood hinge parts were then very carefully removed and glued to the new part. The radiator cover was left as is but its hinges were drilled and both parts had new locking tabs added. Both covers can now be opened and closed.
Bolt heads and locking mechanisms were added to the undersides of the covers.
Only one of the two kit-supplied fire extinguishers was to be used so only one had extra detail added.
The extinguisher painted, decaled and glued in place.

Replacement MP 40 mounting straps and clips made using P/E bits and mag pouch is the modified kit part.

Scratch-built latch locks for large ammunition box door.

Scatch-built storage boxes.

Inexplicable notches in the lower rear corners of the kit’s upper side armour plates must be filled.
Headlight cover hinge detail was added using plastic strip and brass wire.

Scratch-built locking latch on the PaK 40’s tool box.

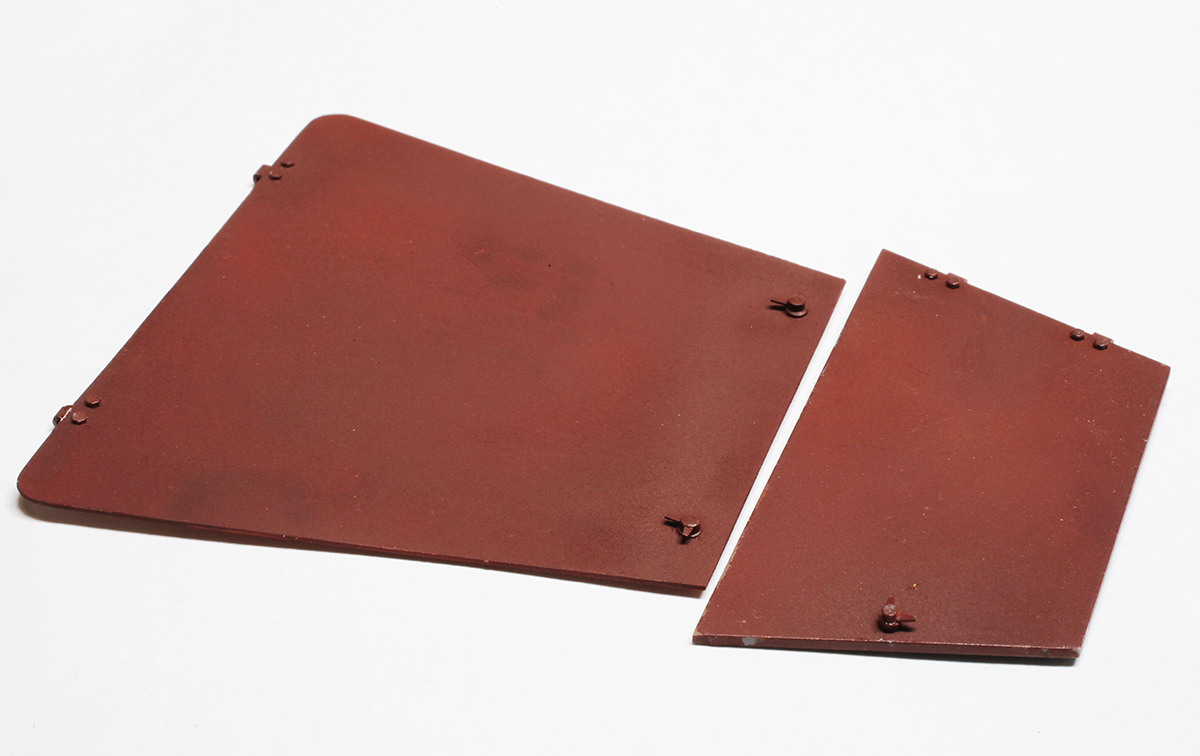
New springs for the rear doors were made by winding fine copper wire around an appropriate diameter brass rod and cut to the correct length.
Rear doors painted and weathered.
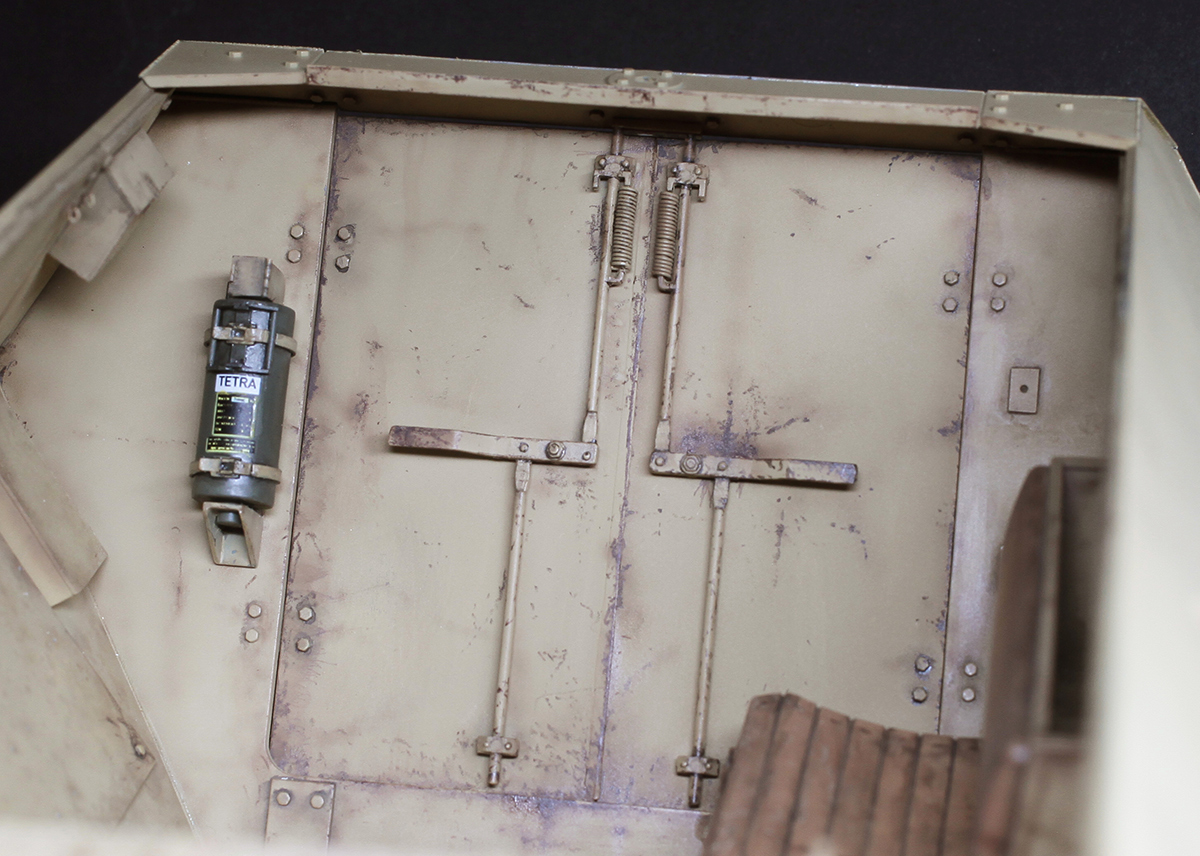
Springs, fire extinguisher and stowage boxes all in place.
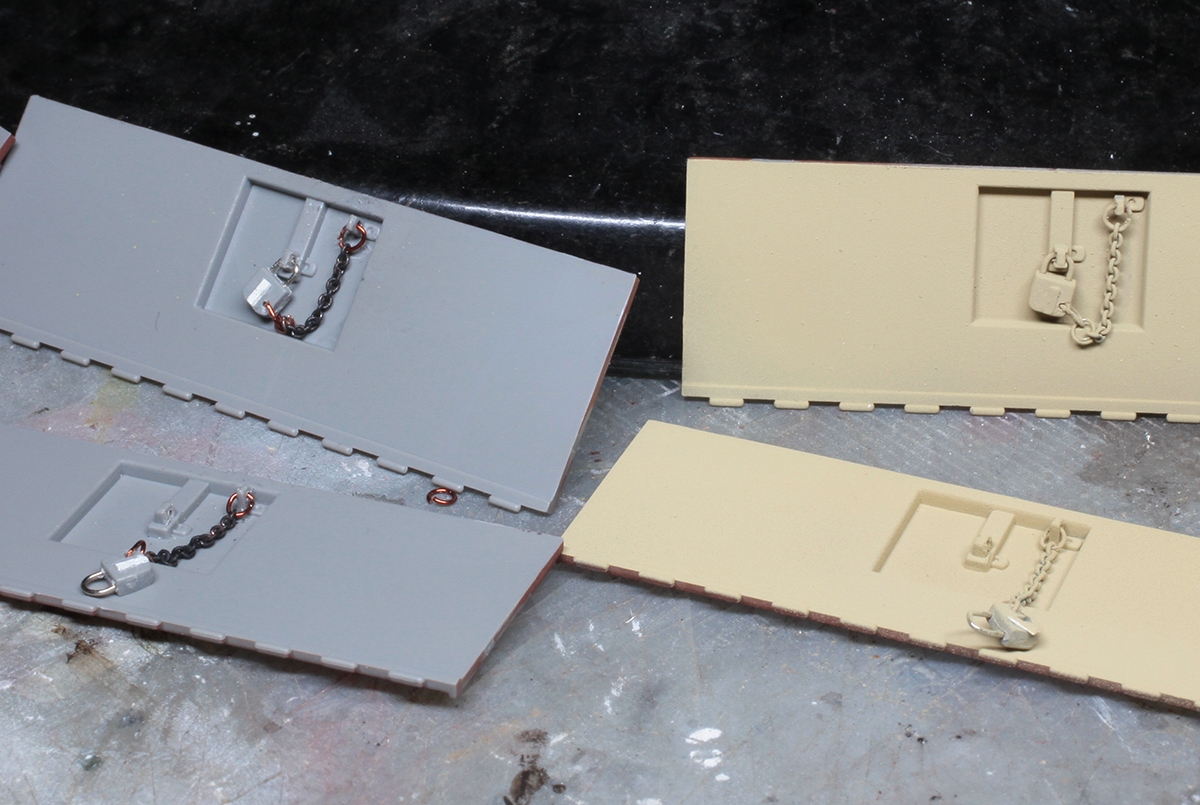
Outer hull side stowage bin doors with detailed padlocks and tiny, 45 links per inch chains. After I ordered the chain on eBay I started to worry that it was going to be too small but it turned out to be just right.
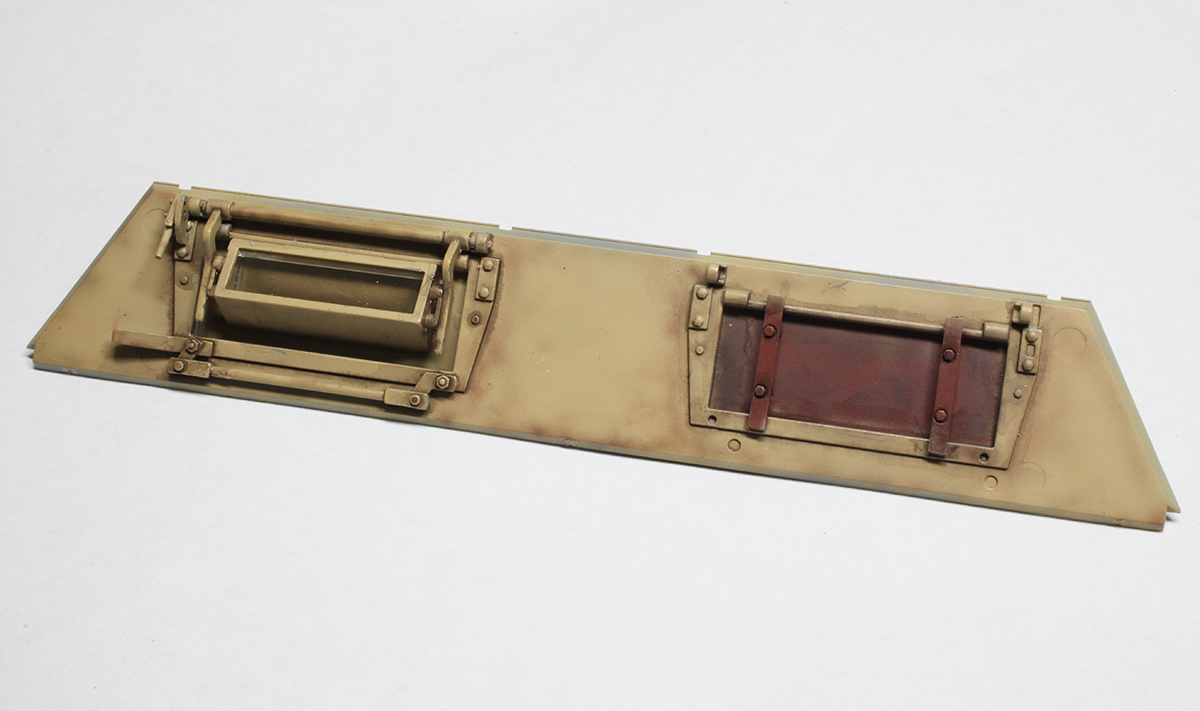
Driver’s vision port with armoured glass on the left and sealed-up commander’s port on the right.

Radio antenna mount with a new spigot made out of brass rod. As far as I can establish radios and their masts were rarely fitted to these vehicles.

MP 40 mounted in its new P/E clip and strap.

Interior of the driver’s and rear fighting compartments with rear bench seats, gun mount and 75mm ammunition stowage boxes fitted.

Basic construction of exterior complete. Camouflage application begins. Wheels were painted and weathered separately.

Working hinges allow engine hatches to be displayed opened or closed.
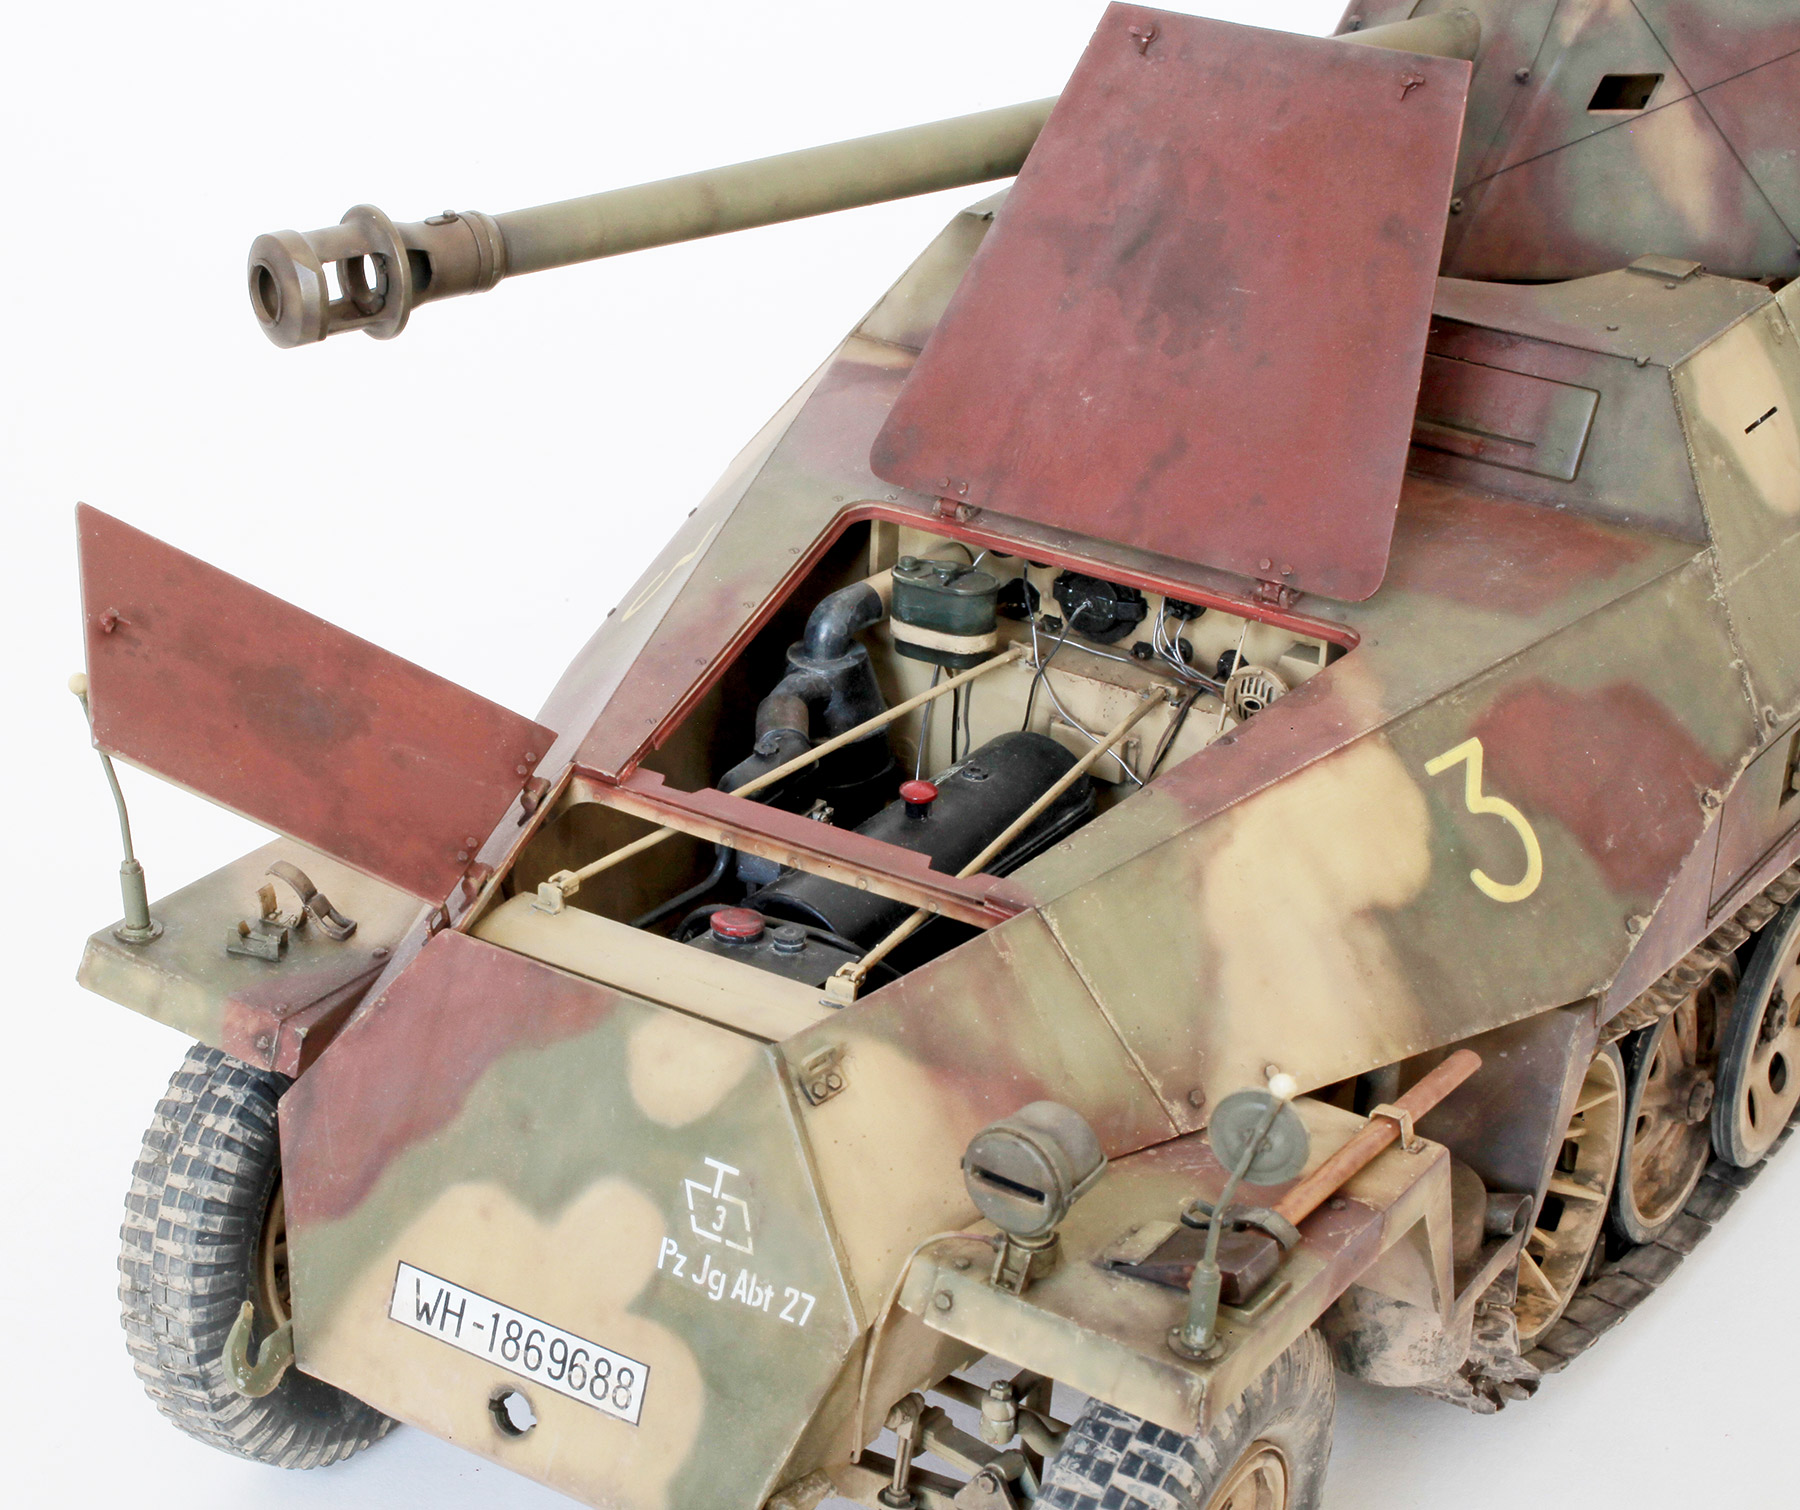
Open hatches.

Open side stowage bin. Some scratch built items were placed inside the bin plus a backing plate and latch were added to the locking box. This does not have a working hinge.
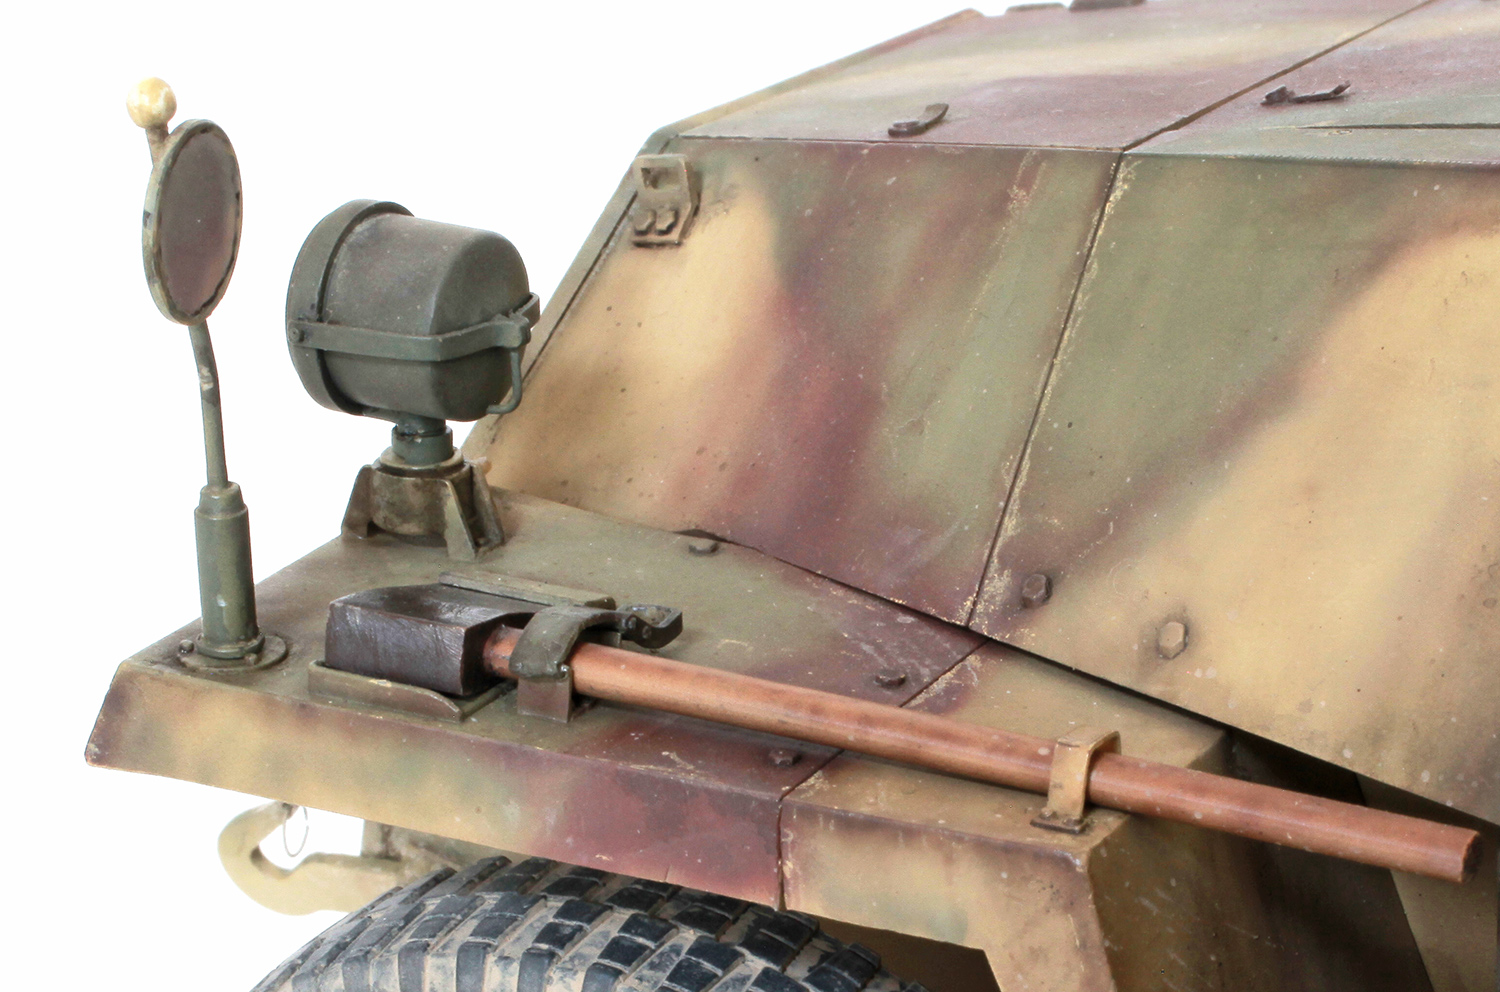
This close-up of the left mudguard shows some of the details added. These include scratch-built bracket and stowage latch for the axe; headlight cover hinge bracket; new, finer width feeler arm and ball, and if you look closely you can see a fine wire ring through the top of the front tow hook. The kit-supplied rectangular tie down brackets on either side of the radiator cover had their incorrectly positioned locating holes filled and the brackets were glued in the correct position about 2 or 3mm further forward.

Wider shot showing exhaust muffler. The end of the muffler’s pipe was drilled out to give it a thinner profile.

The PaK40 shell containers piled up on the gun aimers seat are 3D items from Blast Models. The gun cleaning rods on the lower right were scratch built by me.
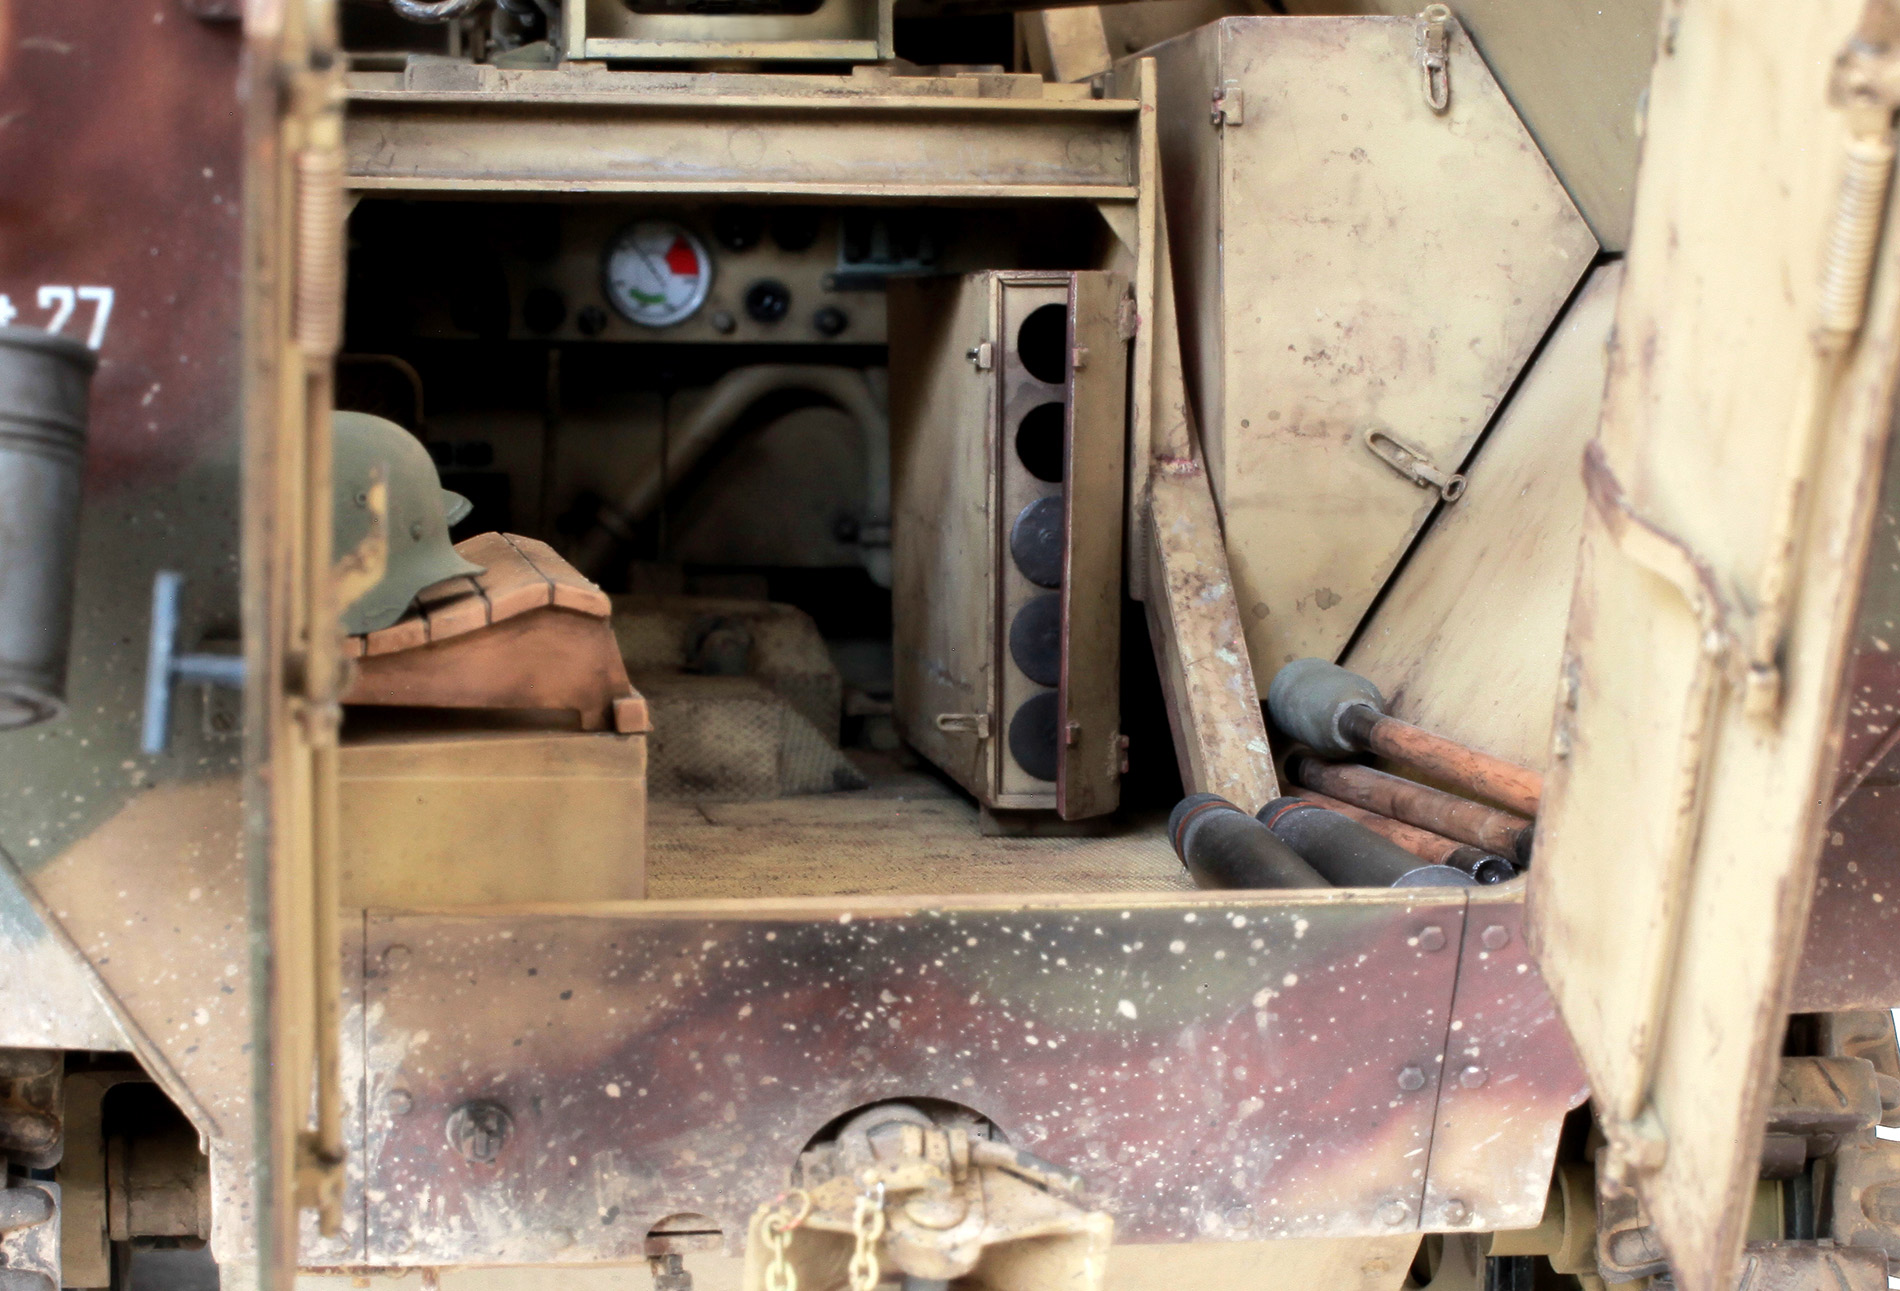
Slightly different angle with a couple of helmets from Black Dog.

This shot shows other 3D items from Blast Models and Black Dog including Jerry can, helmets, 75mm shell cases and a couple of Panzerfausts.

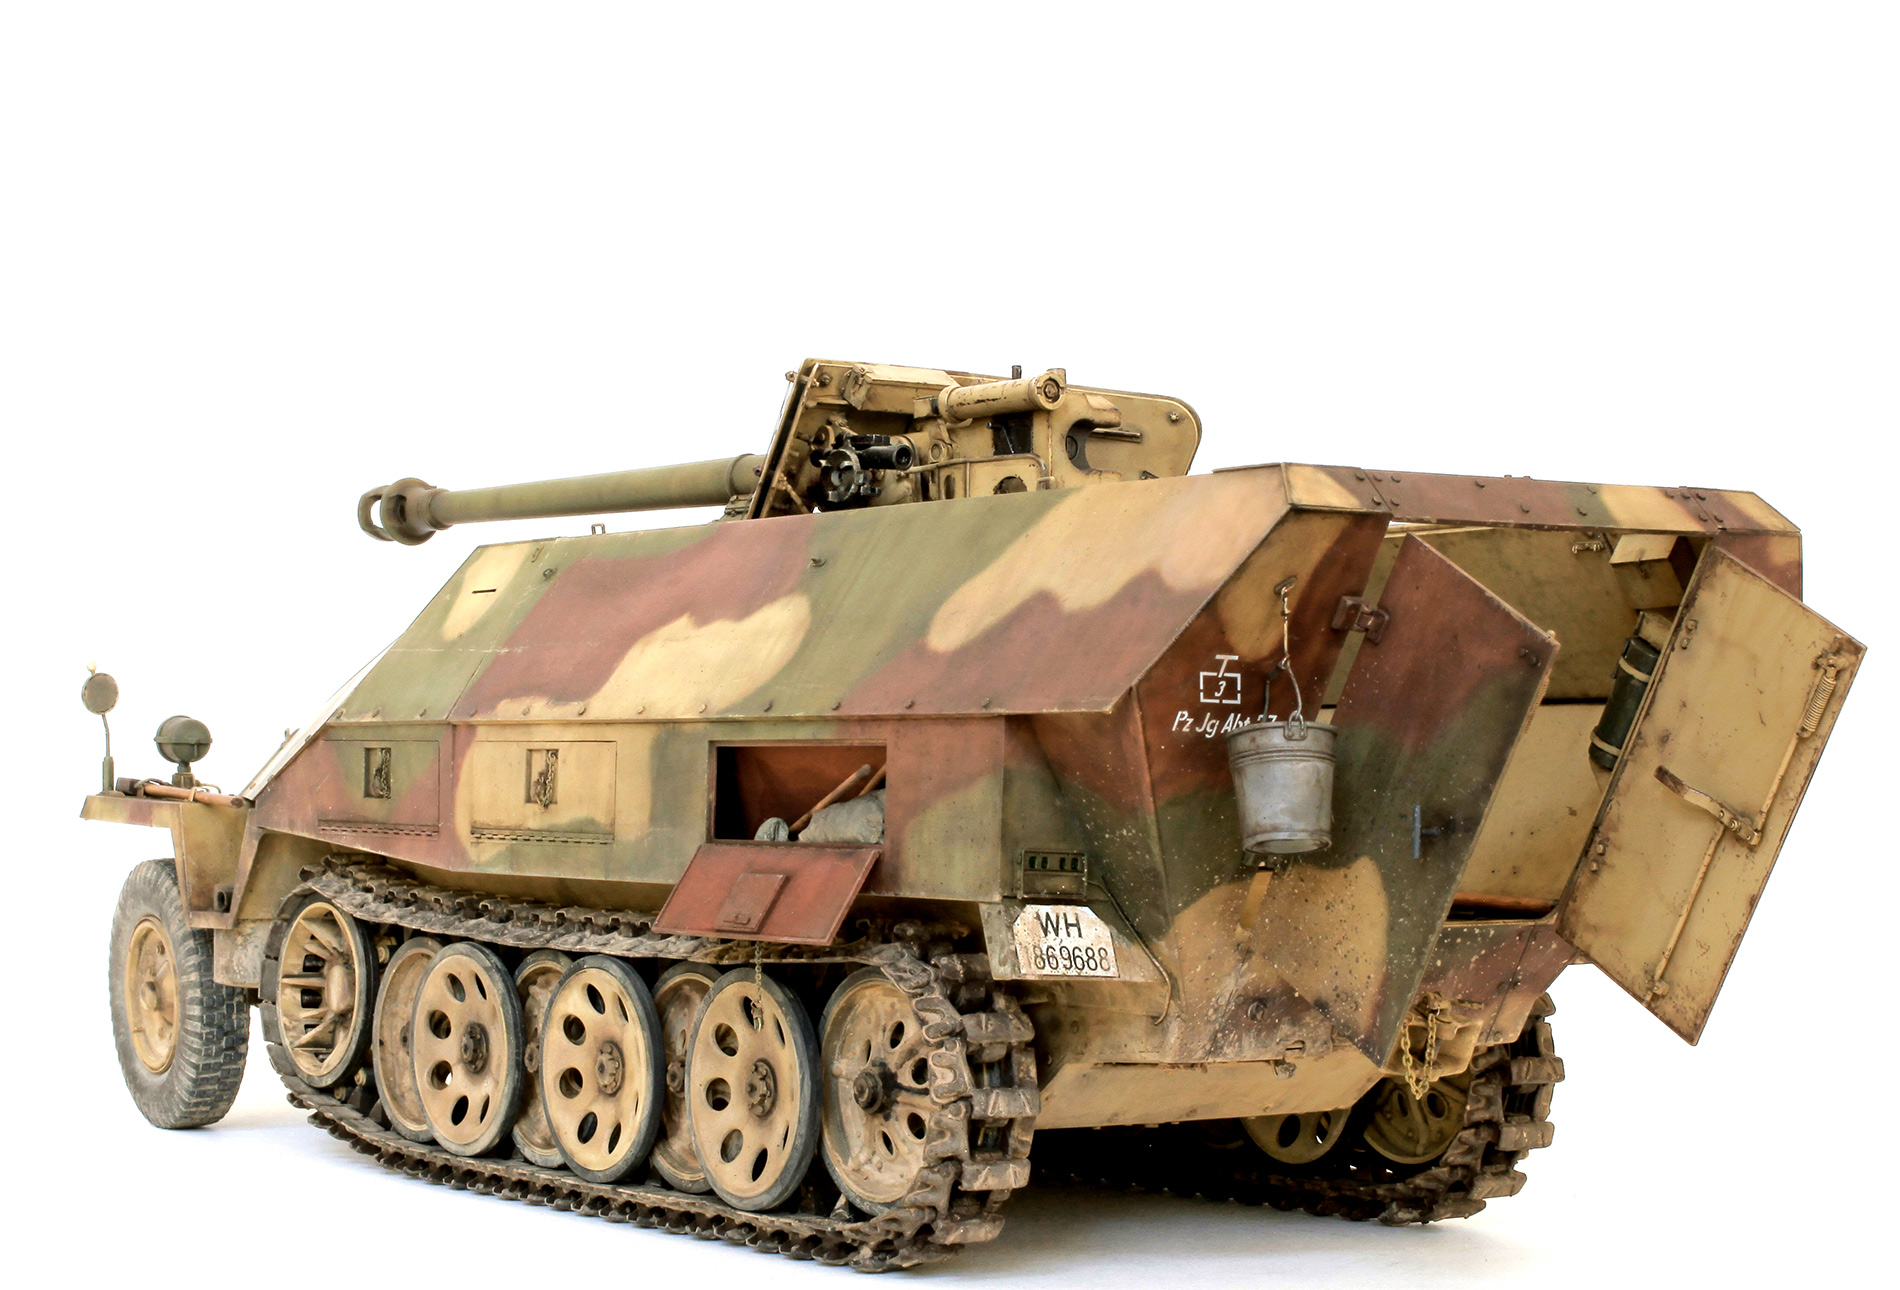
BlastModels 3D printed bucket.

The same extras in slightly different positions. This shot also shows the chain added to the tow pintle’s locking pin.

Fighting compartment showing some PaK40 detail.
GALLERY


Absolutely beautiful! Great you showed also some “in progress” photos! Rather large, this one, wasn’t it? 😉
LikeLiked by 1 person
You said it Brother!
LikeLike
You are truly quite amazing! I never appreciated how much detail went into such a build. Brilliant!
LikeLiked by 1 person
Phew, and I think working in 1:24 is tough. Well done mate, brilliant work
LikeLiked by 1 person
Espetacular!!!
LOCK ‘ N LOAD!
LikeLiked by 1 person
Absolutely amazing. The weathering on your models capture the look of reality better than any other models I’ve seen. Each one is a work of art. Your photography is excellent as well. Can I ask what you use for a camera/lens? Thank you and best regards, Scott
LikeLiked by 1 person
Hi Scott, the camera I use is a Canon EOS 5D fitted with a 50mm macro lens.
LikeLike