1/32 Special Hobby Fieseler Fi 103 (FZG 76) / V-1
V-1 BUZZ BOMB

At sites in northern France, on the night of 12 June 1944, the first Vergeltungswaffen (V-1s) were pushed onto their launching rails. At midnight they were launched and, with their pulse jet engines crackling, set course for London.
Construction

First thing I did before the fuselage/engine halves were glued together was to drill out the access hole on the vertical tail fin and remove the moulded-on support bracket detail from the engine’s blast tube. New internal and external bracket detail was added using various Evergreen plastic strip and rod. In hindsight I wish I had removed the engine from the fuselage mounts before the halves were joined. Adding detail and clean up would have been a lot easier.
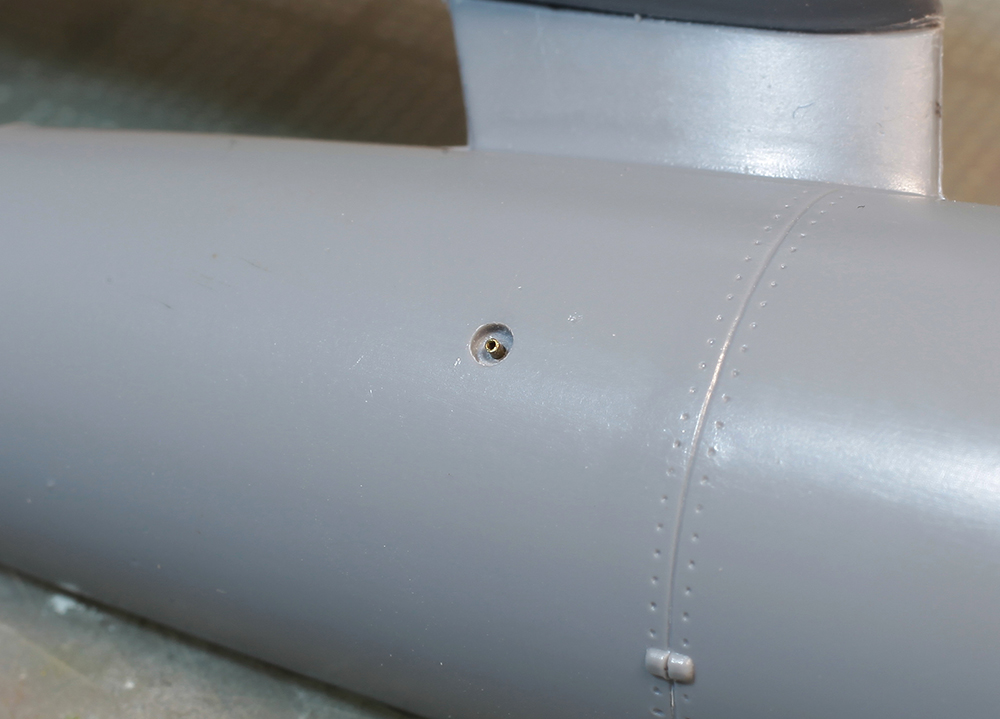
Air filling connection valve(?) was added using brass tube. The kit’s moulded connection bolts (one of which can be seen near the bottom of frame) were removed and replaced with more detailed ones made using Evergreen rod.

Close-up showing added internal vertical tail and engine bracket detail. You can also see in this shot that the engine has been separated from the vertical tail. This was done after the two halves were glued together. A very tedious exercise which, as I said previously, would have been a lot easier if done earlier. The kit also comes with a tubular FuG 23-transmitter moulded to the end of the fuselage below the rudder. I wasn’t happy with this so I cut it off and drilled out the hole it would have been protruding from.

A pitot tube was added to the front engine mount.

A new impact switch and air log prop were added to the nose. This was made using a piece of shaped plastic rod and some strips of scrap P/E. Detail for the two mechanical impact fuse pockets on the top of the warhead section was added by drilling them out and gluing in appropriate lengths of smaller diameter plastic rod. You can also see in this shot some of the scratch built connection bolts that replaced the rather inadequate moulded kit offerings.

The angled control arms for the elevator spoilers can be seen here. I forgot to photograph this addition before the model was completed. This shot also shows the rudder control pushrod. This was made using telescoping brass rod and tube and replaced the flat P/E kit part.

Here I’ve cropped one of the main shots to show the hollowed out end of the port elevator and the tip of its hinge pin.

The completed TW-76 transport trolly. Lots of extra details were added to this which included lots of bolt heads, wheel axles, steerable front wheels and a new telescopic towing handle.

Construction complete and waiting for paint.

Transportwagen 76 finished, painted and weathered and with new handle added.
GALLERY


A late inclusion. This shot of the undersurfaces shows that the section holding the warhead was obviously manufactured and painted in a different facility. This is a common feature and can be seen in quite a few subject photos.

Hi Chris, very nicely executed subject. As usual, pleasure to watch.
Cheers, Tomasz
LikeLike
Superb, well done indeed.
LikeLike
As ever Chris, attention to detail is stunning. I guess the plaudits get tedious to receive after a while LOL :-). Seriously, beautiful work, weathered to perfection. I learn something every time
LikeLike
Nice Doodle Bug Chris!
LikeLike
Outstanding craftsmanship Chris, as always! Not my favourite subject but your workmanship is excellent.
LikeLiked by 1 person
You are one of the finest modelers I’ve ever had the pleasure of following. You might consider doing a modeling book to help us more mundane modelers an opportunity to learn new skills. Thanks
LikeLiked by 1 person
Thanks for your kind words Don but articles and essays on my modelling and painting technique have already appeared in various publications over the past 20 odd years. I may consider doing some form of instructional video and if I do, it will appear here and be free for anyone to view.
Cheers,
Chris.
LikeLiked by 2 people
Awesome work, as usual, Chris. Your work is the quintessential blend of artistry and realism. I have many of the publications which feature your work and have tried to employ your techniques on my own, although my results don’t come close to your skilled craftsmanship.
I encourage you to tackle producing instructional videos as they would be most welcome among those of us who follow your work.
Scott
LikeLiked by 1 person
I wholeheartedly support what Scott has written. It would be absolutely great to see your modeling skills in action.
If editing the video footage is one of the problems stopping you from producing such instructional video, than I can take care of it. If you only provide me with raw video input, I can edit it to the final result of your liking.
Tomasz
LikeLiked by 1 person
Hi Chris! Good to see you “working on kits”, rather than sit on the patio sipping a beer 🙂 Which is a good thing too.
Great paint job! You know, I still like to use that Testors airbrush from 20+ years. Guess, I’ve learned something from
Absolute Hobbies years :-))
Zig
LikeLike
Hi Zig, I’m still using the same Aztec I’ve had for, at least, the last 25 years, and I’ve been sipping beer while I’m using it for about the last 3 years. Ha, ha.
LikeLike
Well, I’ve quite a bit of “unloved samples & bits of Aztec guns” too. I’m set 4 life :-))
I do like that plastic thing! Worked for me so many years!!! Guys get to much sucked into shiny new bits.
Sometimes I pull out a shiny gun, just to justify it’s existence :-))
Fuk this Gov!
Zig
LikeLike