REVELL 1/32 Me Bf109 G-10 Erla
Erla built Messerschmitt Bf 109 G-10 of 2/JG27

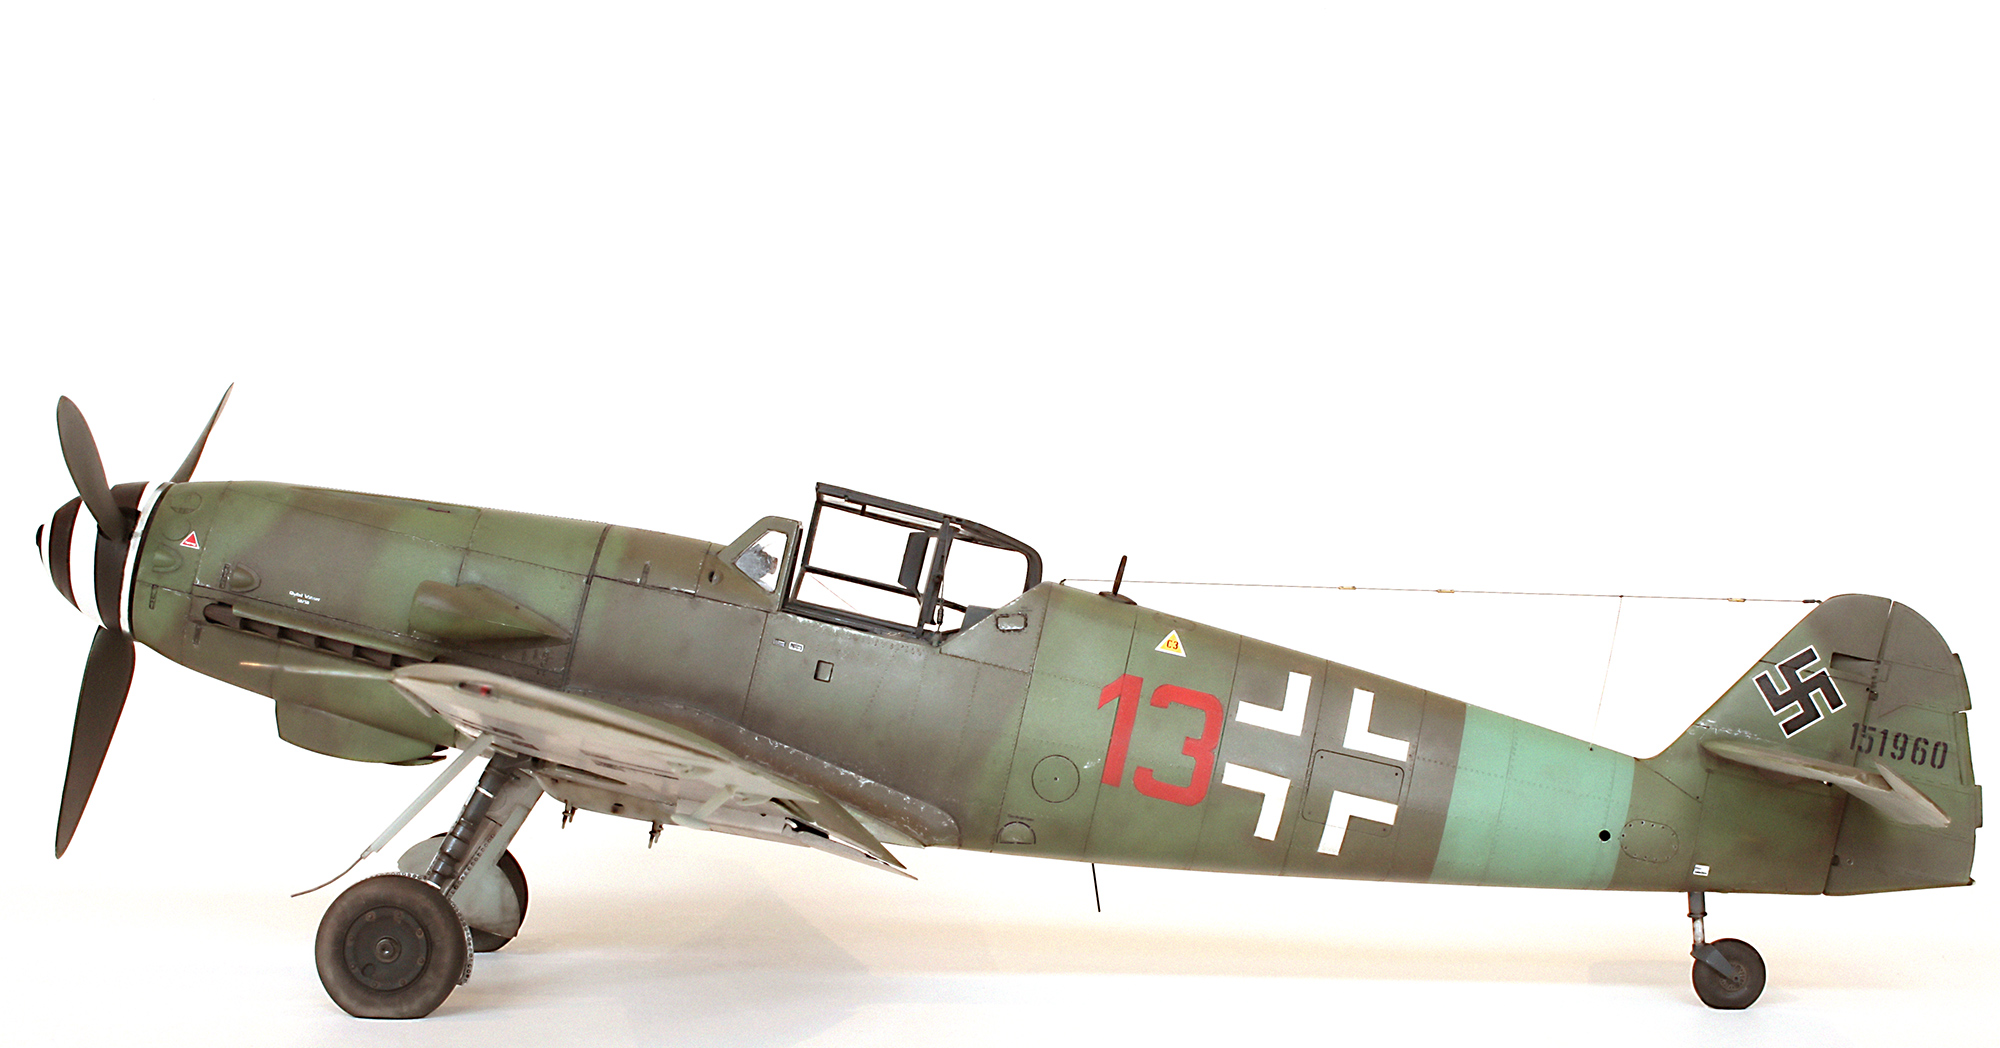
Red 13 of 2./JG27, Schwerin-Görries/ Germany, mid April 1945. Claes Sundin (whose beautiful illustration of this aircraft was my main inspiration for this build) states “that this Bf 109 G-10 was found intact, belly-landed in a field. The W.Nr. on its rudder is a qualified guess as it is known that the Gruppen flew this type of G-10 from the 151XXX block and some of them were camouflaged in this overall scheme of RLM 81/82. This machine had been quoted as being Black 13 however, by this time, 2./JG 27 was only using red tactical numbers.” Claes may be wrong about the red 13 but I think it looks great on this scheme.
Build shots

Cockpit with a fair bit of extra detail added. The very ordinary kit rudder pedals were replaced with the much better items from the Hasegawa G-10 kit.

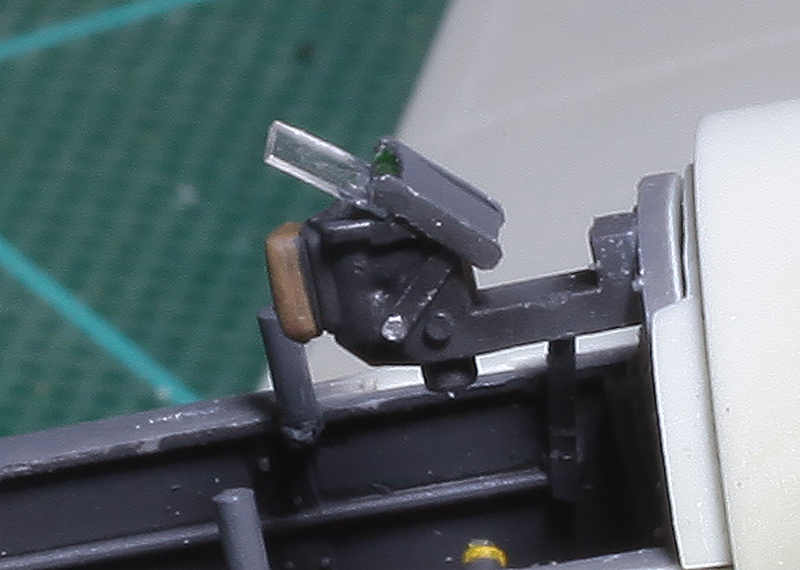
Kit joystick with some extra detail added.
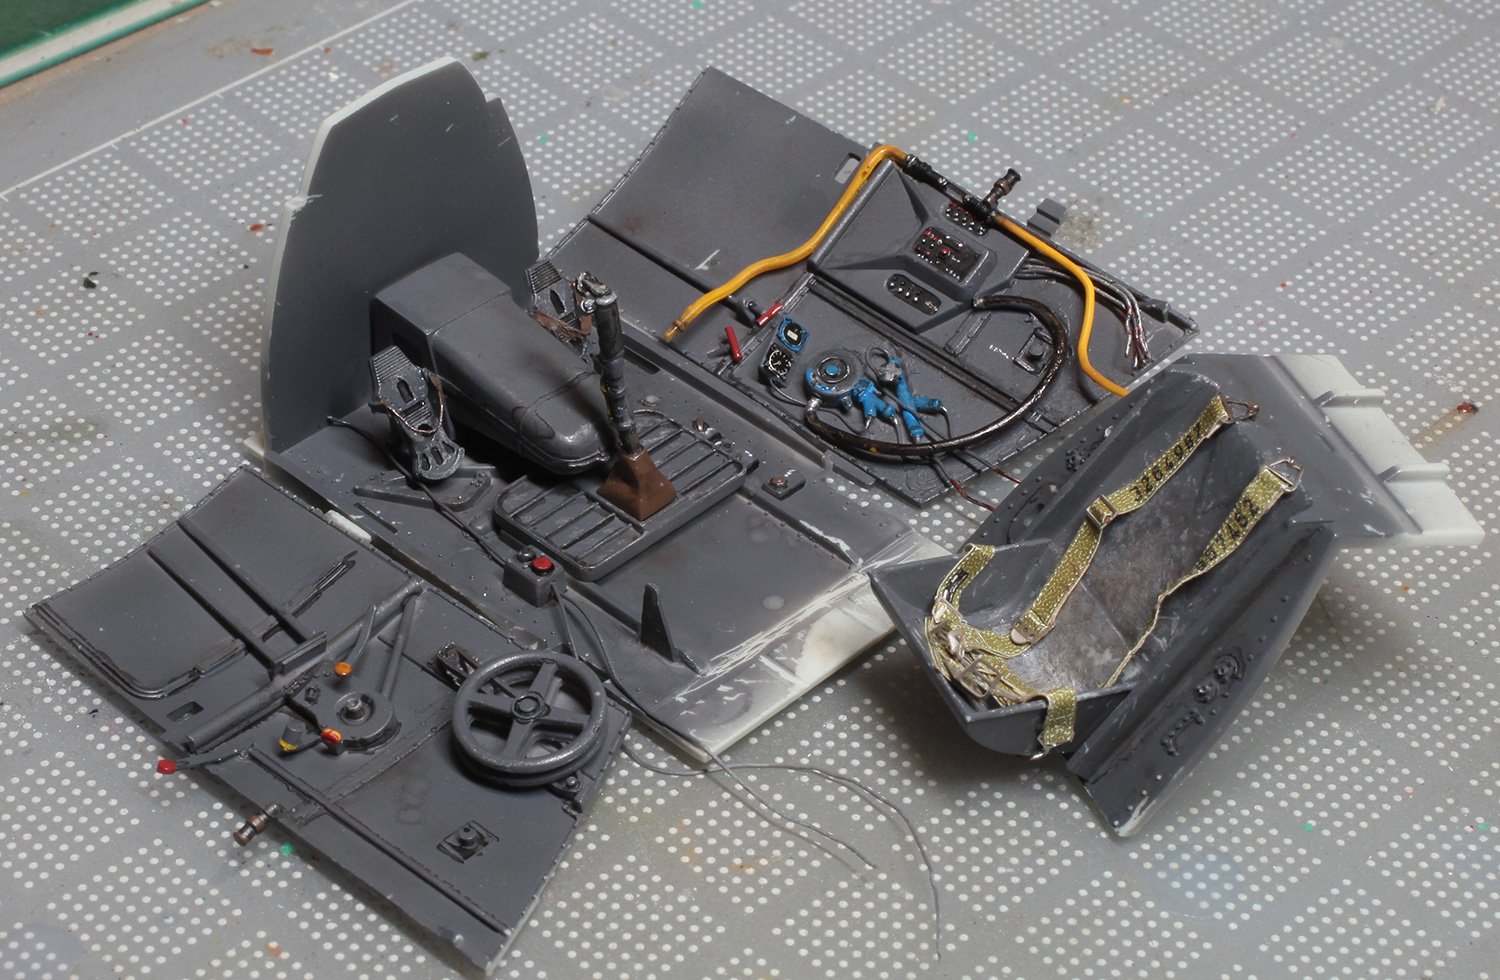
Cockpit painted and weathered with the beautiful HGW micro fibre fabric seatbelts added to the seat.

Interior installed. Decals for the instrument dials were sourced from an old Hasegawa 109 decal sheet. Each dial face was cut out and applied separately.
Revi gunsight from the Hasegawa 109G-10 kit (with a bit of extra detail added) was used in place of the underwhelming kit offering.
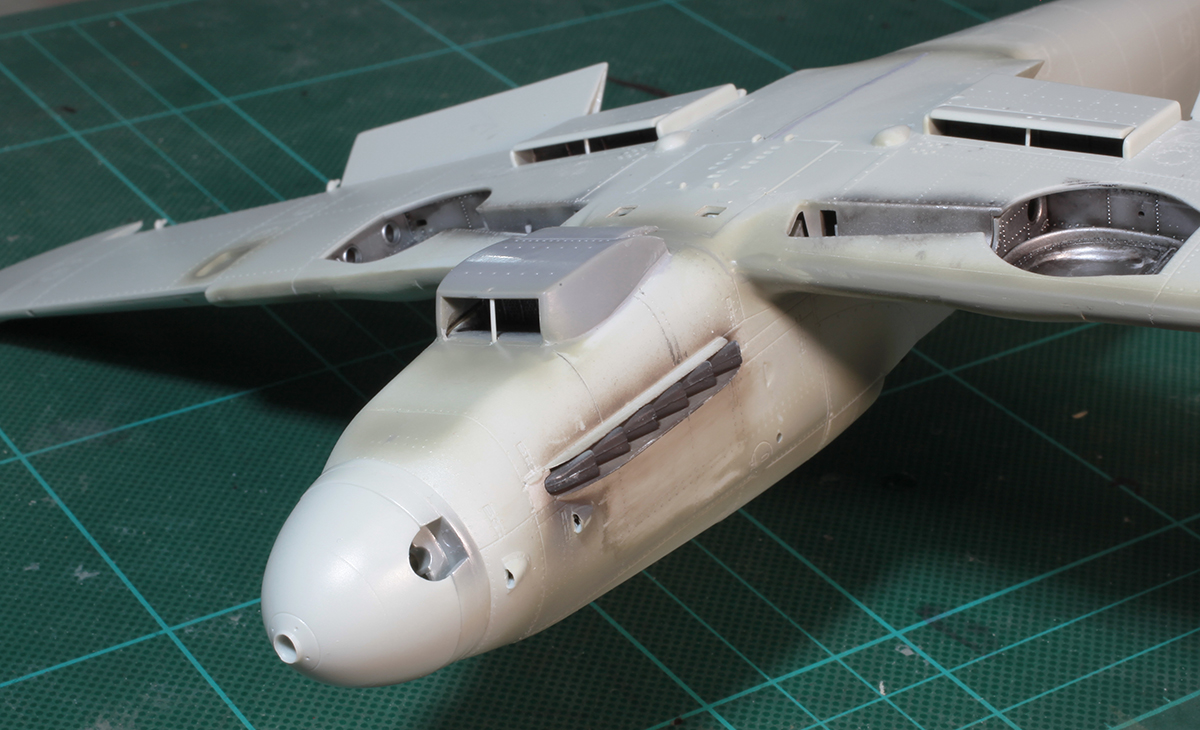
The kit’s chin radiator is way too shallow so I replaced it with the corresponding deeper part from the Hasegawa 109 kit.

The kit’s very narrow exhaust stacks were replaced with the broader Hasegawa offering. This required a bit of surgery to make them fit which included thinning of the exhaust shrouds, which I was going to do anyway. Also the end of each stack was carefully hollowed out.
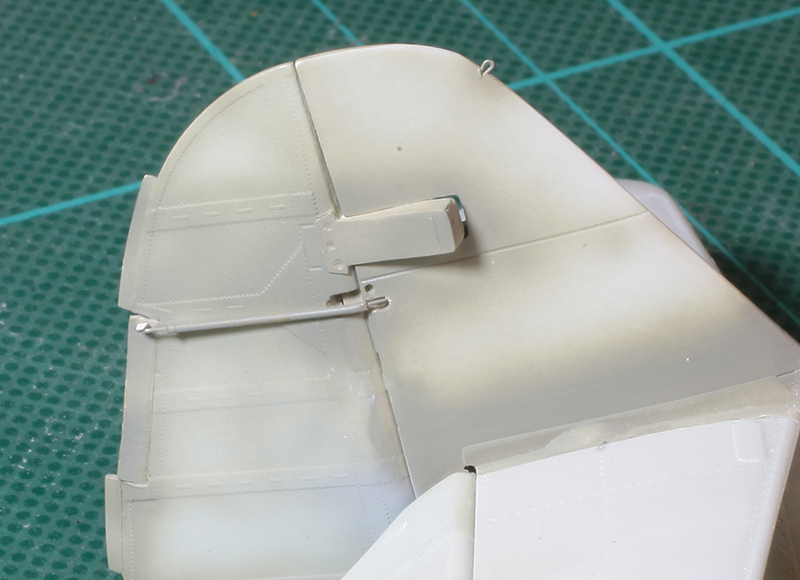
A new push rod for the rudder’s trim tab made from brass wire and tube replaced the kit part. The fine wire loop near the top of the tail fin makes for a very secure attachment point for the radio antenna wire. A corresponding loop was added to the fuselage just behind the cockpit opening for attaching the other end of the wire.

The small scoops on either side of the nose were very carefully hollowed out using my motor tool and a sharp scalpel blade. Note also rivets added to spinner.
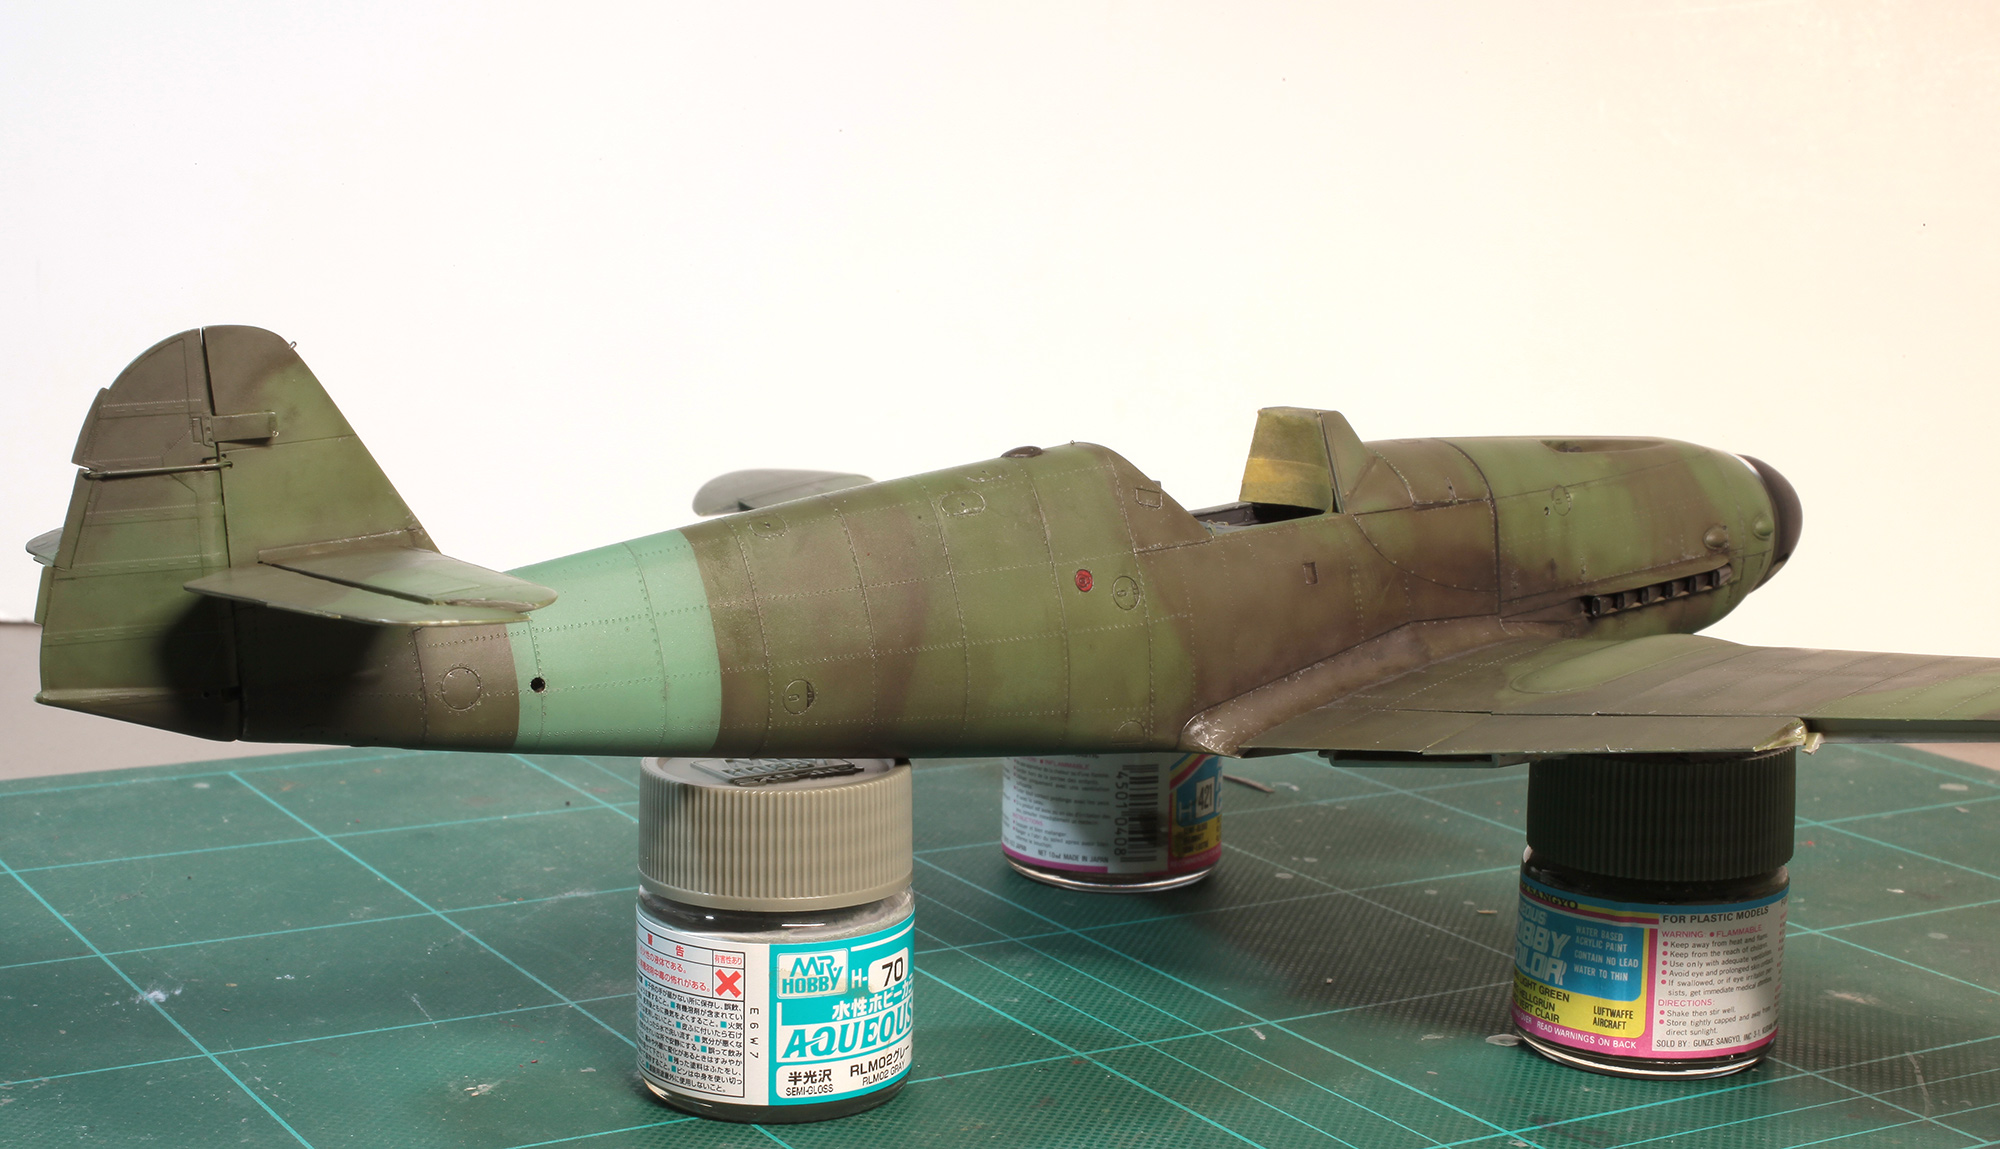
This shot shows the initial application of the cammo colours and the JG27 green Reich Defence band. Weathering is also well underway and you can also see that the entire model has been riveted.

Decals have now been applied but as I couldn’t find any appropriate decals for the fuselage Balkenkreuz and red 13, I cut masks and sprayed them on. The speculative W.Nr. on the tail was made by cutting individual numbers from the kit decal sheet. The insulators on the antenna wire were made by cutting 2.5mm lengths of 0.5mm x 0.3mm brass tube and threading onto the nylon mono filament. Once in position each one was secured with a tiny drop of CA glue.

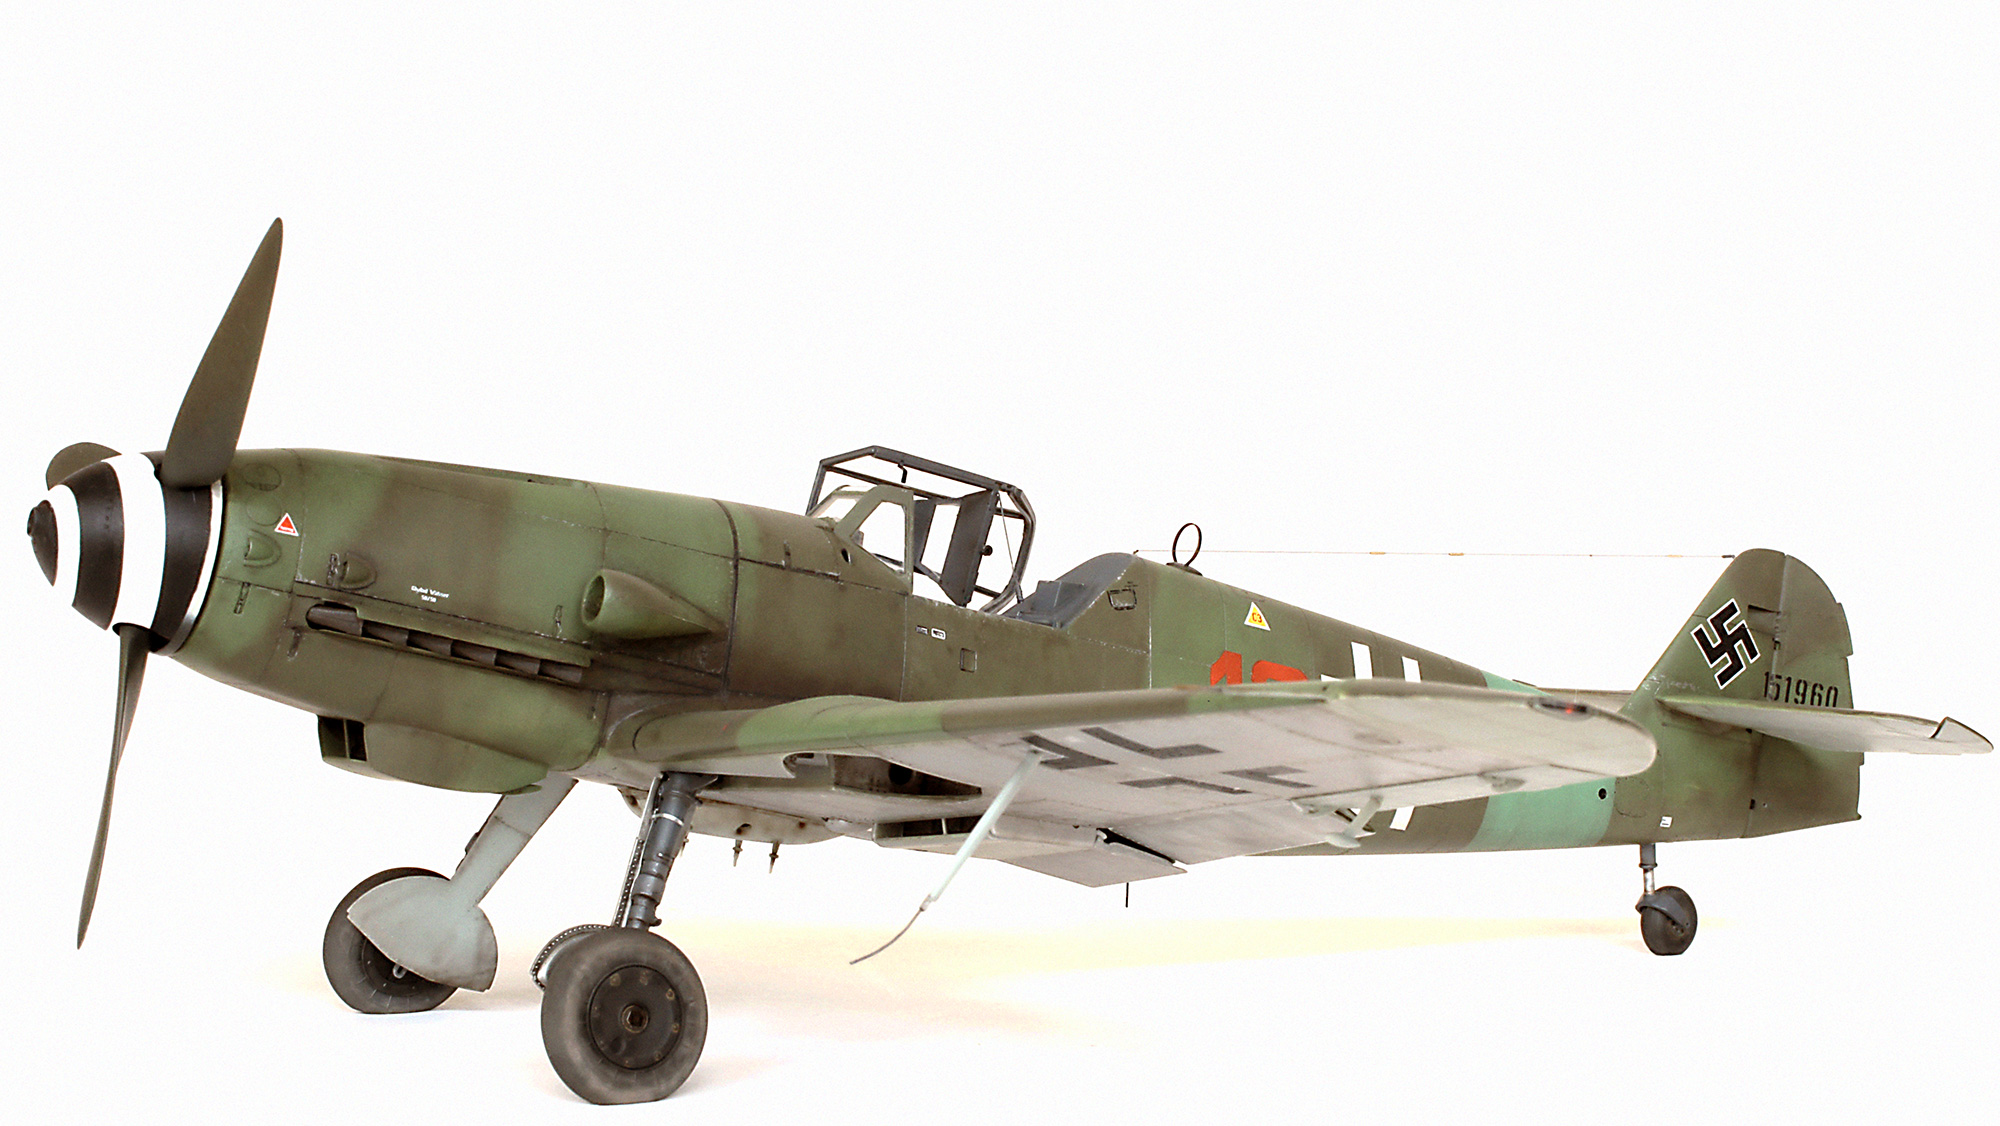
Patchy bare metal lower wings with wingtips, ailerons and horizontal tail surfaces in RLM76. All weathered with my black/brown mix.

Open canopy securing strap and spring were made from very fine copper and brass wire. Securing loops for the radio antenna wire and safety harness buckles were also made from fine wire. DF loop was made from a narrow strip of flat P/E brass from the spares box.
GALLERY


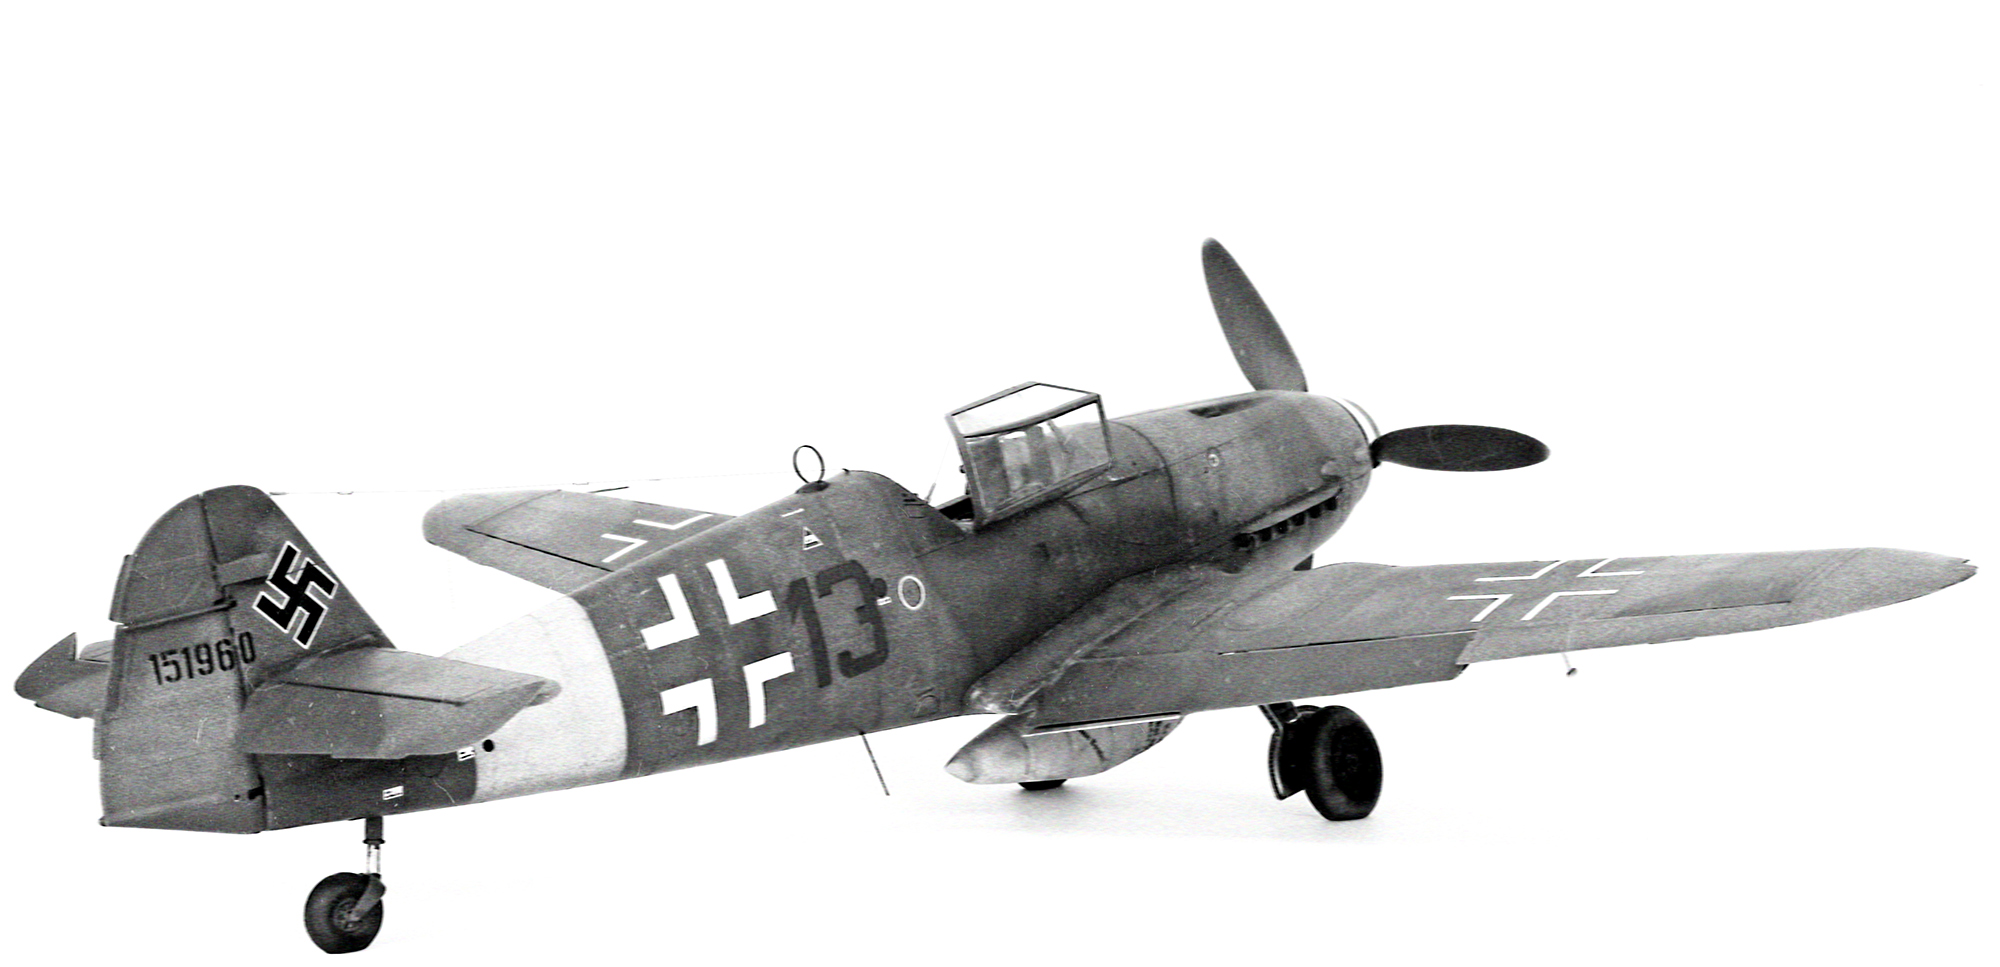
Given the black and white treatment to try and match my B/W reference photo shows how it could easily be interpreted as black or red “13”.
Paints used:
Gunze Sangyo Aqueous Hobby Color- H-65 RLM70 Black Green, H-70 RLM02 Grey, H-417 RLM76 Light Blue, H-421 RLM81 Brown Violet, H-422 RLM82 Light Green.
Tamiya Acrylic- XF-1 Flat Black, XF-2 Flat White, X-18 Semi Gloss Black, XF-24 Dark Grey, XF-64 Red Brown.
Tamiya Lacquer- LP-70 Gloss Aluminum.
Winsor & Newton Galleria- Matt Varnish

Beautiful work Chris!:)
LikeLike
Beautiful work Chris, we must catch up when were next in Sydney (if you’re still living there) I would love to show the young fella what really modelmaking looks like!
Cheers
J
LikeLike
Look forward to it Jules.
LikeLike
hi Chris ,
what did you use to make the rivets ? They look fantastic !
superb model.
Richard
LikeLike
Hi Richard, to make the rivets I used the MDC rivet making tool fitted with a punch that was the appropriate size to represent 1/48 rivets. Thick tape was used as a straight edge and guide as to where the rivets were to be applied. The spacing of each rivet was done freehand. The MDC punches leave a circular rivet head that is very slightly raised which I think is a realistic result.
Hope this answers your question’
Cheers,
Chris.
LikeLike
Stunning as ever Chris. I built the Airfix superkit 109-E4 a while back and added many of your additions too but that was in 1:24.
I bow down to you doing it in 1:32👍What are you using for the reflector glass on the gunsight? Is that thinned down or original. It looks lovely and thin. Cheers for a great build
LikeLike
Craig, the gunsight reflector was cut from a sheet of clear acetate which would normally be used for overhead projecting. So it’s pretty thin.
LikeLiked by 1 person
She looks brilliant Chris, another beauty ! I particularly love the thin application of 81 on the fuselage sides, and the wrap around camouflage under the nose. Your use of beautiful tonal Variation and weathering is clever as always and yes; I think the „Red 13“ looks killer also !
the 109 look so cool in those colours!
Well done, all the best,
cheers,
Peter.
LikeLike
Amazing as always Chris. Wonderful to see you do another 109. Thanks for sharing.
LikeLike
Another masterpiece Chris! Real pleasure to watch. Good, old Aztek still in use? Or have you upgraded to something new?
Cheers, Tomasz
LikeLike
Hi Tom, all the main colours were applied using my new Iwata Tokumi and while I can get it down really fine, I still can’t get it as fine as the Aztek, so all the extremely fine stuff was done with the Aztek fitted with the fine nozzle. I just need a bit more practice I think.
LikeLike
Which Takumi if I may ask? There are two: Eclipse Takumi and Custom Micron Takumi. You will get the details with this airbrush, and much finer than Aztek. To get it really fine you need to remove the needle protective cap (crown cap) and work very close, with the needle exposed. However, it’s very easy to accidentally bump the surface and bend the needle (and with Iwatas it can be very expensive – ask me how I know 😉 )
LikeLike
It’s just the Eclipse but I can’t argue as I got it for nothing.
LikeLike
Oh, and there’s one more trick you may try (if you haven’t already) – the paint cups of your Aztek should fit to your Takumi (they fit to my “old” Eclipse HP-SBS). They are much lighter than the big, heavy piece provided with Takumi (and won’t try to balance out the airbrush in your hand like the original paint cup does). Let me know if it works for you after you try this.
LikeLike
Thanks Tom, I did discover that soon after I got it. It worried me a bit at first but I quickly discovered that they worked fine. Bonus!
LikeLike
Good for you then! The Eclipses are very nice airbrushes. They are the only ones, in whole Iwata lineage, that come equipped with the floating, self-centering nozzle, which makes them very easy to clean and maintain.
LikeLiked by 1 person
Fantastic work as always. You may have inspired my next 109 painting.
LikeLike
Amazing work! Another big inspiration for me 🙂 Thank you Chris
LikeLike
Nice stuff Chris!
LikeLike
Looking great Chris, love the variations of green going on with the red 13 setting them all off. I have always stopped at the antenna wiring. Effectively I have aircraft that are ‘almost done’ waiting for a solution to getting this done convincingly and securely, yours look both. Your use of the loop and real! small tube has sparked a renewed quest.. Cheers and all the best!
LikeLike
Outstanding build, Chris! I love the finish!
LikeLike
Another awesome piece of work, Chris. Really impressive paintwork and weathering – just right. How did you treat the pilot’s seat pan and back? Oils applied as a thin wash or thinned paint by airbrush?
LikeLike
Scott the pilot’s seat weathering was all done using a sharp Prismacolor silver pencil and some subtle shading with the airbrush.
LikeLike
Wunderbar Chris!
LikeLike
Another masterpiece Chris !
LikeLike
Very well done! (as always – I should say).
Love your painting, an it shows on that B/W pic, the variations on the “monotone” parts of cammo, not really noticeable on colour pics.
And I too still use Aztec I’ve got from your shop (+ some others).
Guess, I’ve got used to it like a 6th finger 🙂
Zigmeister
LikeLike
She looks brilliant Chris, another beauty ! I particularly love the thin application of 81 on the fuselage sides, and the wrap around camouflage under the nose. Your use of beautiful tonal Variation and weathering is clever as always and yes; I think the „Red 13“ looks killer also !
the 109 look so cool in those colours!
Well done, all the best,
cheers,
Peter.
LikeLike
A very beautiful Project. I looked through your other builds and saw a lot of Hasegawa/Revell 109s. Did you ever had a go at the Trumpeter? Which would you consider to be the most accurate form? I just got my hands on the Zoukei Mura one and it is exceptionally good.
Best Regards from Switzerland
LikeLike
Hi Dom, I have only just seen your comment and in answer to your question, after previous encounters with Trumpeter kits I would not even consider any kit they produce unless they make some major improvements.
The ZM kit looks to be unnecessarily over detailed and expensive to me. Would love to know how it builds up.
Cheers,
Chris.
LikeLike
Hi Chris, thanks a lot for the response. I just gave the 109 K-4 from Trumpeter a shot and totally agree with your statement… I definately will give the Hasegawa a try next. Last but not least… do you lighten up your colors (scale effect) or not at all, because I think the color tone is on point.
Best Regards
LikeLike
Hi Dom, I find that I don’t have to lighten the Gunze Luftwaffe colours but I do apply them fairly thinly. This allows me to selectively build up the intensity of the colour which gives a subtle uneven finish that I think replicates the real look of, especially late war, Luftwaffe aircraft.
Hope this makes sense,
Cheers,
Chris.
LikeLike
Hi Brett,
Ive really been enjoying your work! I recently bought the 1/32 mosquito along with the “How to build” magazine and your work on it is phenomenal, so i will be using it as a guide.
Id just like to know how you make your black/brown mix, and also how you use it. For example what areas do you use it ? Its very subtle by the looks of it and works perfectly.
Thank you,
Richard
LikeLike
Hi Richard, sorry I’ve taken so long to reply but my web designers recently changed the format of my stats page and I didn’t notice the comments notification until today.
So in answer to your questions my black/brown mix consists of about 90% thinners to 7% Tamiya XF-64 Red Brown and XF-1 Flat Black. This very thin mix is applied very subtly along panel lines and any other hard edge paint lines, e.g. cammo demarcation and painted tactical markings.
For exhaust stains and heavy dirt build up a heavier mix, i.e. 70% thinners with 20% brown and 10% black, is built up very gradually until the desired effect is achieved.
Again, sorry about the delay but I hope this description sufficiently answers your inquiry.
Cheers,
CHRIS.
LikeLike
Hi Chris !
Thanks for the reply. The information you provided is perfect , and I’ve already used it to great effect . One more question if you don’t mind. Do you use oils for weathering ?
Thanks !
LikeLike
Richard it’s all acrylics
LikeLike
Hi Chris,
I always seem to come back to this beautiful build while ‘trying’ myself out on a Revell/Hasegawa K-4. I wondered if you use a gloss varnish before applying decals/start weathering and if yes, how do you achieve this beautiful flat finish? Do you put a final top coat over everything?
Best Regards
Dominik
LikeLike
Hi Dom, yes I do use a gloss varnish but I try to only spray it on the areas that the decals are going to be placed. After the application of the decals, and they have had plenty of time to set, the main weathering is done. I then give the decaled areas a light coat of Windsor & Newton Galeria acrylic Matt Varnish. This is applied gradually until the glossed areas match the, usually semi gloss, overall paint scheme. A few light coats of the matt are then sprayed over the entire model until I am happy with the result. If I think that the finish is looking too matt I’ll give it a very careful polish with the appropriate grade of Micro-mesh surface finishing cloth (usually 6000 grade). This process does vary of course and I keep fiddling until I’m completely satisfied with the way it looks, which is usually never.
I hope this answers your questions if not give us a yell.
Cheers,
Chris.
LikeLike
Excellent as always, best regards, Andrey
LikeLiked by 1 person