Hasegawa 1/72 Mitsubishi Ki67 Hiryu (Peggy)

The ‘Flying Dragon’. In my humble opinion, the best looking Japanese bomber of WW2.

The first job was to replace the plastic radar dipoles with .3mm brass wire. Still not quite thin enough but much more acceptable than the over-thick plastic representation.

The interior was improved by the addition of the photo etch detail set 72 321 from Eduard. Boy! I had forgotten how small 72nd scale was!

Photo etch replacement for the floor of the glazed nose. This is only a fraction of the P/E detail that was to be crammed into this area.
The rear fuselage is a little less crowded.
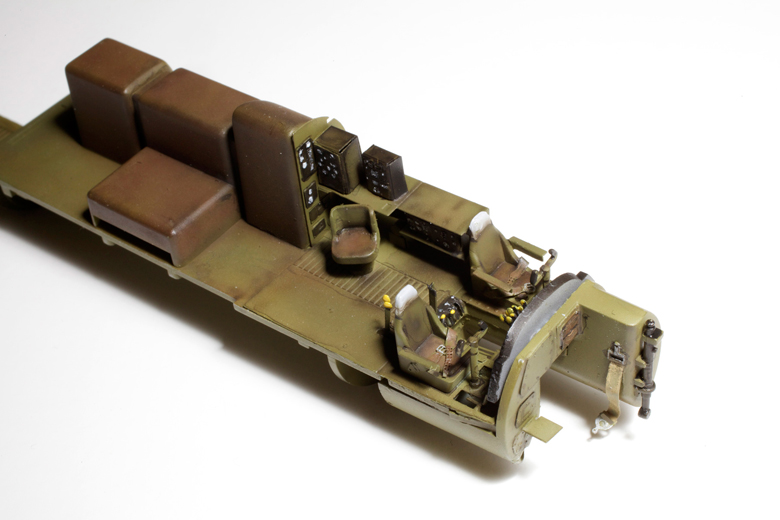
The cockpit area painted and weathered.

I did opt for the kit decal instrument panel rather than the P/E alternative.

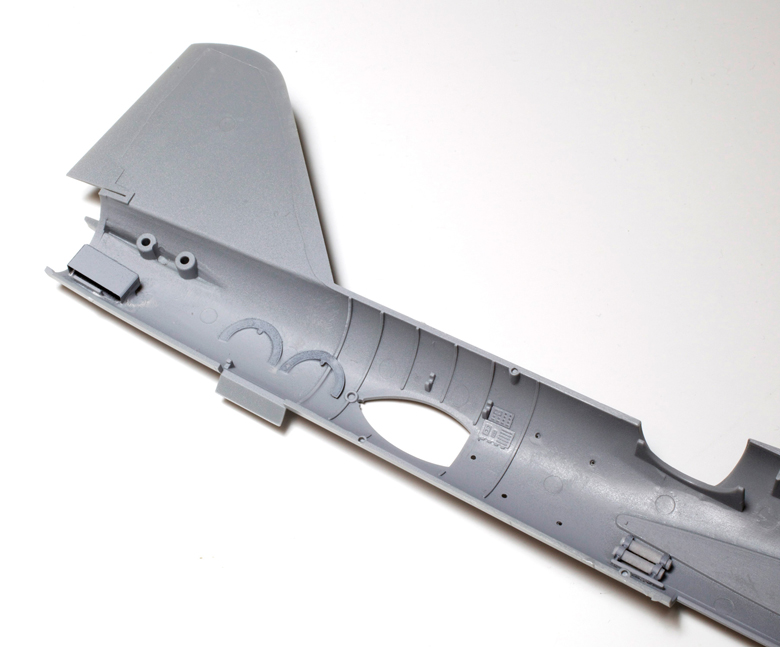
The only major fault that I found with the kit was the difference between the circumference of the fuselage and the slightly smaller, clear nose part. This was rectified by gluing a strip of thin plastic card to the top of the fuselage and sanding until the step between the two parts was eliminated.

I added the internal framework to the rear gunner’s position using .020 plastic rod from Evergreen.

The kit instructions indicate that if the torpedo is to be fitted, that the bomb bay doors are not to be installed. On closer inspection of the available photographic references of the Ki67, I determined that the doors were cut down and fitted in the closed position. I presume this configuration would have provided slightly better aerodynamic quality than no doors at all. In this shot it can be seen that I have removed one 3rd of each door and fixed them in the closed position.

I cut a fine grain pattern on the breakaway wooden torpedo fins which were then painted Tamiya Desert Yellow and given a very thin black/brown wash.

Before fitting the wooden fins, the torpedo’s prop blades were thinned down and each blade was carefully twisted to give them a more correct pitch.
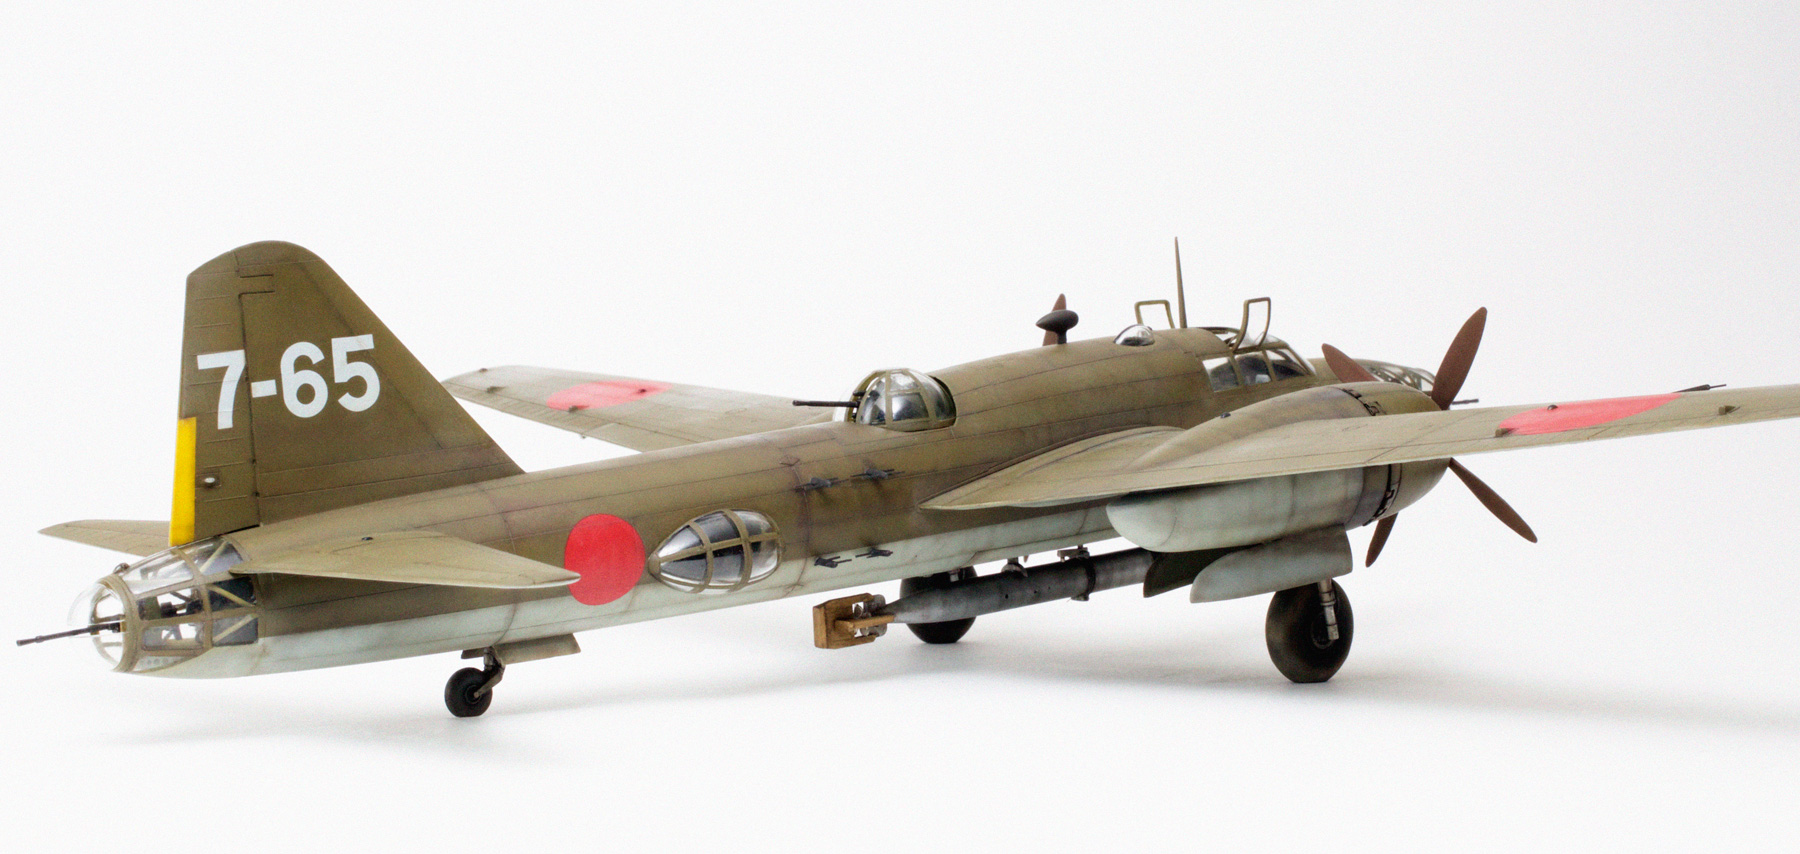
A handsome aircraft from all angles.

All panel lines were shaded to various degrees with my black/brown mix.

Exhaust stains were achieved using the same black/brown mix only applied slightly heavier with a carefully sprayed centre of Tamiya Buff to give a lean burn look. The tyres were sprayed flat black and dirtied up with Tamiya Dark Earth. Hydraulic lines were made from fine solder wire.

Fine lines of rivets were added to the front half of the fuselage and to the engine cowls using the point of a sewing needle. The support struts for the open canopy hatches were made from stretched spru.

Hi Chris,
Good to hear you’re back in business 😉 Especially nice to see that you decided to jump into something smaller than 1/32 scale this time. With equally impressive results!
Chris, could you share some tips on your photo setup – is it continuous lightning or studio flashes, camera settings if not full auto, etc.?
Regards,
Tomasz
LikeLike
Hi Tomasz,
Getting a bit slow in my old age I’m afraid but it was not my decision to build 1/72. I was commissioned by a client to do this and several other 1/72 kits over ten years ago, so I thought it was about time to get started on them! It was good fun but the P/E is bloody fiddly in this scale and he always provides an Eduard set to be used.
My studio setup is pretty basic – just a large piece of curved white cardboard on my benchtop. I do use a very good camera though, a Canon EOS 5D Mk II fitted with 50mm Macro lens. I keep the lens closed down to f32 for maximum depth of field, the shutter speed set at 1/60th of a second and the ISO no higher than 400. The flash I use is a Canon SPEEDLITE 580EX II set on automatic fitted to the camera’s hot shoe and always directed to be bouncing off a reflector (usually just another piece of white card held above and behind me by my able assistant). The exposure can be adjusted simply by moving the reflector closer or further away from the flash. The ability to view the image immediately makes this process fairly easy and I just keep adjusting and shooting until I’m happy.
Hope this answers your questions,
Cheers,
Chris.
LikeLike
Hi Chris, thanks for your very detailed answer. Indeed pretty simple setup – something I can try myself.
LikeLike
Just impressive!…top work…congrats!
Best regards!
Luiz.
LikeLike
Thanks Luiz,
It was good fun doing 1/72 again even though the photo etch parts were VERY small! The guy I built it for was impressed as well (thankfully).
Cheers,
Chris.
LikeLike
Mind blowing as usual Chris. Your work stands for itself. I work primarily in 72 scale and being born and raised in Hawaii I am a big fan of all things Japanese. I’m still convinced Carravaggio and Rodin are channeling through your hands. Keep up the creative flow!
ClintBova
LikeLike
Hi Clint,
Channeling Carravaggio and Rodin eh? That explains the voices! And how I can suddenly speak Italian and French!
Grazie,
Chris.
LikeLike
Very nice Chris! I really like how the post-shading gives life to the base colors!
LikeLike
Thanks Emil,
I have always used this method because I think it gives a more realistic effect than pre-shading and, as you point out, it dose make the base colours look much richer.
All the best,
Chris.
LikeLike
G’day Chris,
Yeah its looking very good mate. However I’m not into Japanese AC but it looks nice. Lots going on here that I can’t talk about. However, I have been fool’n around with the DH Chipmunk from AIRFIX. It’s got a few tight issues but didn’t have to worry about fine PE. However most of the work is scratch-built #:o) .Will post some pic’s on Brett site for you to look at, or would you like to look at the Photobucket Album?
PHIL
Still in California ……..
LikeLike
Look forward to seeing it.
LikeLike
Chris,
Congratulations on a magnificent rendition! I have a question: to me, the centerpiece is the torpedo. How did you get the realistic finish? Did you use Alclad, or some other metalizer? It actually appears to be 3-4 shades of aluminum. Thank you for any reply.
LikeLike
Hi DJ, I’m glad you like the model and to answer your question, yes I did use the Alclad Aluminium on the torpedo but just the one shade. To get the variation of colour I carefully airbrushed dark streaks of my black/brown mix around the tube of the torpedo. Before these streaks were completely dry I gave it a careful but rather vigorous polish with the finest Micro-mesh cloth. If you do not have this product, using the smooth side of a nail buffer will produce the same result. This method not only removes the soft edges of the dark streaks but also gives the whole thing a very realistic, metallic sheen.
I hope this helps,
All the best
Chris.
LikeLike
Olá Chris!
Muito bonito! Parabéns!
Abc
Chaves
LikeLike
Hi Chaves,
Really pleased you like it.
What does Abc mean?
Cheers,
Chris.
LikeLike
Hey Chris quick question what did you use for upper and lower camo color? As well as interior color?
Your color ways look spot on to me I have a Hasegawa Peggy type 4 I Gou type 1 Kou in the que’ and would love a recommendation.
Always inspiring stuff Chris
Clint Bova
LikeLike
Aloha Clint. I found three colour photos which show three different upper surface colours ranging from very dark IJN green to an olive green to a faded light brown! Because you can’t really trust the colour balance of these old pics I chose a colour that matched the beautiful Shigeo box art which is a brownish green. This was a mix of about 40% Gunze Sangyo H 81 Khaki plus 40% Gunze Sangyo H421 RLM81 Brown Violet and 20% Tamiya XF-64 Red Brown. This colour was mixed by eye so the proportions may vary a bit. The lower surfaces are Gunze H61 IJN Grey straight from the jar. As for the interior colour, I found a really good modern colour photo of a G4M ‘Betty’ cockpit which I think is in its original paint and seems to be a pretty good match for Mitsubishi interior green. To match this colour I made a 50/50 mix of Gunze Sangyo H58 Interior Green and H70 RLM Grey 02.
Hope this is useful,
Cheers,
Chris.
LikeLike
Thanks Chris!, the khaki color is really quite gorgeous you captured it so well. I’m about ready to launch into the KI-67 Hasegawa Kit after a relaxing spitfire PR X1X build, may have to take a large dose of vitamin C and practice holding my breath on this kit, especially on the nose glazing interior. Thanks for the helpful hints before taking the punge!
Much mahalo and Alhambra Clint
LikeLike
Oops… “Alhambra”….spellcheck snafu
Aloha Clint
LikeLike
Give us a shout any time you need hints Clint. Hopefully they will be helpful.
LikeLike
I’ve just seen this work — two years later! Wow. What is the airbrush that you use to make such fine, subtle lines? I have been getting the hang of airbrushing with a very basic model for the last year or so, but I have lately begun to dream of something more advanced… Thanks —
LikeLike
Muito bom!
2017-02-24 18:21 GMT-03:00 STATIC CAPITAL :
> christopherpflueger commented: “I’ve just seen this work — two years > later! Wow. What is the airbrush that you use to make such fine, subtle > lines? I have been getting the hang of airbrushing with a very basic model > for the last year or so, but I have lately begun to dream of something” >
LikeLike
Hi Chris, it’s never too late. The airbrush I use is the Aztek A470 which I realise is not liked by a lot of people, and sometimes it really pisses me off too, but it is the brush I’ve been using for about 20 years and I am now very familiar with its little quirks and idiosyncrasies. I’m sure there are better airbrushes available but the features that I really like about the Aztek are that I can achieve an extremely fine line when using the fine nozzle and I can have several of their syphon type paint cups filled with different paint and being used on the same model. Also, as they are not as expensive as most of the better brushes, I can afford to have two hooked up to the compressor at once.
With the right paint mix, and a bit of practice, you will be able to achieve very fine lines using any of the better airbrushes. A lot of my friends use Iwata brushes but they can be quite expensive.
Hope this is of some help.
Cheers,
Chris.
LikeLike
Pues, que comentar … .Muchas gracias por presentar su increíble trabajo , Sr. Chris Wauchop ,Olé !!! .
LikeLike