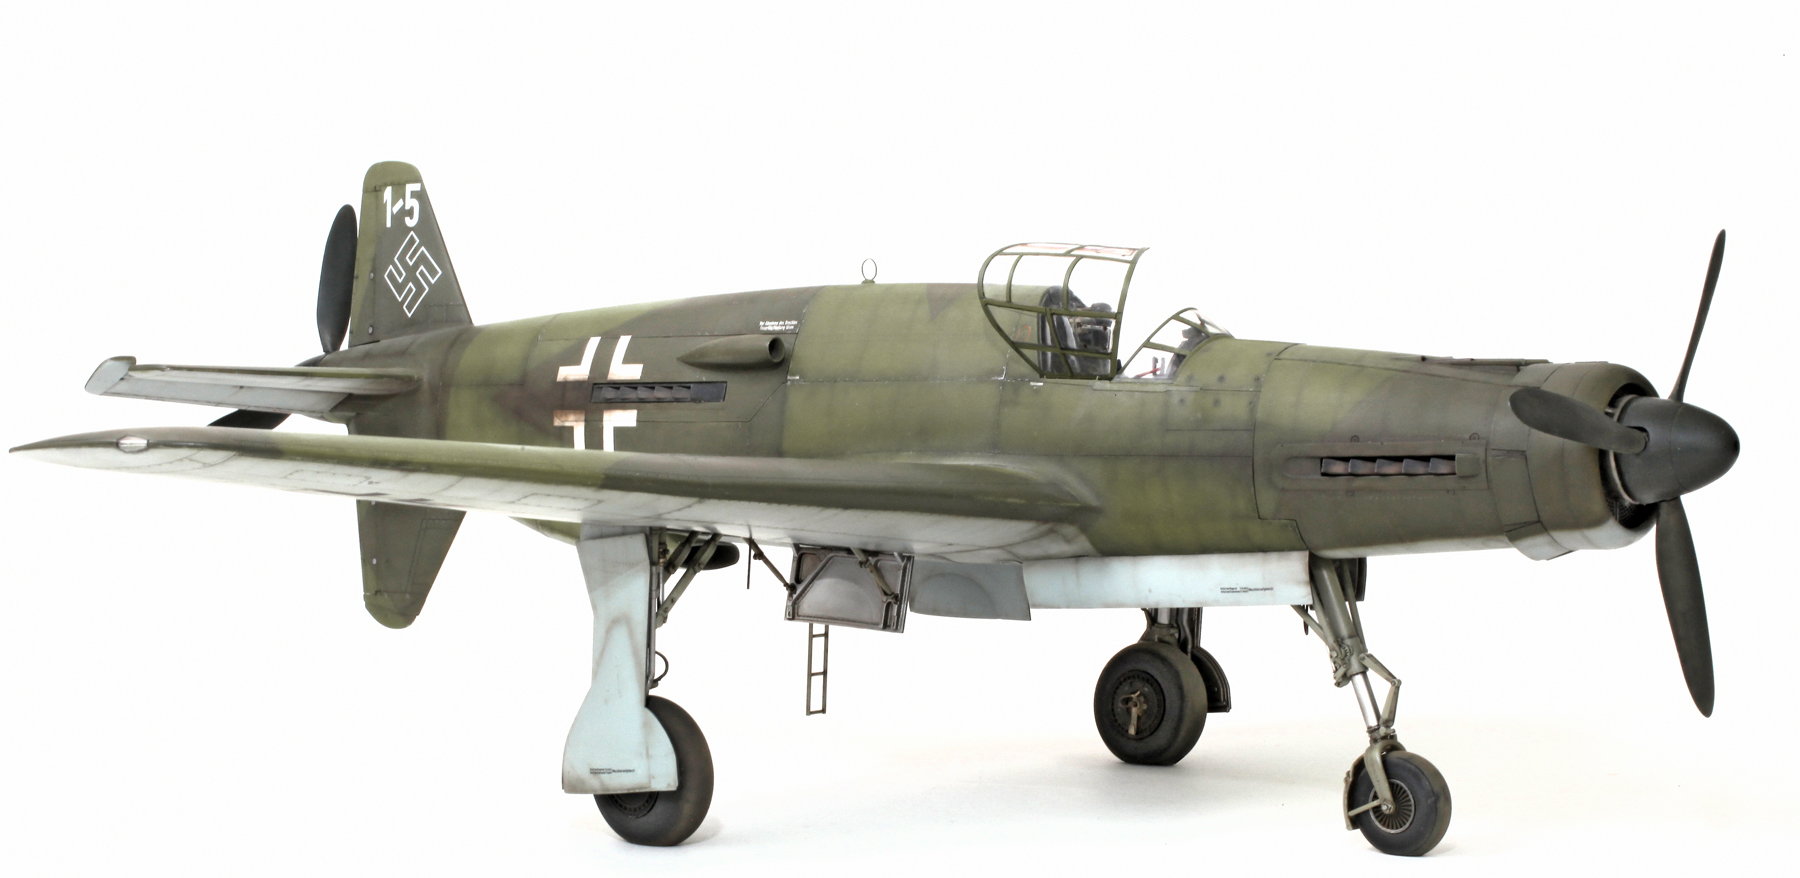
Zoukei-mura 1/32 Dornier Do 335 A-0 ‘Pfeil’

Do 335 A-1, W.Nr. 240167 Oberpfaffenhofen April 1945. (speculative)

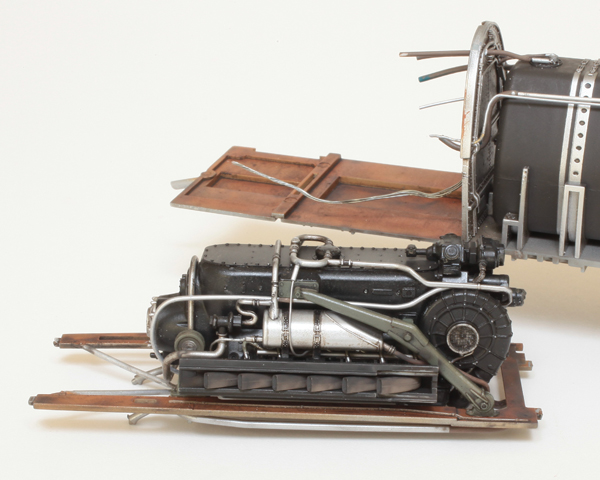
Even if it’s not the first step in the instructions, I usually like to start with the assembly of the engine or, in this case, the engines. This kit provides two very acceptable representations of the DB 603 A twelve-cylinder inverted-vee liquid cooled engine. Even though Zoukei-mura include the completely hidden internal cylinder detail they don’t provide much of the very visible external wiring. The internal cylinders were removed from the front engine before assembly and the resulting cavity was filled with as much lead shot as I could cram in there. Once assembled and painted gloss black with a wash of flat earth, I added the external wiring using fine solder and jewellers wire. Also a small disc was cut from some P/E mesh found in my spares drawer and glued over the supercharger intake.

Very busy under the front engine. This detail will be visible with the cowlings removed.
Rear engine ready for installation. Most of the lower wiring detail was not added because it was never going to be seen. There will be lots of plumbing though.

The ejection seat also received some extra details. These included a new parachute pack behind the headrest, new headrest and backrest padding, a beautiful set of HGW microtextile seat belts and, because I fixed the armrests in the upright position, some mounting detail was added under the armrest supports. The brass mounting clips for the shoulder harnesses were later painted black.

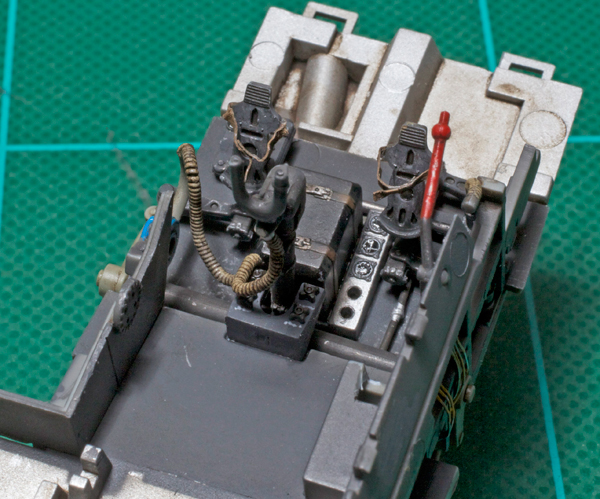
Side consoles with replacement throttle control levers made from Evergreen plastic strip.

Instrument panel in place with MDC instrument dial decals replacing those supplied in the kit. Instrument dial bezels have been painted individually.

Wiring was added to the back of each instrument. This feature will be visible when the model is complete.
Toe straps made from lead foil were added to the rudder pedals. A new oxygen hose was made to replace the short kit part by wrapping solder wire around a copper wire core.
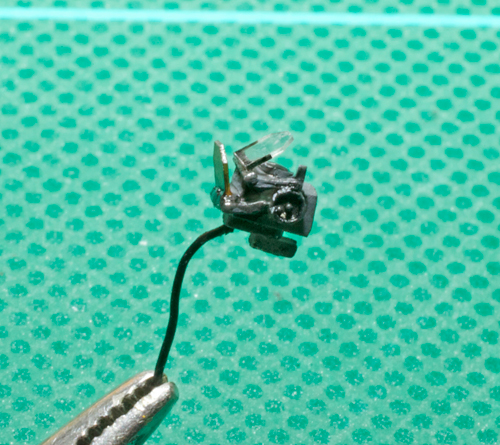
New reflector elements were cut from clear plastic sheet to replace the thick kit offering and a power cable made from solder wire was also added.

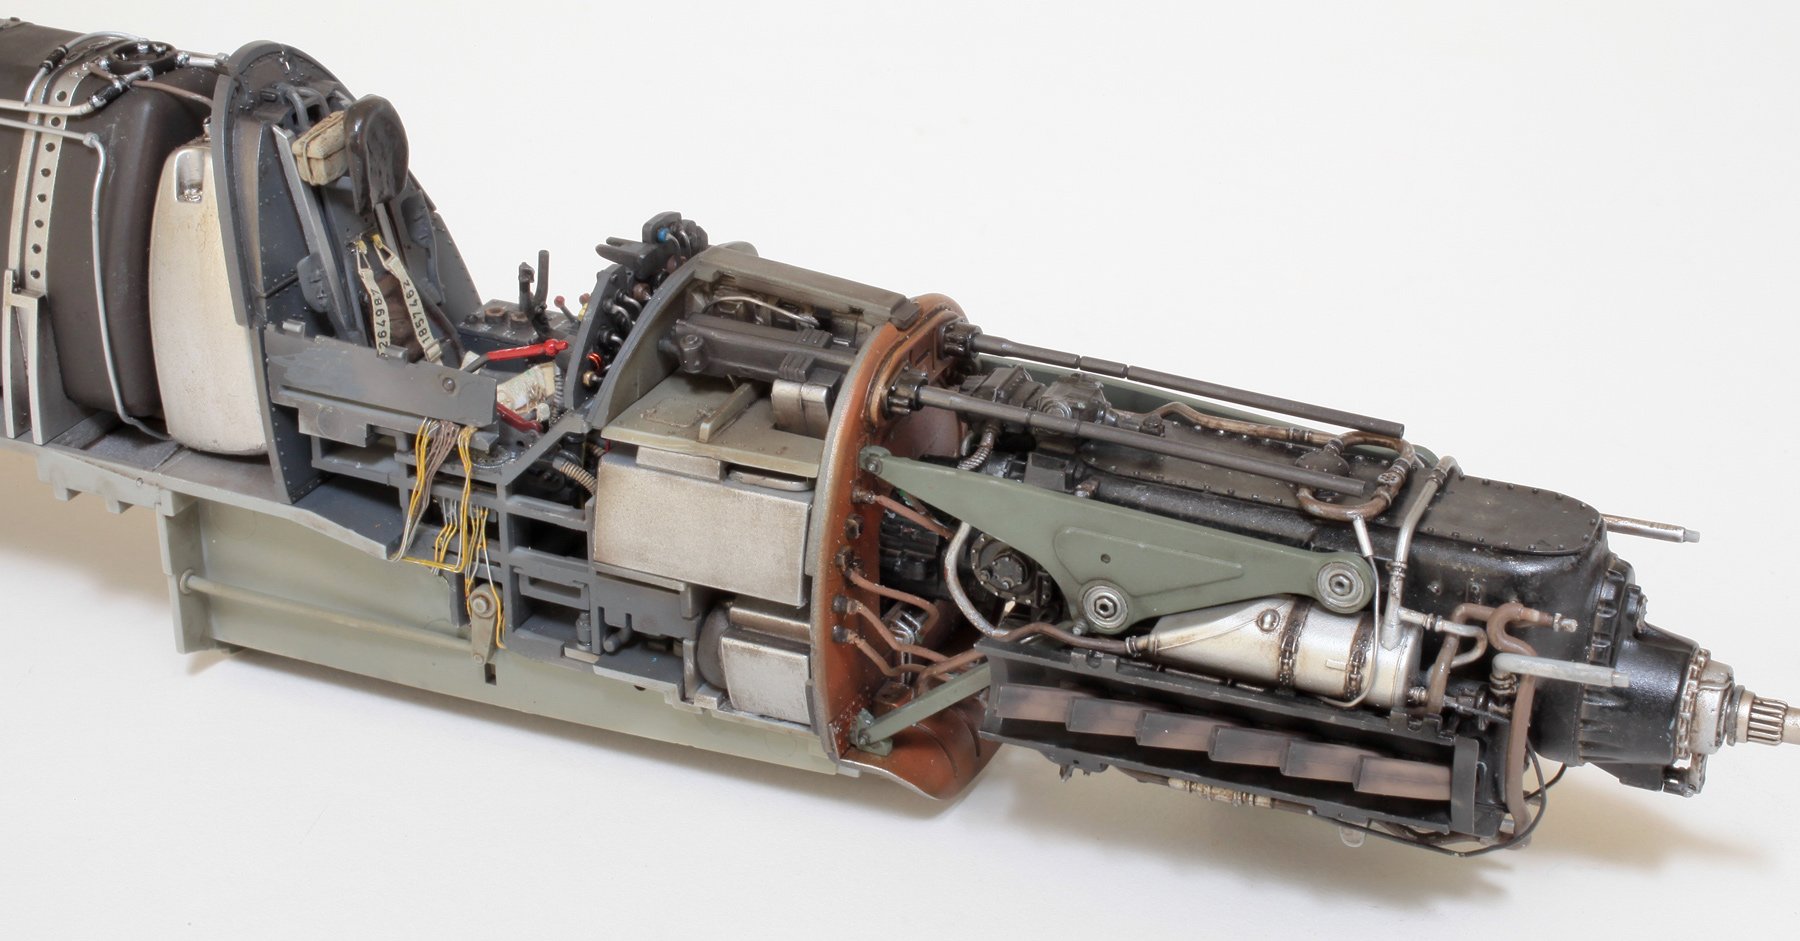
Front engine, main armament, cockpit, oil and main fuel tanks and rear engine firewall all assembled and waiting for rear engine to be installed.
This shot shows wiring added to the starboard cockpit console. Never to be seen again! The guns’ ammo boxes were also packed full of lead shot.

The rear engine firewall with some extra plumbing and wiring.

All its innards in place. To my astonishment everything fitted pretty much perfectly!

Although not accurate, the radiator detail is still very nice.

The back of the radiator showing the cooling flap actuator mechanism.

After closer examination I determined that the radiator flaps were completely inaccurate and so replaced them with scratch-built items made from .005″ Evergreen plastic card.

The main elements are now all together. At this point I am going to ask why on earth Zoukei-mura have insisted on moulding the majority of the parts of this kit in a very brittle, frosted semi-transparent plastic. They have also inexplicably moulded the wing mounted landing light cover and navigation light covers out of the same textured plastic!! I was able to polish the larger landing light cover to an acceptable state of clarity but the smaller nav light covers were impossible.
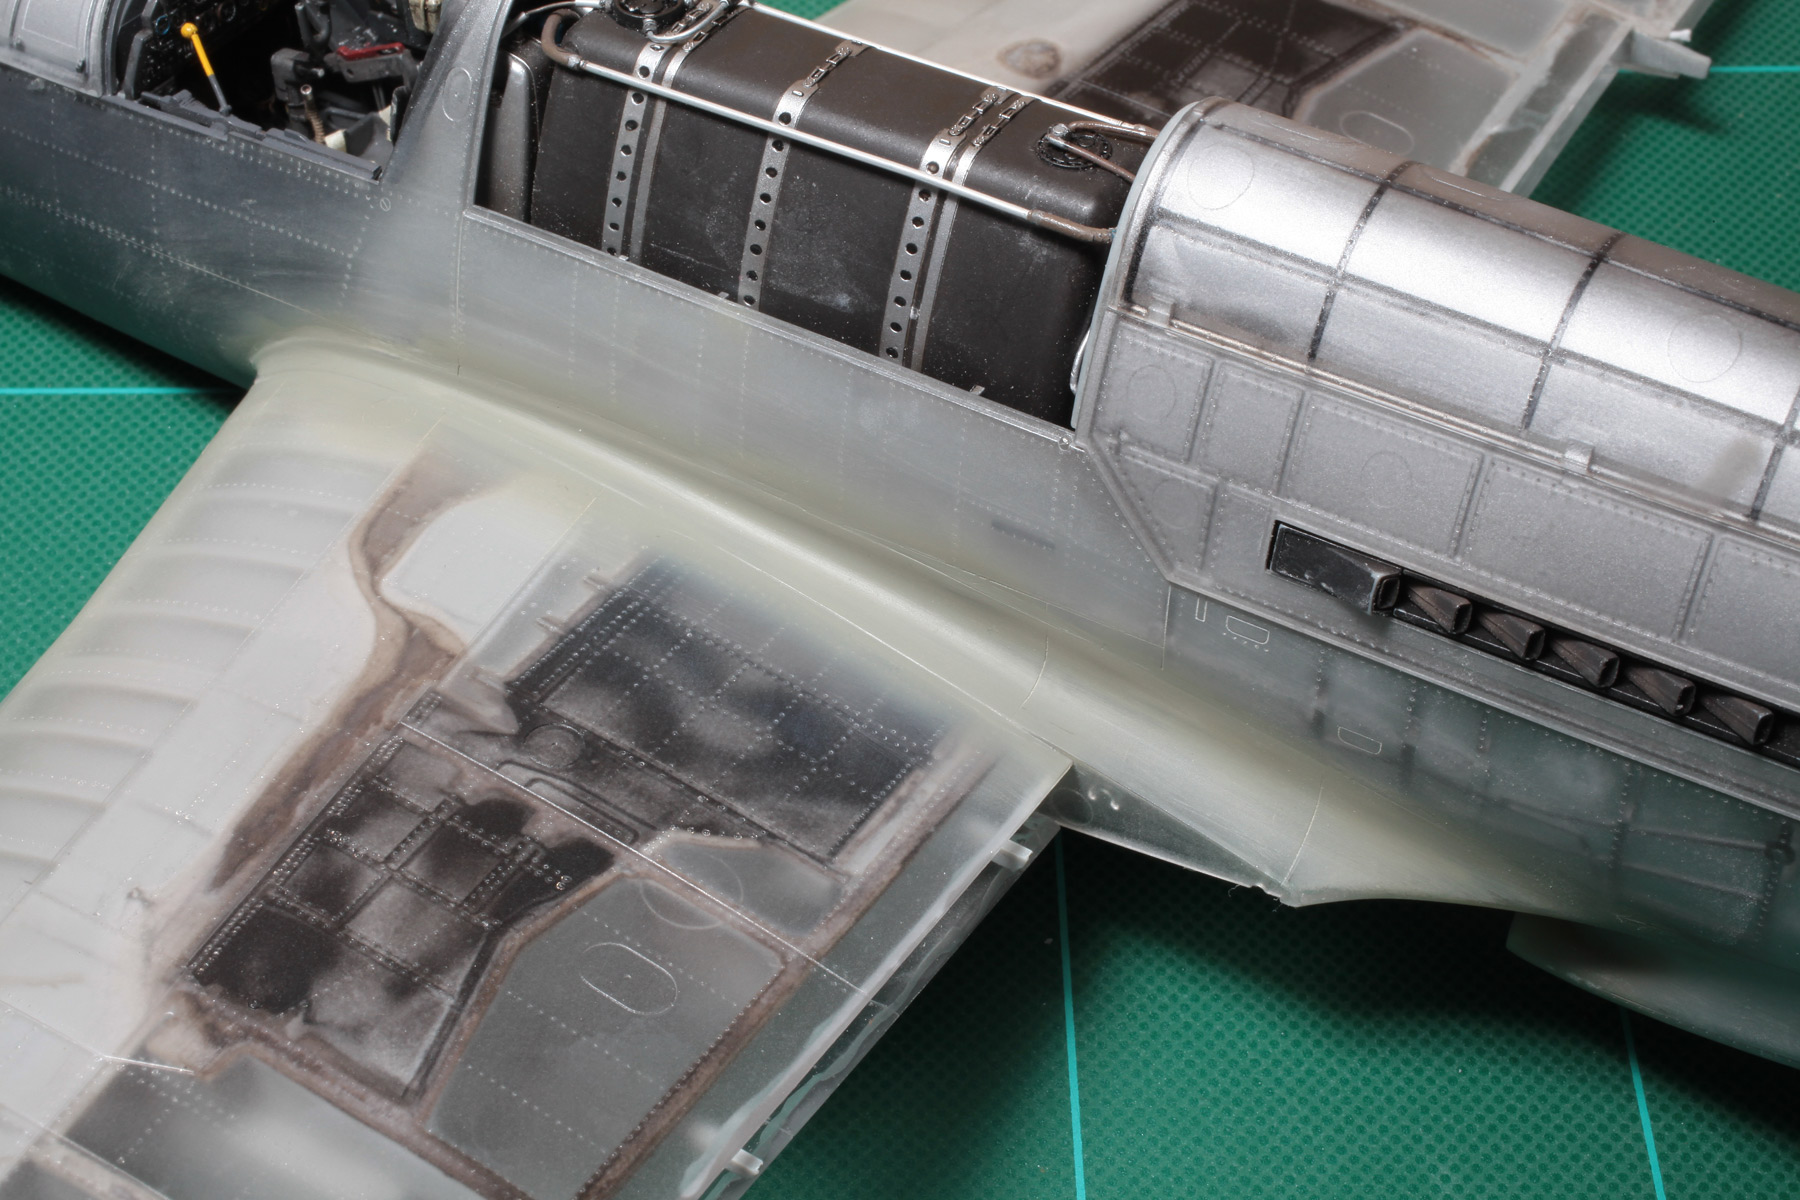
The hardness of this translucent plastic also made the task of applying rivet detail all the more tedious. Fortunately I was after a subtle effect but still had to press very hard to get any result at all. Also, this brittle plastic almost caused a huge disaster when, after applying an oil wash to the silver painted interior of the starboard bomb bay, this large part actually cracked and broke in two! I was initially horrified and dumbstruck, but after closer examination I determined that the break was fairly clean and with aid of Tamiya extra thin cement and lots of super glue I was able to affect a very clean repair. Because of the liberal application of the CA glue to the fuselage interior the bomb bay doors would have to be glued shut.
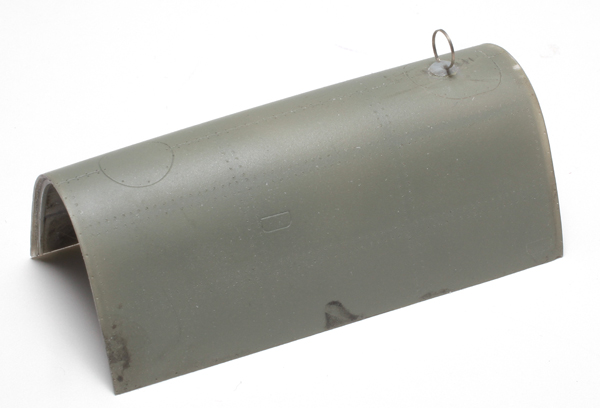
A new D/F loop was fashioned using a flat strip of spare P/E which was then attached to the base of the original kit part.

Lower engine detail with radiator and exhausts attached.

Complete fuselage and wings primed and ready for some camouflage.


In this shot the undersurfaces have already been painted RLM 76 and the first of the upper surface greens (RLM 82) has been applied.

RLM 81 Brown Violet was next.

Decals have been applied in this shot. The fuselage cross was carefully masked and sprayed to avoid the multiple cuts that would be necessary for the decal to fit over the removable engine covers.
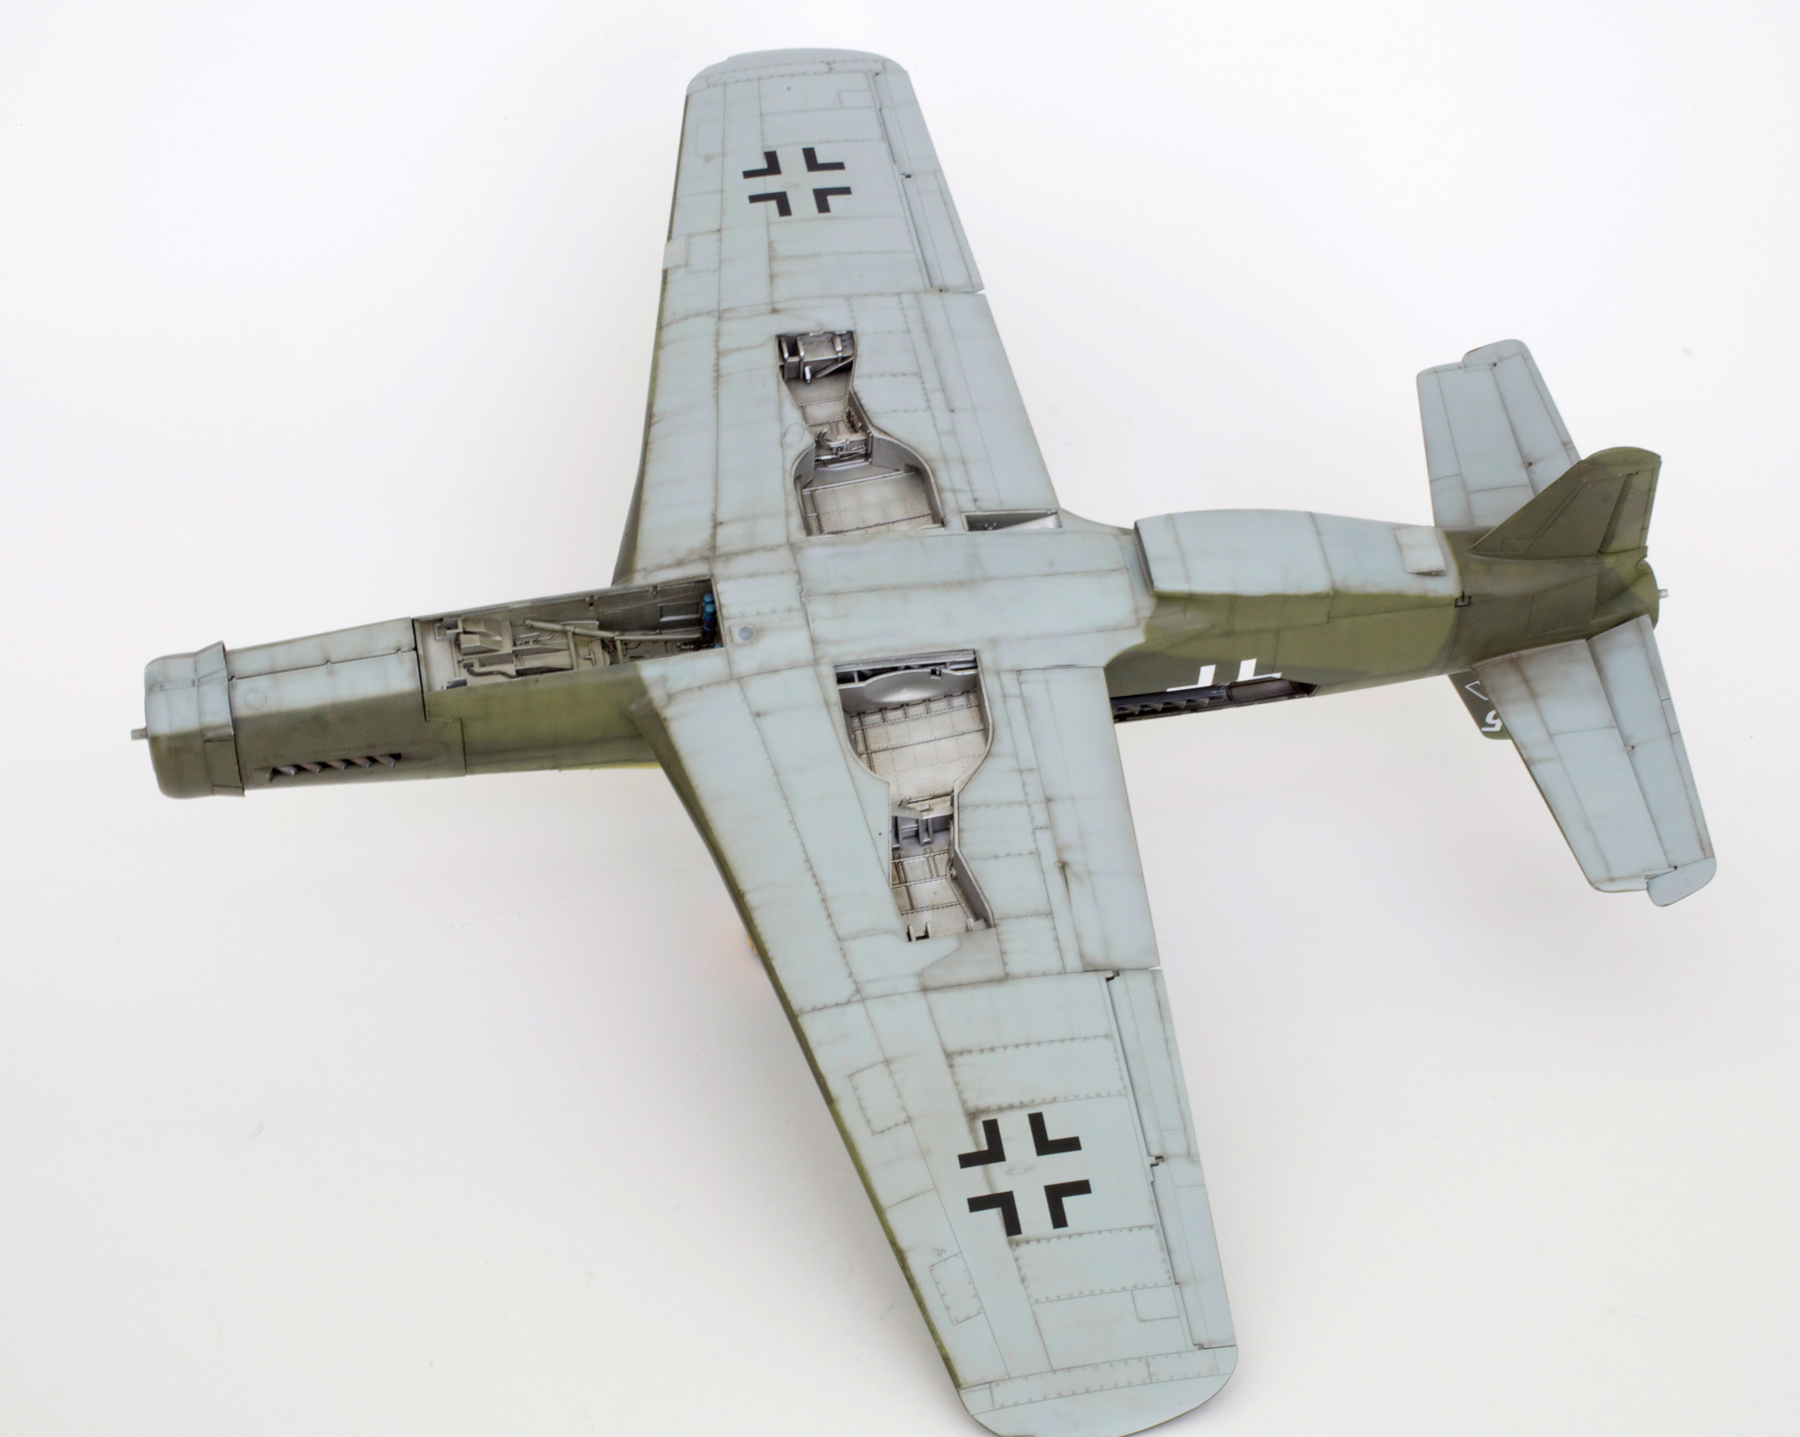
Undersurfaces have received moderate to heavy weathering.
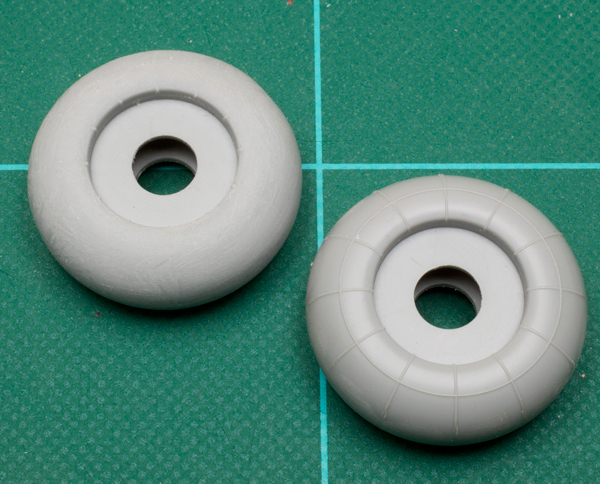
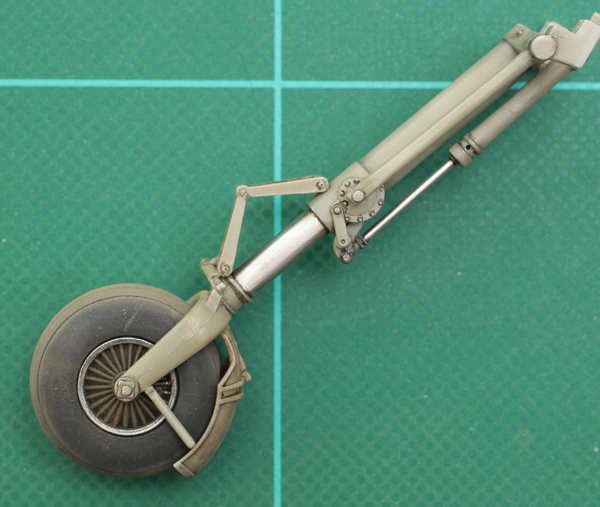
After careful examination of photographic evidence I determined that the tyre tread pattern was usually worn pretty well completely smooth, so the kit tyres were sanded until there was only the vaguest hint of tread left.

The flat moulded plastic catch hooks and air lines on the wheel hubs were replaced with scratch-built items and the tyres have been flat-spotted.

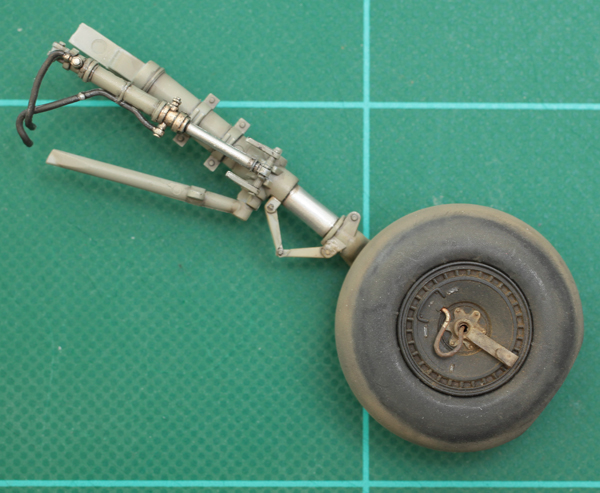
The undercarriage legs are nicely moulded but some extra detail does need to be added. This will take the form of brake lines on the main legs and hydraulic lines on the nose wheel leg.
Nose wheel attached.
Starboard wheel temporarily in place.

Main undercarriage legs firmly glued to their doors with brake lines in place.

The boarding ladder release handle was scratch-built using Evergreen plastic rod and card. The knob on the end was made by building up layers of white glue. The colour is purely speculative.
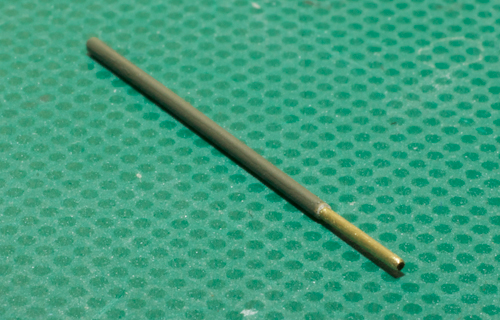
The kits’ clear plastic pitot tube snapped in half before I could get it off the sprue so I replaced it with a much more accurate item made using Albion Alloys slide fit brass tube.

The windscreen seems to have been moulded too flat which meant it was slightly wider than the cockpit rail. To pinch it in a bit, small holes were drilled into the bottom of the windscreen frame with corresponding holes drilled into the top of the cockpit wall. This little exercise was a pain but it did the trick.

The location holes for the windscreen can be seen here. After closer examination of reference photos, I removed the knobs on the ends of the red canopy release and yellow canopy locking levers.

Front engine cowlings removed.
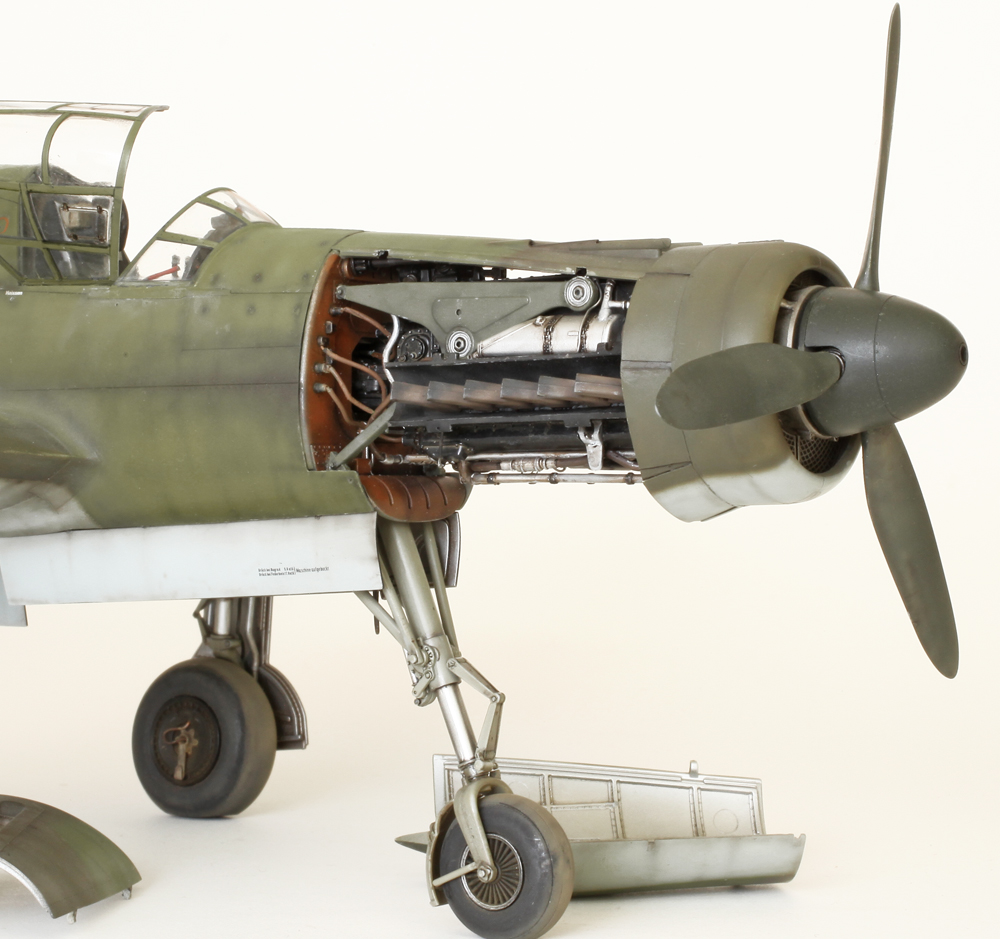
Front and rear engine cowls are all removable and when closed are held in place with small, strategically placed, blobs of Blu-Tack!

Rear DB 603, starboard.

Rear DB 603, port.

The markings and paint scheme are purely speculative on my part mainly because I wanted to do an example of a Do 335 A-1 but didn’t want to do one with any external bare metal panels because usually any bare metal panels were covered with manufacturer’s stencilling.

GALLERY


Chris, good to hear from you again! Excellent job, as usual! Could you please be so kind and tell how you painted the main undercarriage wheels? They look so convincing…
regards, tomasz
LikeLike
Hi Tomasz, sorry it’s been so long between posts, but this one has actually taken me nearly as long to finish as it has been since I finished the Zero! The wheel hubs are basically Tamiya X-18 Semi-gloss Black and the tyres were sprayed flat black with a touch of red-brown. The contact point of each tyre was then carefully sprayed with a very thin mix of Tamiya XF-57 Buff (no masking). When fully dry each wheel and tyre was liberally dusted with pastel chalk powder of the same buff colour.
Hope this explains it.
Cheers,
Chris.
LikeLike
Thanks Chris, seems clear to me. I guess it takes lots of practice to achieve such great results with this relatively simple technique… You definitely nailed it.
Regards, Tomasz
LikeLike
great work as usual Chris!
LikeLike
Congratulations Chirs, as usually you did an excellent job on detailing and painting/weathering the model!
LikeLike
Simply beautiful job, as always. Have you ever considered doing a book illustrating how you do your techniques?
LikeLike
Thanks Roger, and no, not a book but about twelve or thirteen years ago I had, what I thought was a great idea, to make a video showing my method of doing things but no one was interested in helping me to produce it so it never happened. I’m too old and tired to worry about it at the moment so this blog will have to do for now. If people keep asking I might get re-motivated enough to make it, and if I do I’ll post it here for sure, free for all to see.
Cheers,
Chris.
LikeLike
“Old and tired?”, buddy, I have been doing aircraft kits for the last forty (yes, forty) years and surfing the net for the last fifteen, looking for good aircraft kits to inspire me…and I have never seen nothing like yours.
You are playing in a different league than all of us. Your planes are, by far, the best kits I´ve seen.
LikeLiked by 1 person
Thanks for the kind words Fernando, but I don’t think that I’m in a different league it’s just that I have probably been doing this for a bit longer than most of you guys. Started building models in about 1965, so I hope that I’ve nearly got it right by now. Always room for improvement though.
Never stop learning.
Cheers,
Chris.
LikeLike
Hi Chris, good stuff here!
Is the orange firewall colour speculative or not?
And…what will your next project be?
Cheers
LikeLike
Hi Alex, no, not speculation. There is at least one colour photo of a Do335 fuselage, which was captured at OberPfaffenhofen, showing the rear engine firewall as being this orange/brown colour. There are also several b/w shots that show the front firewall being a shade that is, in my opinion, too dark to be RLM 02. So my educated guess is that they are also this brown colour. Me163s also used this colour on their firewalls.
Next project will be a commission job. A Tamiya 1/35 Panther D which will be a nice change from this monster.
All the best,
Chris.
LikeLike
Chris,
What color/paint did you use for the orange/brown? Trying to replicate in 1/72 scale.
Thank you.
Steve
LikeLike
Hi Steve, on the real aircraft the engine bulkheads were painted with Flieglack 7142 or 7130 which was a protective primer having this orange/brown colour. The paint I used to match this was a simple mix of Tamiya XF-3 Flat Yellow with a dash of XF-7 Flat Red. I can’t remember the exact proportions but I think it was around 90% yellow to 10% red. This mix looks very close to a colour photo I have, especially after it received some shading with my black/brown mix.
Hope this answers your question.
Cheers,
Chris.
LikeLike
Thank you sir for the recommendation and the explanation. Adds needed splash of color and draws the eye to the engine detailing. Inspirational work as usual.
LikeLike
Thanks! Very nice job!
2016-12-12 8:16 GMT+03:00 STATIC CAPITAL :
> Chris Wauchop posted: ” Do 335 A-1, W.Nr. 240167 Oberpfaffenhofen April > 1945. (speculative) Even if it’s not the first step in the instructions, I > usually like to start with the assembly of the engine or, in this case, the > engines. This kit provides two very acceptabl” >
LikeLike
Hi Chris, you are without my favourite modellers in the world and a huge inspiration to me. The realism you bring to your work is incredible. I’ve see you comment that you often apply a very thin mix of tamiya black mixed with tamiya red brown along panels, do you spray this finely with your airbrush or do you carefully use a brush?
LikeLike
Hi James, I carefully spray this very thin mix with the airbrush.
Always remember that subtly is the key to it looking right.
Cheers,
Chris.
LikeLike
Hi Chris, it looks fantastic mate, very nicely done Indeed ! The subtle weathering looks awesome.!!!
I’ve got the ZM kit in my stash so hopefully I’ll get to it at some stage…..Also have the Tamiya one filled with Aires goodies and ready for paint ; boy the Aires cockpit and Wheelbays really threw the fit out of wack though 😉
All the best to you and your family for Christmas and the New Year.
Cheers,
Peter
p.s, Here’s a WIP of my 1:48 Tamiya Tomcat on LSM if you’d like to take a look…….
http://forum.largescalemodeller.com/topic/4911-148-tamiya-f-14a-tomcat/
LikeLike
Hi Pete, I’m very happy with the way it turned out, but it did take me nearly six months of cursing and hard liquor to get it like that! Really look forward to seeing your Tamiya one finished. That Tomcat really looks like a beautiful kit. Can’t wait to see it finished as well.
You guys have a great Christmas and New Year too. We’ll just have to sweat it out down hear I guess.
All the best,
Chris.
LikeLike
Chris- whenever I’m in a rut, all I need to do is look at your beautiful work! In my years of building, you’re the best I’ve seen.
LikeLike
Thanks Steve, I’m very pleased to get you out of that rut.
LikeLike
I was wondering if you would like to share with us (www.modelersite.com) this one. We pay our contributors. Please contact my email, thanks!
LikeLike
QUE BELLEZA
LikeLike
Gracias Fabian.
LikeLike
A quick one, I build the HKM, and have 2 ZM Do335’s in my stash. The HKM Do335 had a led weight in the front engine. How did you solve that on the ZM version? I’ve got about 12 ZM 1/32 kits in my stash, but only build one TA152 (used yours for inspiration)
LikeLike
Tony, I filled every space in front of the cockpit with lead shot including the engine and ammunition boxes but not the nose wheel well. When the kit was finished I still had to fill the prop spinner before it would sit properly! I’m not sure what the actual weight of lead was, I just kept adding until it was enough.
Sorry I can’t be more precise.
Cheers,
Chris.
LikeLike
Hi Chris,
A quick question (with maybe not so quick answer): what were the different painting steps (paint used, application method) to achieve such realistic looking tires? I have the two-seater waiting to be built and will use your article as benchmark. I’d be happy if it turns out only half as good as yours. I particularly like that you don’t exaggerate the panel lines. It looks much more realistic than if the panel lines are too prominent.
I am working on a new book that is dedicated to photos and stories of the captured Do 335. It will contain many previously unpublished photos of captured Do 335 incl. a new color shot taken in summer 1945, which will provide very useful information about the colors used for the camouflage.
Cheers,
Roger
http://www.vintageeagle.com
LikeLike
Hi Roger, the tyres are first sprayed with a 50/50 mix of Tamiya XF-1 Flat Black and XF-64 Red Brown. The contact point of each tyre were then carefully freehand sprayed with a thin mix of Tamiya XF-67 Buff. Once dry the whole wheel and tyre assembly was liberally dusted with pastel chalk dust of the same colour.
Hope this explains it .
Cheers,
Chris.
LikeLike
Hi Chris, thank you very much for taking the time to reply and explain how you achieved this realistic looking finish. I’ll try and see if I can recreate this finish. But I assume the last “ingredient” of your excellent finish is a lot of experience and talent that cannot so easily be copied. Cheers, Roger
LikeLike
Hi Chris,
In a word.. spectacular.. What a huge amount of work and it is beautiful.. Question.. Did you find any evidence
of a torsional damper on the aft engine/ shaft or outboard prop bearing ? I was just wondering how Dornier delt
with torsional resonance in the shaft drive for the rear prop.
LikeLike
Hi Al,
Really glad you like the model but my research concentrated mainly on the cosmetic appearance of the subject and not the actual mechanical details. This is the way I approach most, if not all, of the models I build so I’m sorry I can’t answer your question.
Cheers,
Chris.
LikeLike
Hi Chris- Nice job. I just purchased this kit and am looking forward to building it. I recently completed Z-M’s Ho-229 and they used the same brittle frosted plastic. I have spoken to them about this because I think there is no real advantage to using this material over standard styrene. I think it detracts from an otherwise beautiful kit.
LikeLike
Hi George,
Couldn’t agree more with you about the use of this translucent (not transparent) material! It is absolutely a disadvantage rather than any form of advantage or enhancement to the model. I did state in an article about this kit that I would not be building any more of these grossly over engineered and expensive kits.
That feels better. Thanks George.
All the best,
Chris.
LikeLike
Hi Chris .. a fantastic model, I’m happy when I see super well painted models. That is a very good inspiration for me. I thank you for this. I live approx. 50 km from the production facility at Lake Constance and the airport in Mengen. Therefore, the Do 335 is a special model for me.
Greetings Kay
LikeLike
Great post thankks
LikeLike
Que extraordinario trabajo!
LikeLike