Bronco 1/35 Rheinmetall-Borsig ‘Rheintochter’ R-1

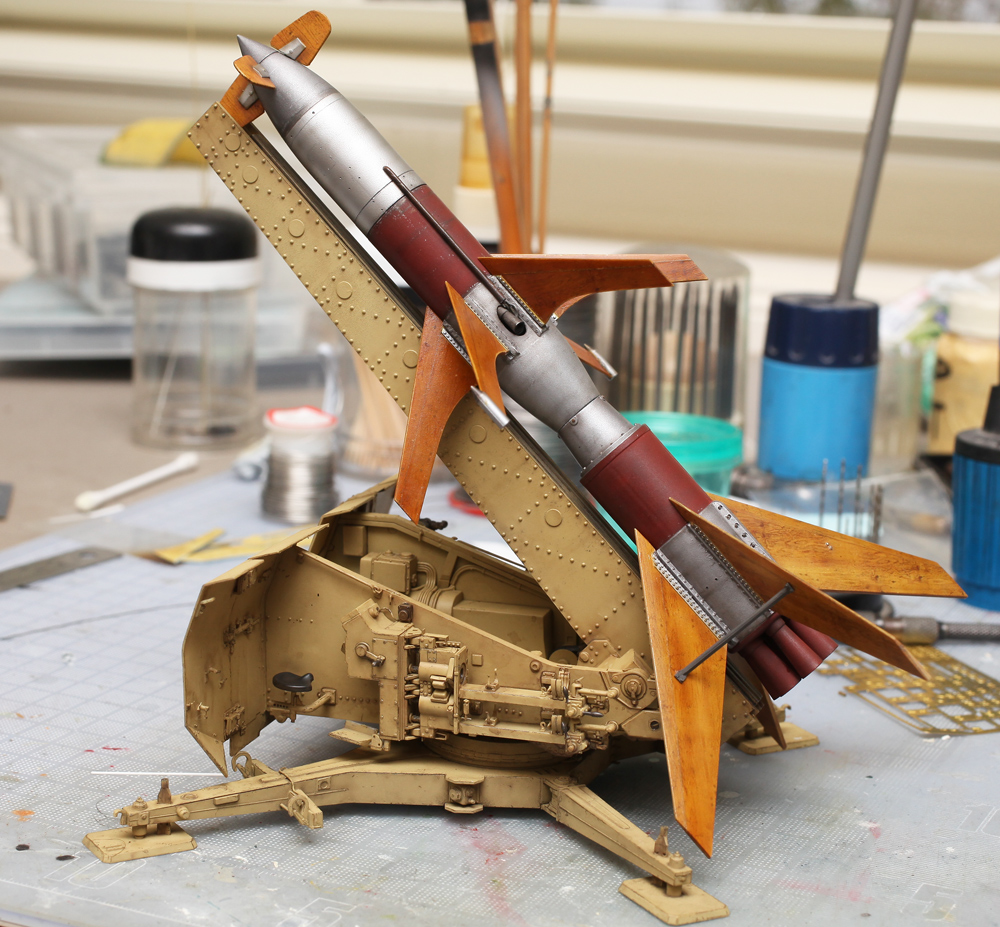
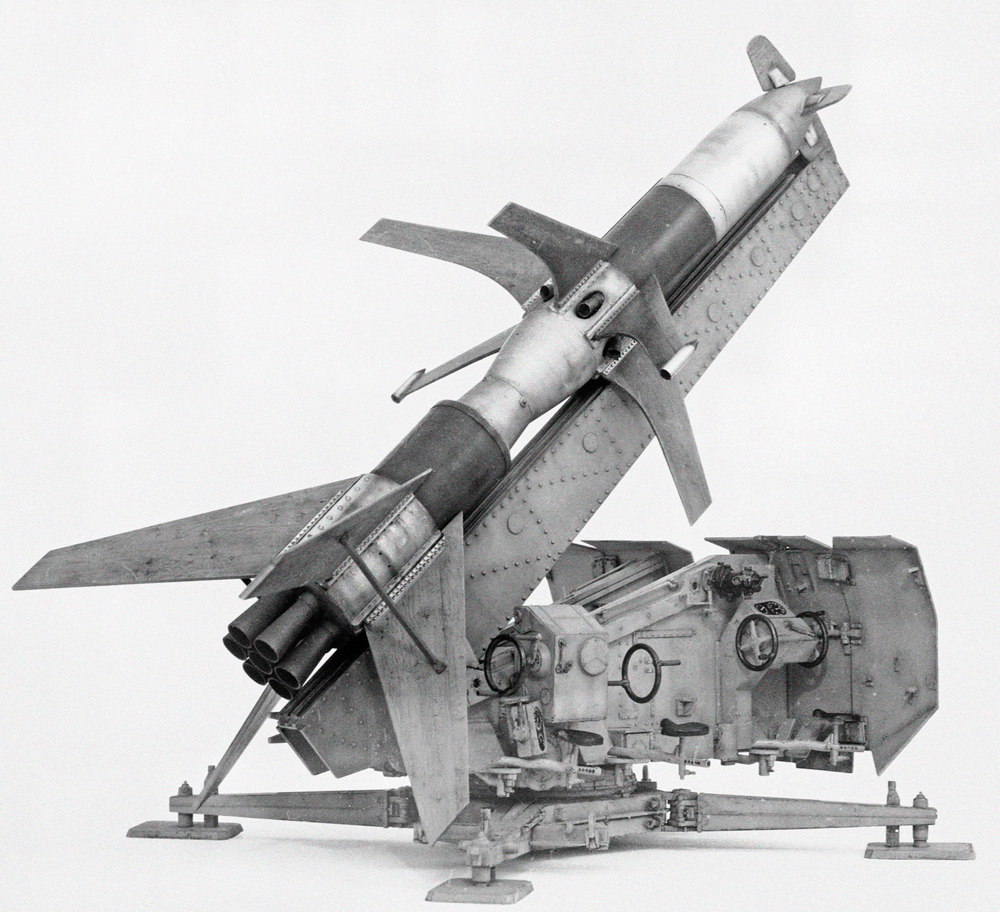
In 1942 the Luftwaffe asked Rheinmetall-Borsig to develop an anti-aircraft missile and the Rheintochter 1 was the result. It was a subsonic, two-stage, solid-fuelled, radio controlled rocket that was ground-launched from a rail attached to a converted 88mm Flak 41 gun mount. The four smaller fins at the tip of the nose were radio controlled and used to guide the missile towards its target. When close enough to the target its 150kg warhead was detonated by the Kranich acoustic proximity fuse which was housed in the control compartment in its nose.

All the stabilising and control fins on the Rheintochter were made of a highly compressed laminated wood called Lignofol. To reproduce the look of this material I was eager to use Ushi van der Rosten’s Wood Grain Decal. To achieve the look I was after I first gave the fins a coat of Gunze Sangyo H318 Radome and then applied some colour variation by carefully spraying Tamiya XF-59 Desert Yellow in controlled but random looking patterns. Next I masked and sprayed the bolted mounting brackets at the base of each fin silver.
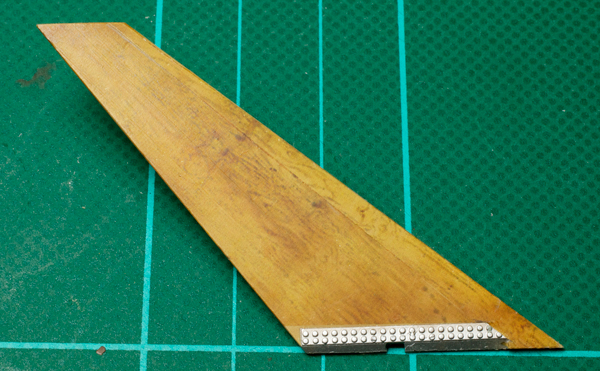
The decal was then cut to fit the shape of the fin as closely as possible. Note also that great care was taken to make sure that the line of the woodgrain pattern on the decal followed the shape and angle of the fin. In reality the fins were made from two pieces of ply, with the shaped leading edge being a separate piece added to the main fin. I tried to achieve this look by applying the decal in two separate pieces that were cut from different areas of the decal sheet.
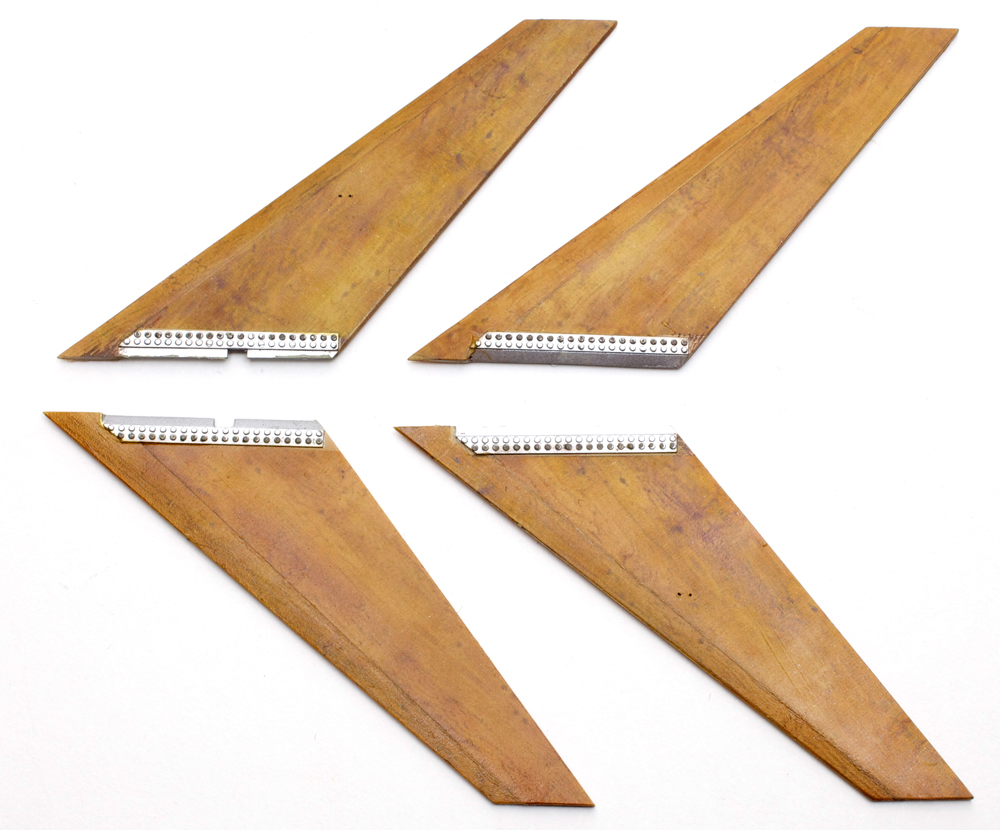
The four large first-stage stabiliser fins complete. The six smaller second stage fins received the same treatment but once the decal was completely dry they were given a very thin coat of clear orange. This gave them a noticeably darker appearance which corresponded pretty well with my reference.

The painted and decaled guide fins waiting to be attached to the rocket’s nose.

Rather than the large, flat wooden fin braces that were attached to the outer tips of the four rear stabiliser fins, I chose the option of the much more discrete angled metal ones that were bolted to the inner surfaces of the two outer fins. The flat P/E items supplied in the kit were discarded and replaced with more accurate ones made from Evergreen plastic strip and rod.
The holes for the six rocket exhausts were moulded closed so I drilled and cut them open for a more accurate result.

The exhaust nozzles were then very carefully glued in place with the aid of lots of liquid glue. Also in this shot you can see that I have hollowed out the end of the wiring conduit and added two or three lengths of wire and fed them through the exhaust opening as per my reference pics.

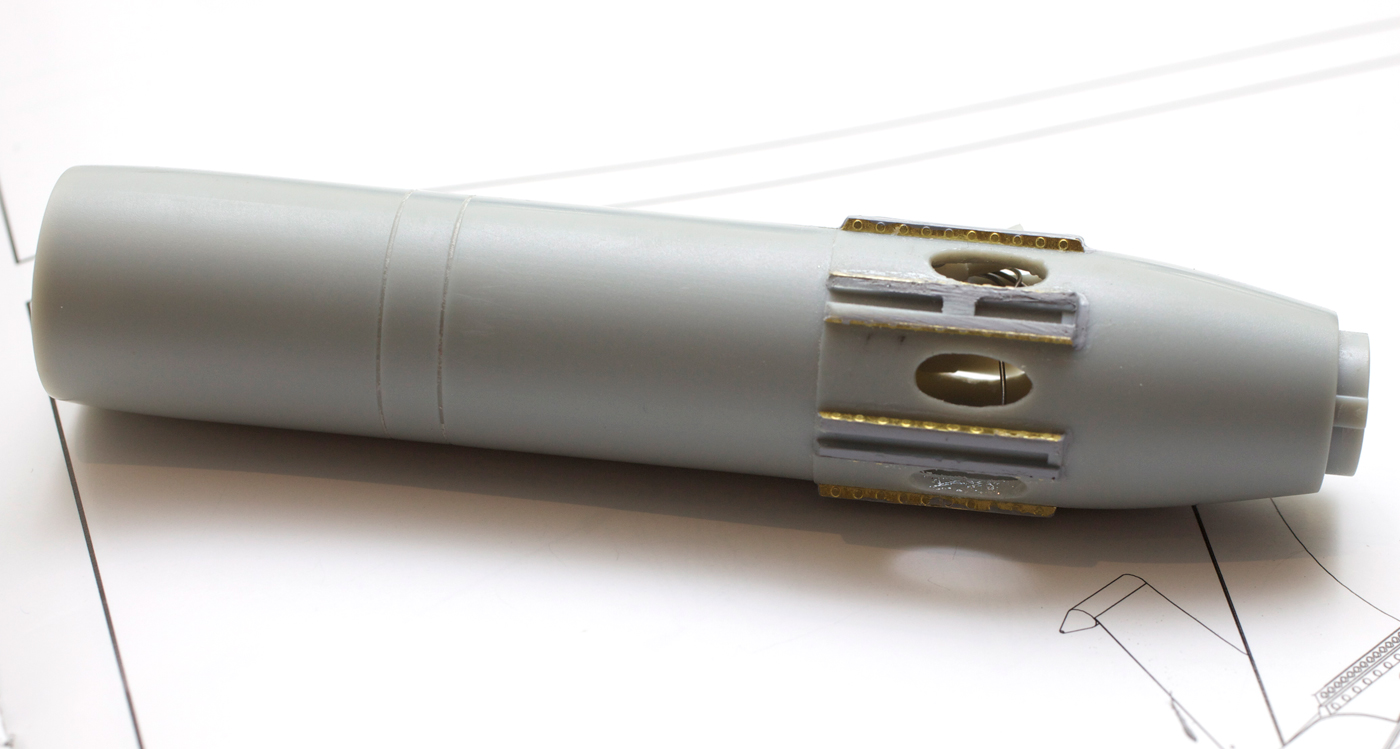
I decided not to use the kit supplied P/E bolt panels for the first stage fin mounts as the bolt heads seemed a bit too flat. So the P/E strips of bolt heads were replaced by drilling holes along each side of the plastic mounting brackets and glueing into each hole a short length of Evergreen .020 plastic rod. When the glue was well and truly dry the plastic bolt heads were filed to an even, but slightly more prominent length.

Once all the fin brackets were finished I noticed that the very heavy, bolted seam joint on the fin sleeve had been omitted by the manufacturer! I added this rather prominent detail using plastic strip, rod and Milliput.

Painting and weathering is almost complete. The dark red colour of the fuel cells and the first stage exhaust nozzles represents red primer because in reality these parts were made of sheet steel. This colour is a mix of Tamiya XF-7 Flat Red and XF-64 Red Brown. The rest of the missile was masked and sprayed various shades of silver and metallic grey from the wonderful range of Alclad II lacquers. Note also in this and the next shot the various screw holes, panel lines and other holes that have been added after careful study of reference photos. Some were added after painting was complete as new reference pics were discovered.
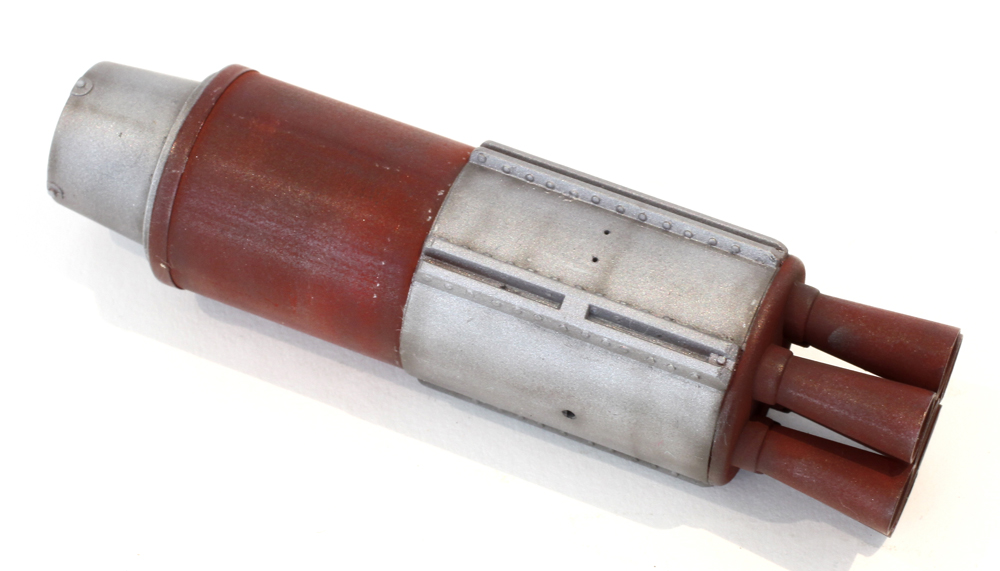
All shading and weathering was applied using the airbrush and a very thin mix of black/brown. The dark red areas ended up receiving a lot more shading than is seen here.

The plastic handles and shafts of the gun mount’s control wheels were replaced with brass wire and tube.

The Flak 41 gun mount construction complete. Note the brass pin protruding from the launch rail. This pin fits into a corresponding hole that has been drilled into the rocket and holds it securely in position.

A few minor alterations were made before painting was commenced.
Looking very bright in this shot before the dark red was made considerably darker.
GALLERY


Hi Chris, good to hear you’re back! Rather unusual subject, right? And again, perfect execution. Very nice 🙂
Cheers, Tomasz
LikeLike
Nice job Chris even if it a little off beat from your normal subjects!
LikeLike
Another amazing build!
LikeLike
Hello Chris. Very nice! I particularly like the wood grain effect and colour. So convincing thats its difficult to figure out the models actual dimensions from your photos, if that makes sense. Detailed commentary is great as always, lots of bits and pieces for me to take on board.. Thanks.
LikeLike
As always,a fantastic job Chris! You always manage to get the weathering to that sweet spot where it´s just enough to be convincing and not too much. Sublime, just sublime! Very inspirational!
LikeLike
Hi Chris, it looks great mate, I love the wood effects, very realistic.
Hey Chris, is there any chance you might post some more pics of your 1:32 Meng Me 163 that was published in MIM a while back. I would really love to see any extra pics that you may have.
All the best,
cheers,
Pete.
LikeLike
Beautiful Job Chris! I only recently just saw this kit listed on Luckymodel’s website and had never heard of it before. You have really created a masterpiece again with this rendition.
LikeLike
Hi Chris, I’m a big fan of your work, and your R-2 is no exception !
I had a more old-school approach to the Rheintochter (I need to move out of my comfort zone and get to weathering, I know … maybe next time 🙂 )
All the best
Patrick
LikeLike