Special Hobby 1/32 Hawker Tempest Mk.V

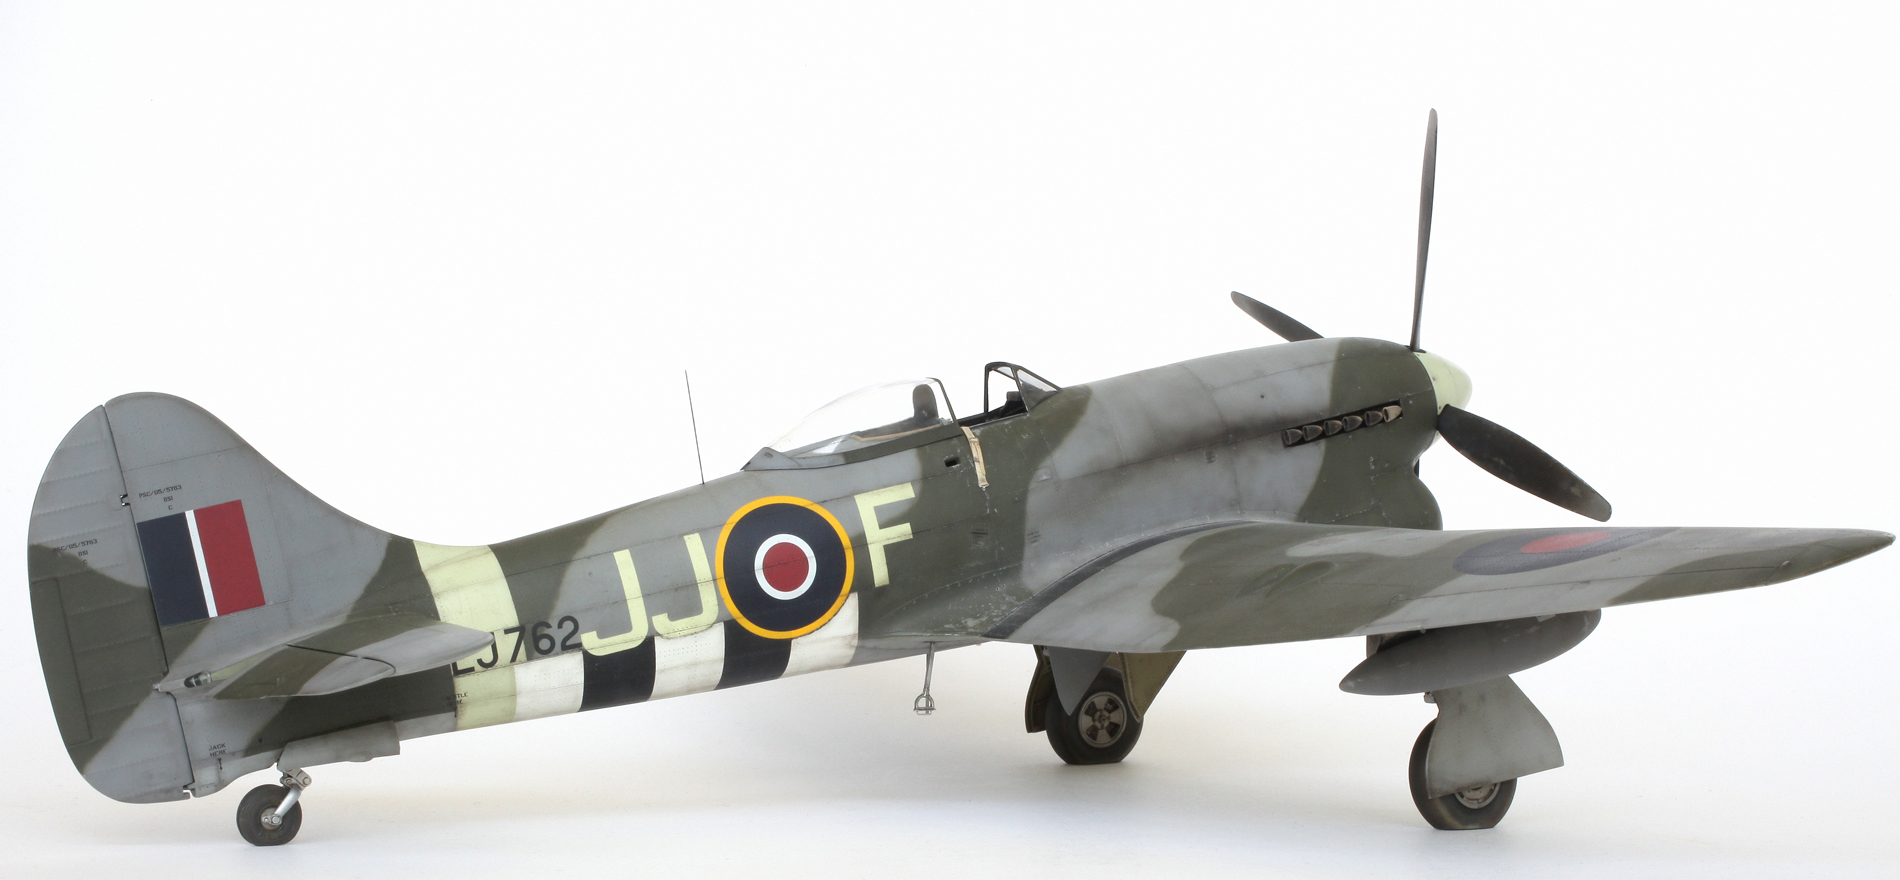
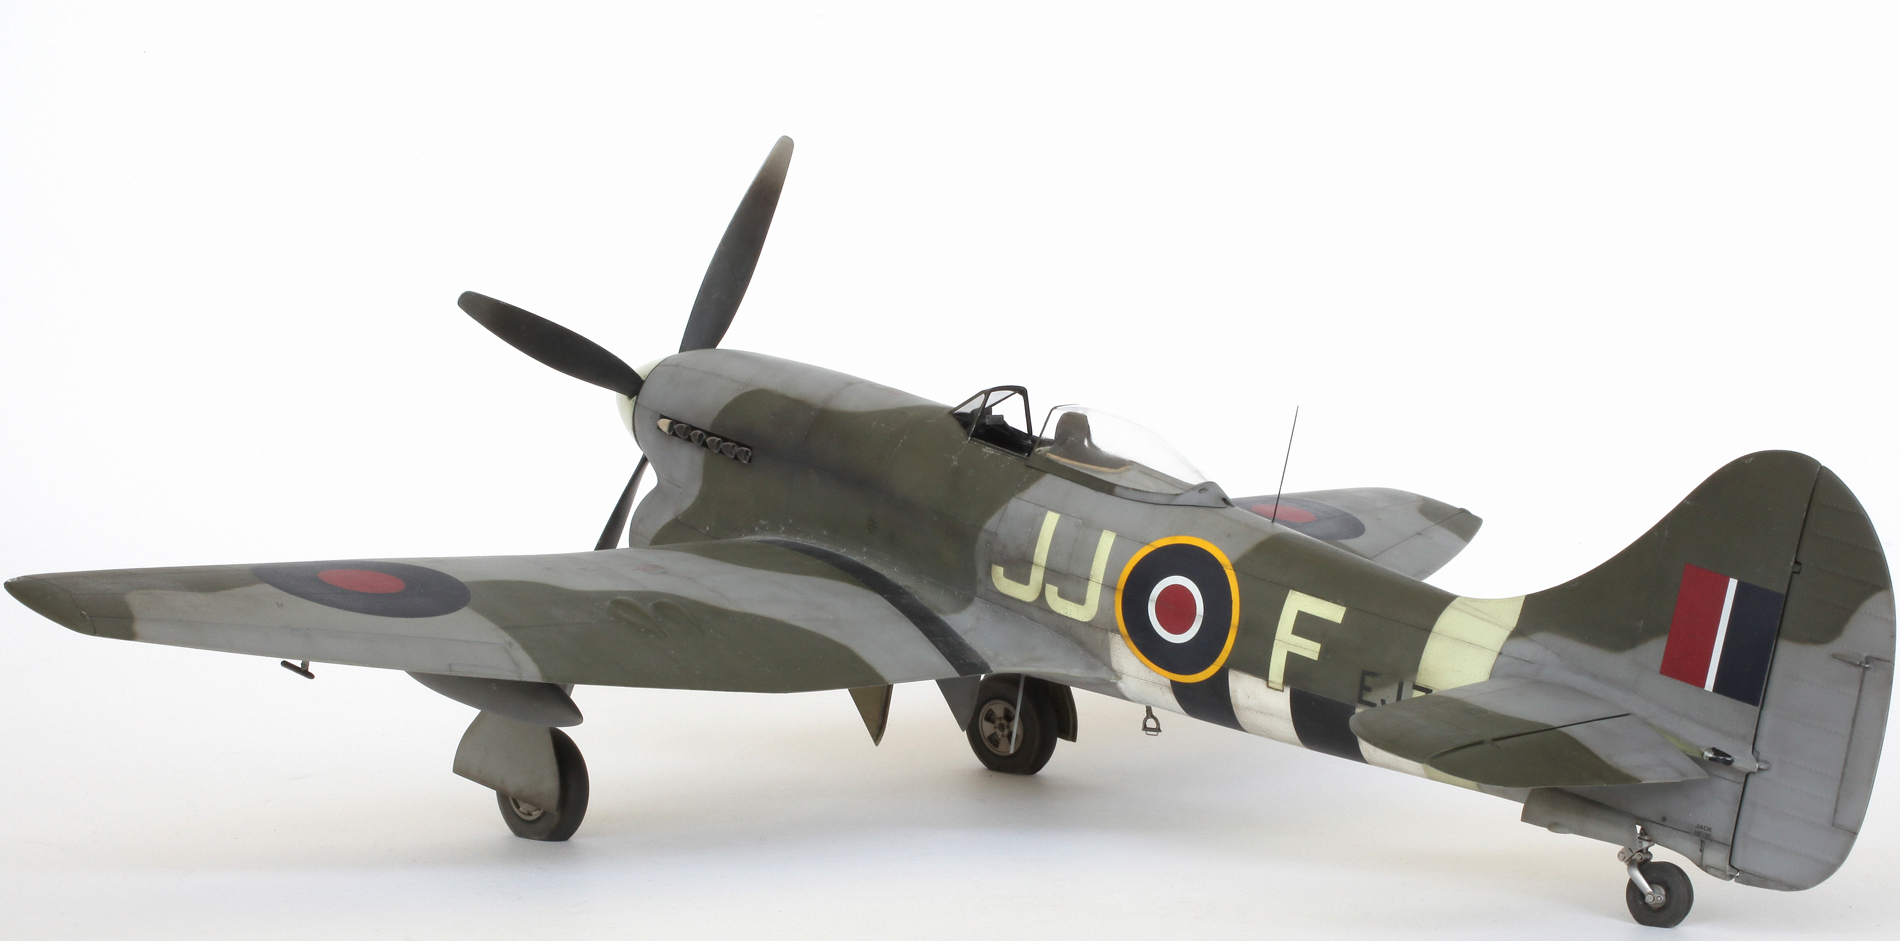
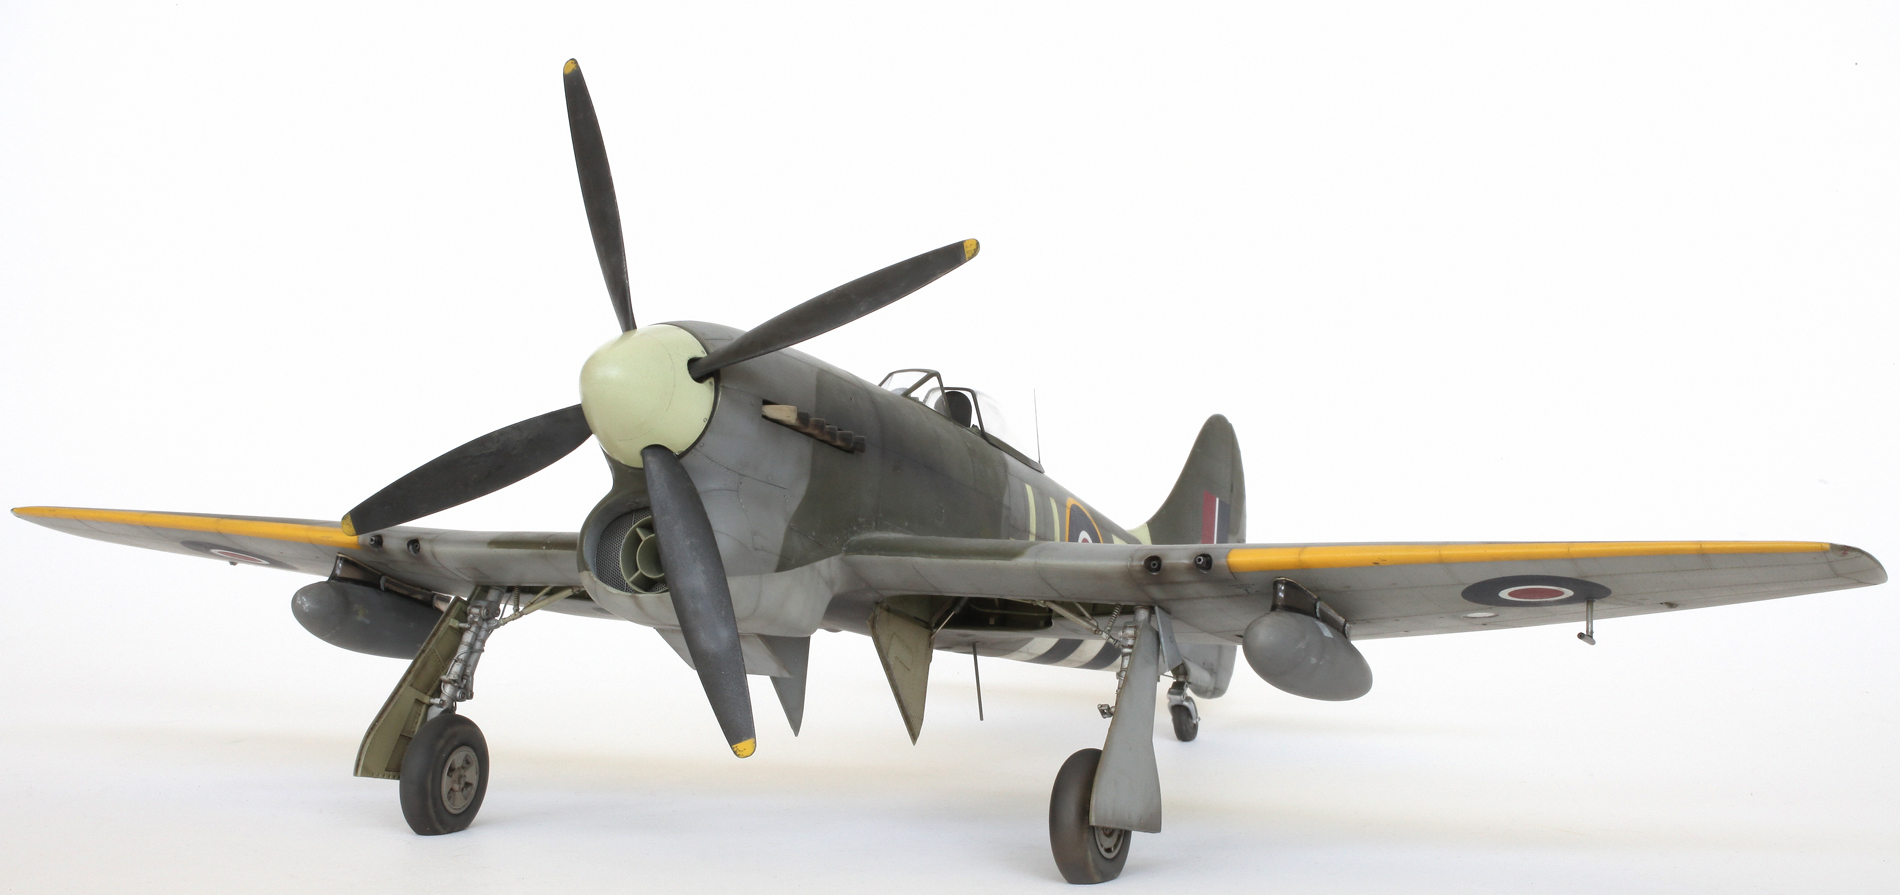
Hawker Tempest Mk.V EJ762/JJ-F of 274 Squadron, piloted by Flt. Lt. D. C. Fairbanks, DFC and Two Bars with 12.5 victories, while flying out of Volkel in Holland, October 1944.

Cockpit parts with some wiring and other detail added prior to painting. Front and rear engine radiators are also included in this shot.

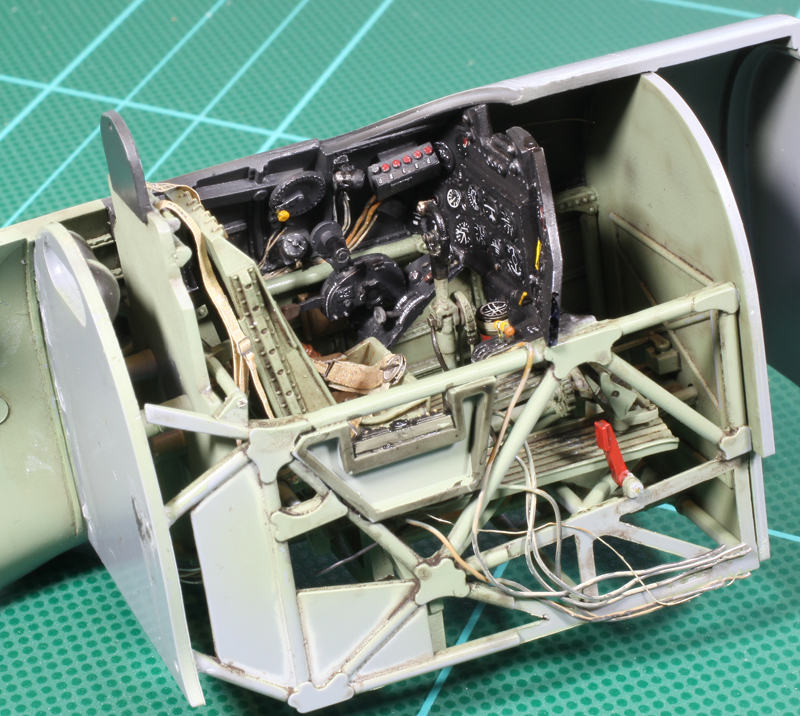
Port cockpit sidewall with a little extra detail and a lot of wiring added.

Painted and weathered.
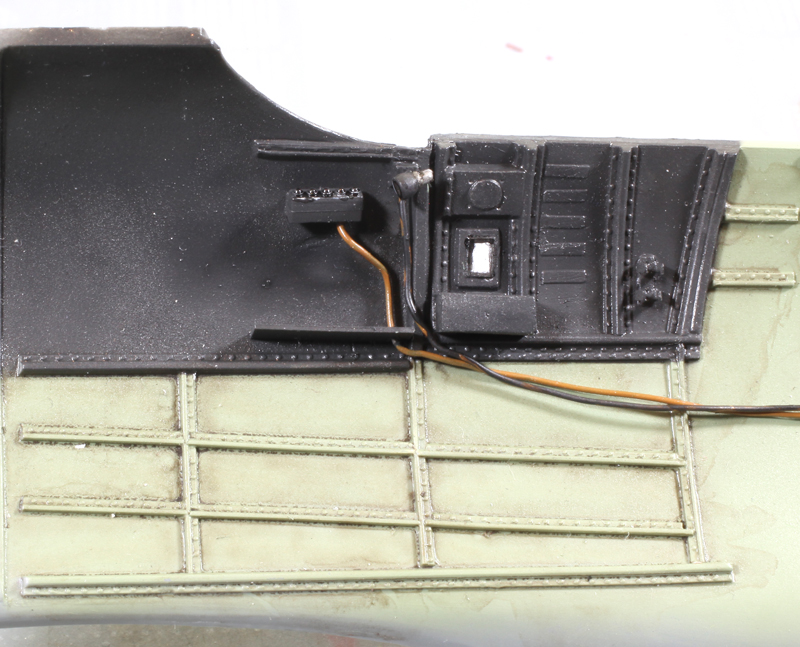
Starboard cockpit sidewall painted with not so much added detail.

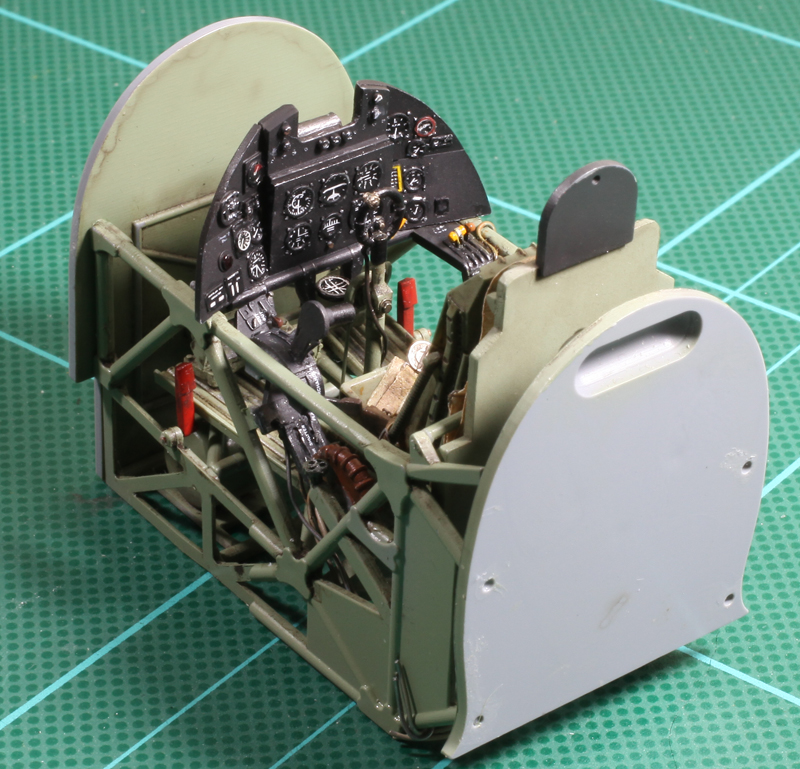
Instrument panel with kit decal dials which have been cut out and added individually.

Seat painted and weathered with the kit-supplied HGW harnesses. The armoured headrest is much too thick and was later replaced with a more accurate, thinner and taller scratch built item.

Cockpit elements complete and waiting for assembly.
Assembled and waiting to be installed.
Installed. To my surprise and relief, the fit was very good.
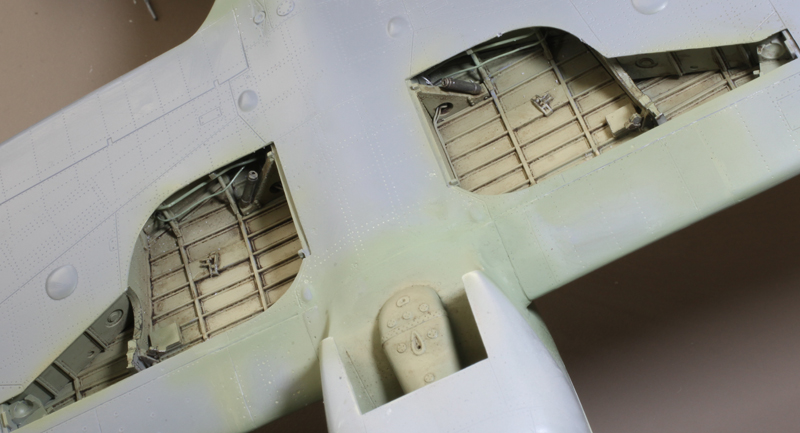
A little bit of extra plumbing was added to the wheel wells. There should be a lot more but I did not have enough reference of this feature to do an accurate job.
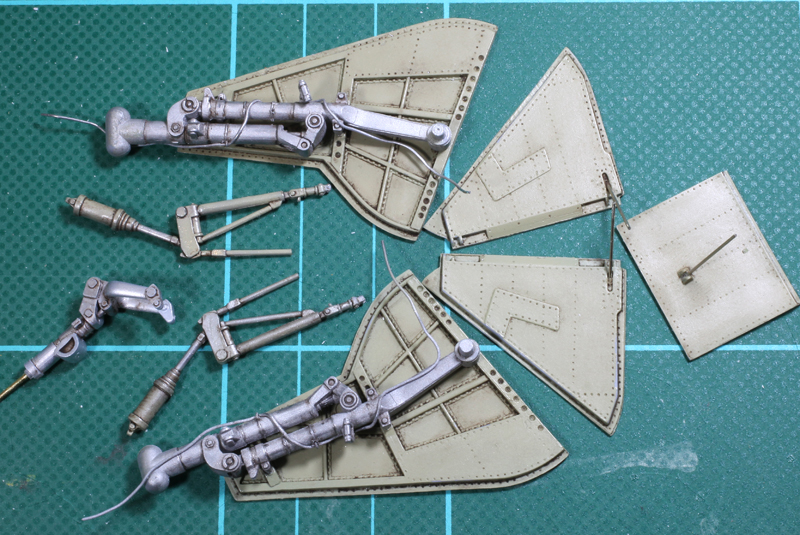
Undercarriage parts and radiator flap painted, weathered and detailed. There are quite a few more parts for the main gear that are not included in this shot but can be seen in later shots of the completed model. These, along with any other dangly bits, will all be installed when the model has been completed.

Upper surface camouflage has begun. If you look closely you can just see the very light pencil line indicating the colour demarcation and the letter ‘G’ for green in the appropriate areas.

Basic painting complete. Next step is weathering.

With me weathering always starts on the undersurfaces. As seen previously, the undercarriage doors and radiator flap were painted and weathered separately.

Upper surface weathering comprises exhaust staining, panel line shading, paint chipping and very subtle shading along the edges of any hard edge painted lines.This includes fuselage band, invasion stripes and wing walk strips. Paint chipping was achieved using a silver Prismicolor pencil. Also keen eyes may notice that the kit nose and spinner have been replaced with the much more accurate Barracuda resin parts.

Weathering complete. Decals next.
GALLERY


Hi Chris,
Fantastic job, especially the weathering!
Cheers, Tomasz
LikeLike
Thanks Tomasz, always appreciate your thoughts.
LikeLike
Very interesting build Chris…I’m waiting on that new Eduard 1/48 scale kit to appear for my build which I hope is soon. I’m not sure of the lines around the nose of this SH kit but I figure unless your a diehard T-Pest fan I wouldn’t sweat it…nice build indeed.
LikeLike
Phil, if you look closely you will notice that the nose on my model is the more accurate Barracuda Studios resin replacement.
Cheers,
Chris.
LikeLike
Well done, very well done as always.. Your work is an inspiration! Did you use the Tamiya Dark green, ocean gray and light sea gray from the Tamiya range? If yes, were they sprayed straight from the bottle or “modified”? Keep on the good job!!
LikeLike
Hi Henri, I used Tamiya XF-19 Sky Grey for the under surfaces and on the upper surfaces I used Gunze Sangyo H75 Dark Seagray and the new Tamiya XF-81 Dark Green with around 10% Gunze H330 Dark Green. I find the new Tamiya RAF colours lacking a bit in contrast.
Hope this answers your question.
Cheers,
Chris.
LikeLike
Thank you for the info! Looking forward to other models from you soon..;-)
LikeLike
Another stunning aircraft from you! I love weathering on the underside and the subtle chipping on the wing root.
Great job as always!
LikeLike
Hi Chris. Looks great! Particularly like the exhaust stacks and how you get each looking just a bit different, really creates a depth of detail, kind of like the more you look, the more you see. Looking forward to your next..
LikeLike
Chris: excellent work. How do you keep such a nice tight camo demarcation line with your airbrush.
LikeLike
Hi Chris, Steve Rewey again. Brilliant job on your tempest! I Laid down basic colors on my 1/32 Tamiya Spitfire MK IX. getting ready to begin weathering. Couple questions: How do you do your exhaust staining, and your panel lines? Also on my Spit, I’d like to do faded, worn invasion stripes on lower fuselage( none on wings, about Sep or Oct ’44). Any suggestions? Cheers from Minnesota… Steve
LikeLike
Hi Steve, the exhaust staining is done by building up layers of a very thin (and I do mean very thin) mix of 60% Tamiya XF-64 Red Brown and 40% Flat Black with the air brush on its finest setting. For air brushing I use isopropyl alcohol to thin Tamiya and Gunze water based acrylics and for this mix it’s about 90% thinners to 10% paint. The panel lines are first carefully painted with a thin mix of Tamiya X-18 Semi-gloss Black and water. Once this has dried they are very carefully shaded using the same thin black/brown mix used for the exhaust stains. I also use this mix to weather and dirty-up the invasion stripes. In reality I don’t think these stripes actually faded but, depending on how much care was given to their application, they did ware and chip. This effect can be achieved by using a fine brush to apply small, irregular dots the underlying colours.
Hope this answers your questions. If not let us know.
Cheers,
Chris.
LikeLike
Thank you Chris!
LikeLike
Chris: another couple questions. Your weathering is fantastic as I mentioned. Do you use a wash on your panel lines before you lightly shade them? It also appears that you weather the airplane before the decals. Is there a reason for this? Finally, with solid camouflage colors of green and grey, what do you use for tonal variety? Light shading with the red/brown and black mix?
Cheers, Steve
LikeLike
Hi Steve, I do give the panel lines a carefully applied pin wash using a very thin, watery wash of X-18 Semi gloss black. This wash is thin enough to be transparent and so will give a slightly darker shade of what it is covering. And being a thin water wash you can usually wipe away any mishaps.
My habit of starting the weathering before decalling is usually because I am impatient to see what it will look like and I know I can continue the weathering process after the decals have been applied. I really don’t recommend this method.
I do use tonal variation on solid colours. The dark green has had a careful but patchy application of a thin mix of Tamiya XF-49 Khaki on and around the centre of the larger areas. The green and the greys were all carefully shaded with the black/brown mix (extremely thin).
Cheers,
Chris.
LikeLike
Thank you for all the advice Chris. BTW, I have a layover in London this weekend, and I will be attending an airbrushing clinic at Hannants Sunday afternoon!
LikeLike