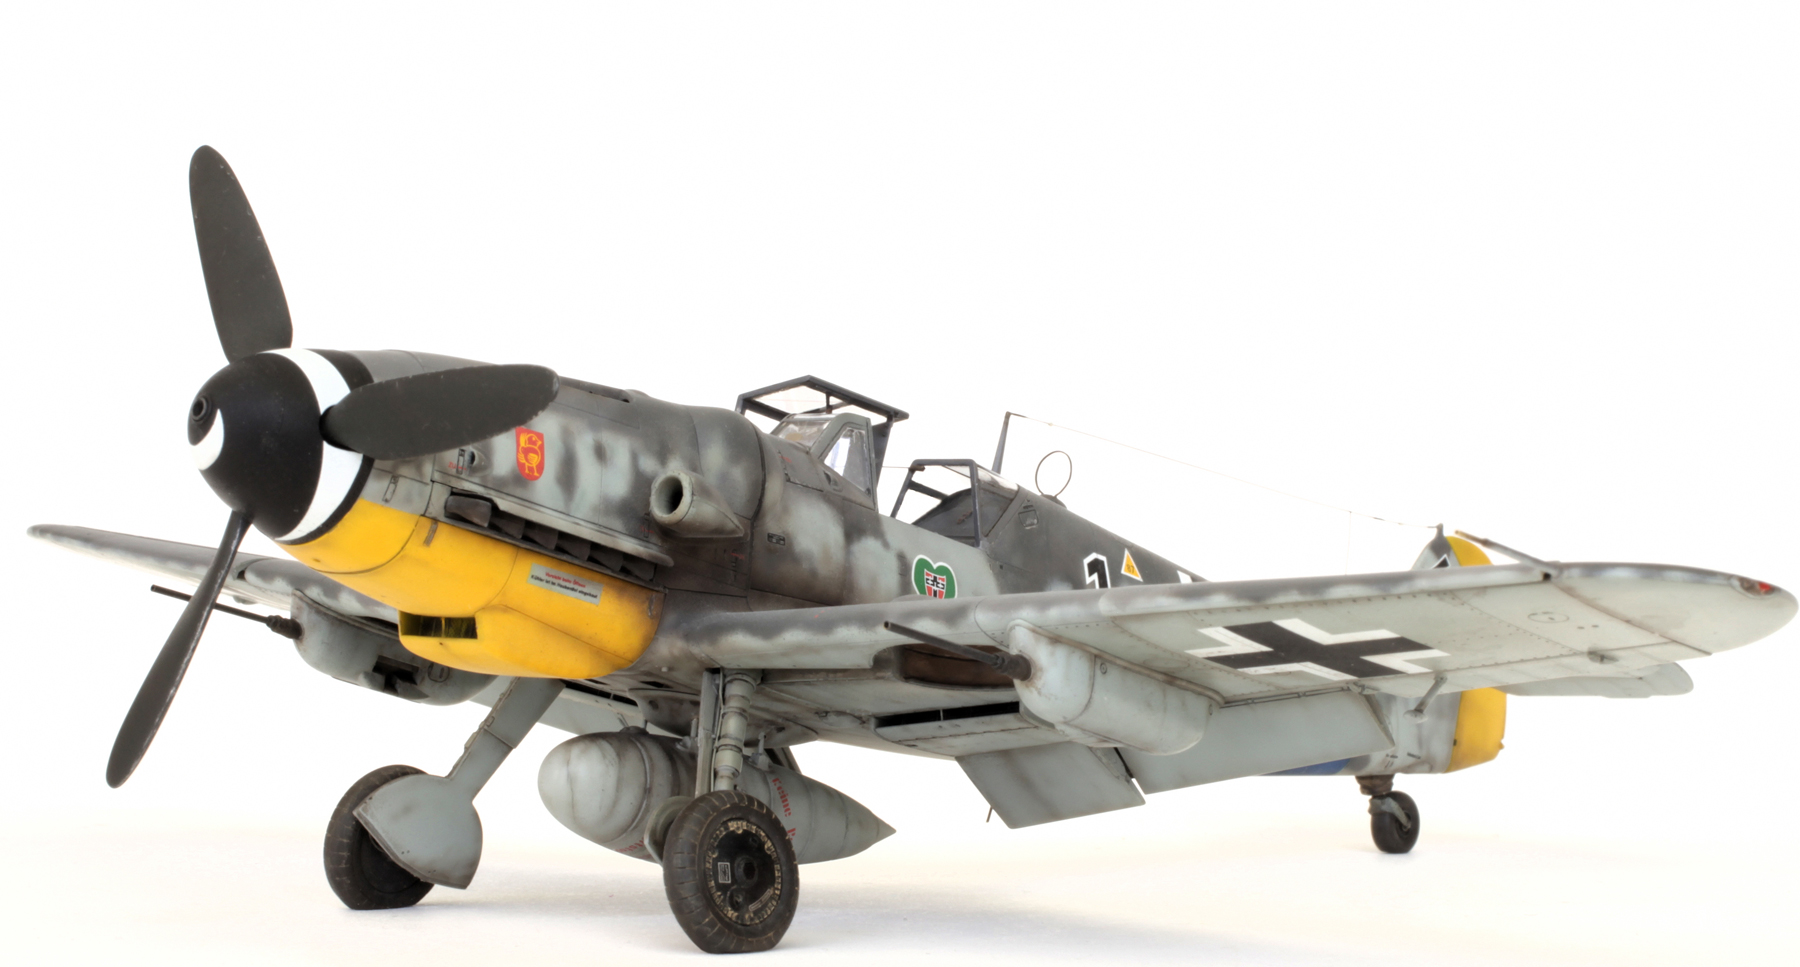
Tamiya 1/48 Messerscmitt Bf 109 G6

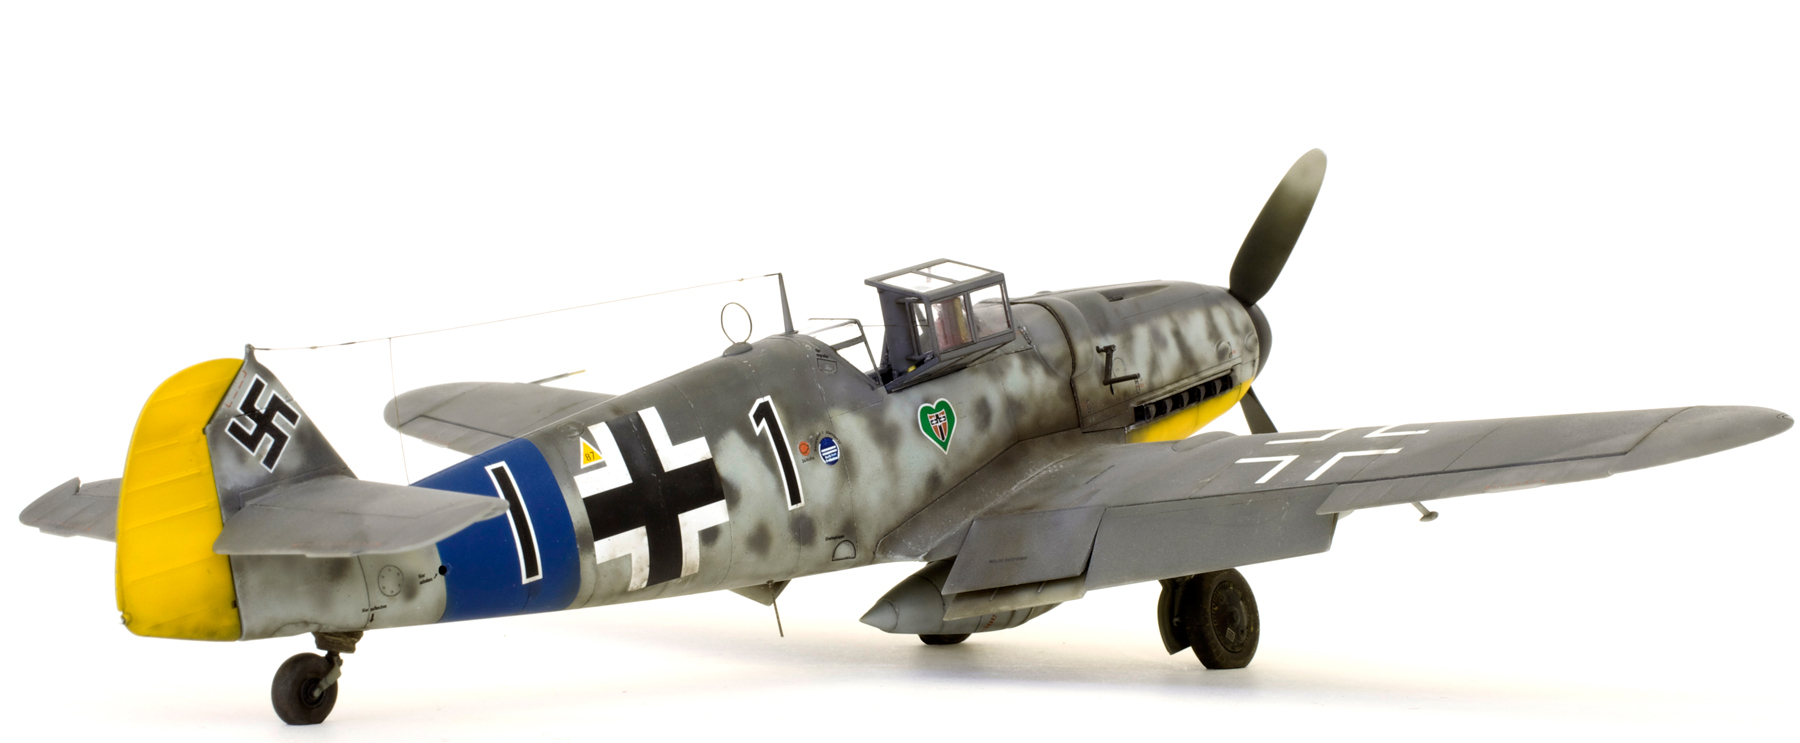
ME Bf 109 G6/R6 ‘Black 1’ W.Nr. Unknown 8./JG 54 Pilot Unknown Lüneburg, Germany Spring 1944.
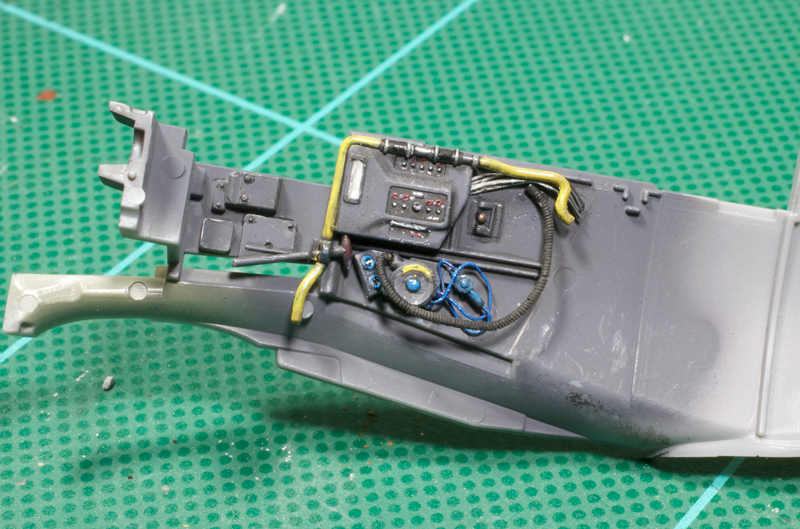
Starboard cockpit wall with some added detail to the oxygen supply mechanism.

Cockpit tub with straps added to the rudder pedals and scratch-built seat belts added to the seat.
Bottom of the engine with extra detail.

Extra plumbing and wiring was added to the engine sides and bottom using fine copper and solder wire.

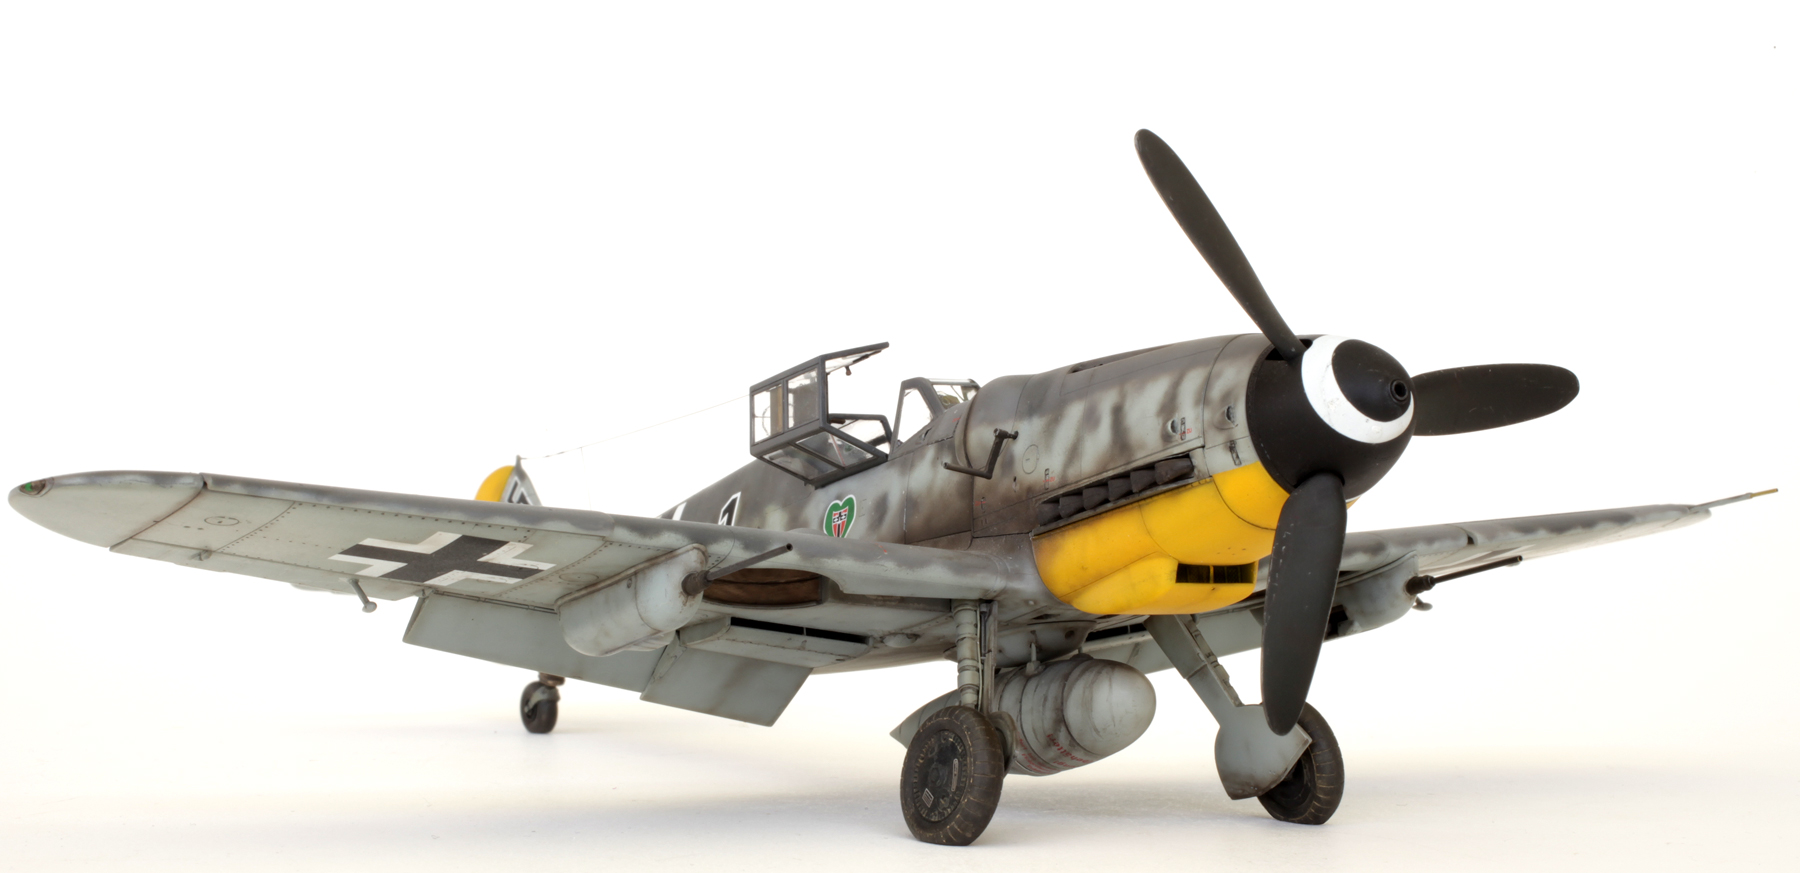
Underwing gondola cannon barrels were replaced with brass tube.
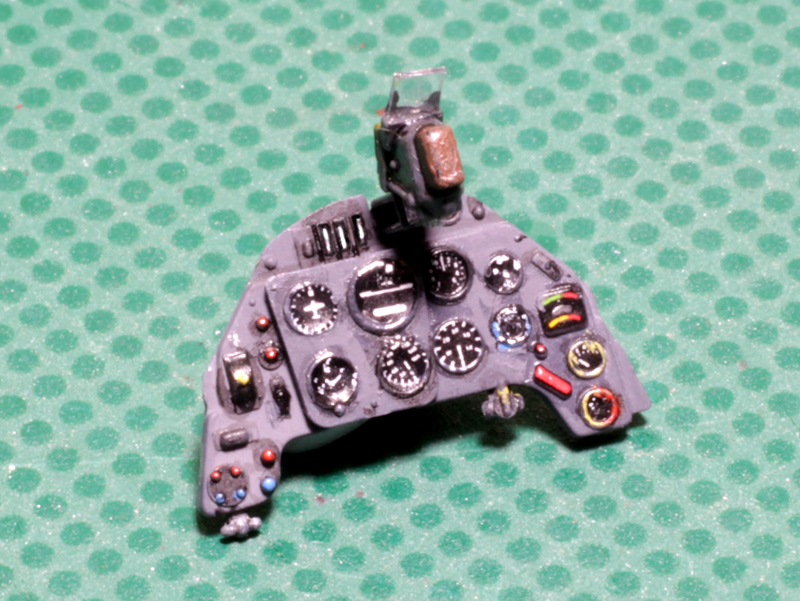
Kit decals were used for the instrument panel.

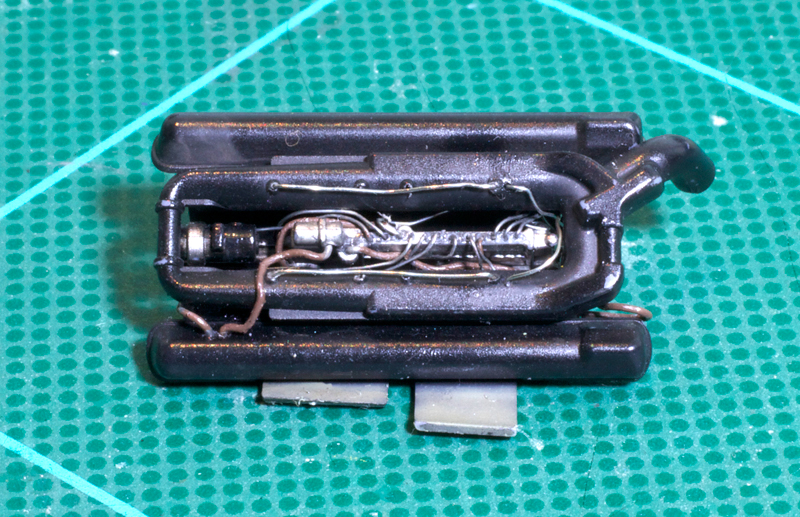
Wing radiator innards.

The navigation lights are moulded as part of the solid grey wing tips, so with some good photographic reference I painted them to look transparent.

I was very happy with the result.
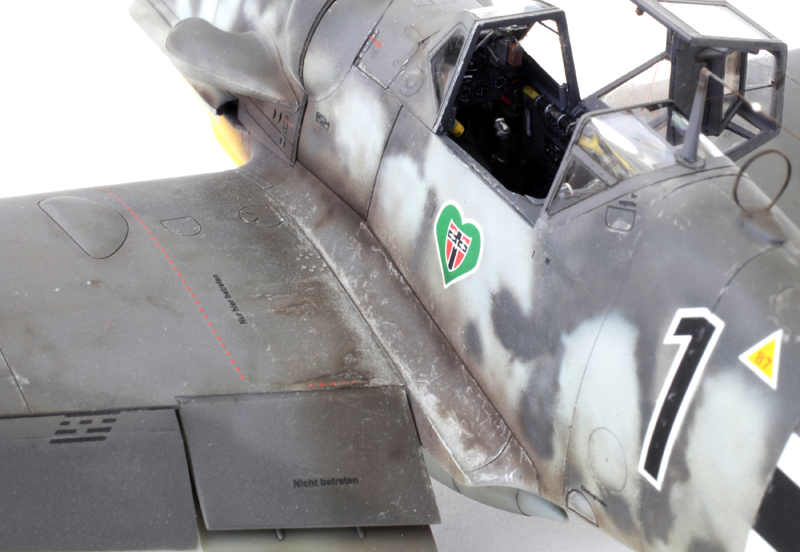
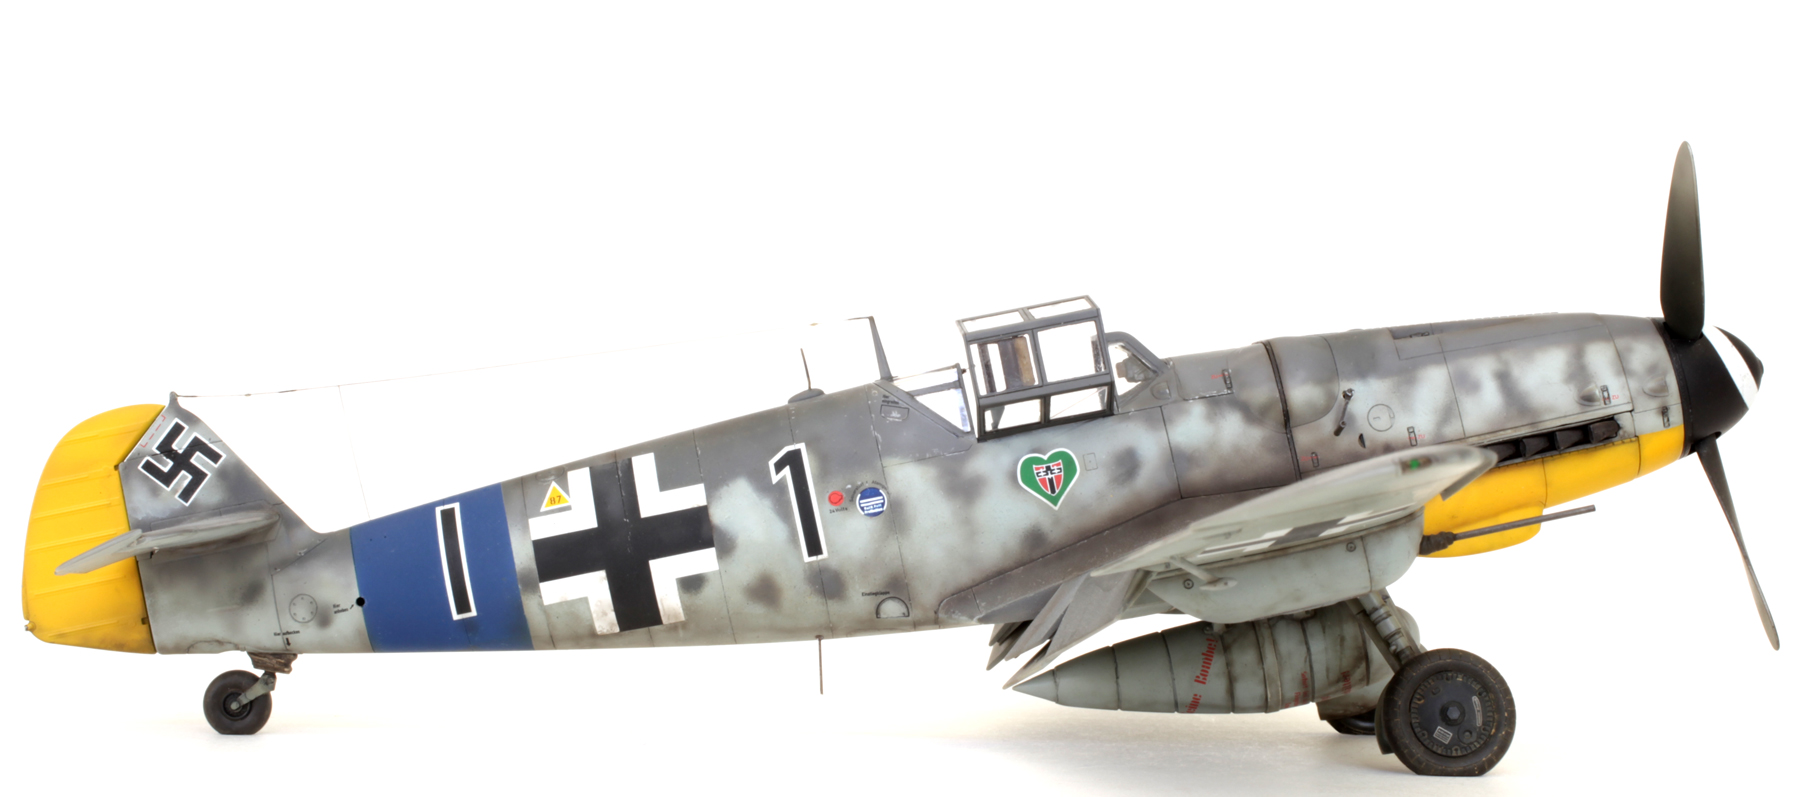
Chipping along the wing roots was done using a very sharp Prismacolor silver pencil. Also in this shot can be seen grab handles on the rear frame of the forward canopy, retaining wire holding the centre canopy section and the replacement D/F loop made using scrap P/E.

Very dirty belly of this well-used machine.

The top deck’s pretty messy too.
GALLERY


Beautiful as always Chris, thanks for sharing. I’m curious how you find the Tamiya kit vs Eduard?
LikeLike
Can’t really comment Rob ’cause I haven’t actually ever seen the Eduard kit. It would have to be pretty good to beat this one though.
LikeLike
Lovely stuff Mr Wauchop!
LikeLike
Thanks Rodger.
LikeLike
WOW Chris! love the cammo, especially the port side, looks so real. And the mottling, is dense with relatively hard demacration lines. Can you tell us about it?
LikeLike
Hi Alex, glad you like it. I’ve interpreted the cammo as being a very heavily mottled scheme that has had a patchy over spray of RLM 76. The tactical markings have also been painted over and replaced. My reference was the illustration supplied with the EagleCal decals so it’s probably not 100% accurate but it was the most interesting scheme on the sheet.
Hope this makes sense.
Cheers,
Chris.
LikeLike
Another great build, Chris. Hoping mine turns out half this good!
LikeLike
I’m sure it will be fantastic Bill.
LikeLike
Amazing build and finish.
LikeLike
Hi Nick,
the build of this beautiful little kit was fairly effortless, though the painting and weathering in this smaller scale is getting a bit more challenging these days.
LikeLike
Gorgeous, Chris! The paintwork and weathering are exceptional.
LikeLike
They’re the bits I really love doing, but as I said above it is getting a little harder in the smaller scales.
LikeLike
Another one for the hangar Chris..nice work!
LikeLike
Yep, I think I’ll keep this one.
LikeLike
Hi Chris,
absolutely wonderful piece of art as usual. Can you describe how did u paint the navigation lights? I like them!
LikeLike
Hi George, really glad you like the model, and as for the nav lights, each housing was first painted RLM02, then the red and green bulbs were added. Once these were dry a thin black wash was carefully built-up around each coloured bulb and the outer edges of each light housing all the while, carefully trying to match my photo reference. When this was dry each light was given several coats of clear gloss. Reproducing the look of the pics was a bit of a challenge but the results , I think, are very pleasing.
Hope this description is clear enough. If not I’m happy to answer anymore questions you may have.
Cheers,
Chris.
LikeLike
thank you Chris i will try it to my next model!
thank you
George
LikeLike
brilliant piece of work on the nav lights Chris. your work is always inspiring .
be well,
roger
LikeLike
Very inspiring to see what can be done. Someday I wish to be able to do that kind of detailing. So this goes into my “library of the future”
LikeLike
Hi Scooter, always great to know I’m an inspiration.
LikeLike
Great. Paint, as always nice work! Thanks for post. With all respect, Andrey.
LikeLike
Absolutely great! Thanks for posting this one Chris!
Regards,
Tomasz
LikeLike
Thanks Tom, great to hear from you.
LikeLike
Superb work as always Chis, you’re a master of the craft. What brand of paint are you using these days for the camo and interior and did you mix any colors for the camo on this project?
LikeLike
Hi Scott,
paints used are a combination of Gunze and Tamiya acrylics. Main cammo is all Gunze with a combination of both for the rest.
LikeLike
Hi Chris,
Great work, needless to say, as always. I always wondered how you do all the fine details on the exterior to have it look this vivid and realistic. Are there any step for step explanations somewhere? For example how did you do the weathering on the yellow rudder?
Best Regards
LikeLike
What to say? Every 2 or 3 days I check if you post something new, i’been following your work for a couple of months now and there’s always a new detail to see in all your models, and for my part there’s also the try to emulate some of your results and i must say that your work has inspire me to do things i didn’t before, for that thanks for sharing your work.
For that Me 109, it’s superb, I been really paying attention to the exact ammount of weathering that you apply, and it’s a thing of beauty, knowing how some fashions regarding heavy shadings are trending today, that 109 is a solid parameter to follow in the matter of realistic finish without pushing it too far, a true difficult spot on work.
Really glad to see it, and wondering what’s next in your workbench.
Cheers. From Argentina .
Nacho.
LikeLike
Thanks for your very kind words Nacho and yes I have to agree that there does seem to be a tendency to overdo things these days. I have always said that subtlety is the key. Next on the workbench is a Hasegawa 1/32 P-40E Warhawk in RAAF North African theatre markings. This is a commission job and it has been supplied to me with a lot of aftermarket stuff. Not my favourite subject but should be fun anyway.
All the best,
Chris.
LikeLike
In effect, subtlety is the key (i will steal this statement from now on). I expect to see the harsh conditions of the african campaing reflected in that warhawk. I will keep on studying your pictures and working in the subtleties of colour and shape.
Thanks for your reply,
Nacho.
LikeLike
Hi Chris, Its looks really fantastic, very nicely done !
I’m looking forward to see what you do with the Hasegawa P-40, I’m sure it will be an absolute ripper aswell !
By the way, I recently posted my 1:32 Fw 190d-9 on Large scale Planes, here’s the link if you’d like to take a look……
https://forum.largescaleplanes.com/index.php?showtopic=75186
Cheers,
Pete.
LikeLike
Absolutely stunning build on the Dora Pete. Can’t wait to see the book.
Cheers,
Chris.
LikeLike
Hey Chris, I’ve read and reread your June 3rd description regarding the nav lights and am still left scratching my head trying to understand this technique. When you say you added the red and green bulbs, what exactly does that mean? Are they simply paint dots at the very tip or do they wrap slightly over top and bottom?
LikeLike
Hi Wally,
They are simply dots of colour that do go slightly over top and bottom of the extreme outer edge of the lens cover. They have been very carefully shaded around the inner edge of the main housing and around each coloured dot with a thin black mix. When dry they were given a good coat of clear gloss. I think the dark shading and especially the gloss coat is what gives the illusion of depth. Just find some good reference pics and try to reproduce the way they look. Practice on an old kit first. Hope this is of more help.
Cheers,
Chris.
LikeLike
Chris, thanks very much for taking the time to respond. I believe your answer covers it. I was really struggling trying to understand how to achieve depth. Finally, I’ve been following your work for some time and find it truly inspirational. Thank you!
LikeLike
Amazing build. Wonder what size of brass tubing did you use for the gondala guns?
LikeLike
Hi Michael, I’m pretty sure it is 0.5mm I.D.
LikeLike
A little late to the party but your weathering is always soft, feathered and beautiful. The art in your work really shines there. So, I picked this up to practice the mottling effect and oil-based weathering before my pre-order of the 1/32 Zoukie-Mura G14 comes out in a month or so. What’s your recommendation on PSI and needle-size? I’ve read low PSI and .20 or lower. Also, any additional chipping w/fluids or all Prismacolor silver pencil?
LikeLike
Wes, the PSI I run my old Aztek at is usually between 20 and 30 PSI but this will depend a lot on what airbrush you’re using . I’ve just started using an Iwata Eclipse Takumi and I’m still figuring out the air pressure to run it at but it seems to be about the same as the Aztek. For really fine work I did get a better result working with a much lower pressure, about 10 PSI. Still can’t get as fine a line as I can with the Aztek though so am using a combination of both fitted with their finest needles. All the chipping is done using the silver pencil with fine edging of a watery black/brown mix added using a 5/0 paint brush. This edge is then very subtly shaded using the airbrush and the same thin black/brown mix.
Hope this helps.
Cheers,
Chris.
LikeLike
Appreciate it! I had not thought to feather pencil work w/thinned wash…thx!
LikeLike