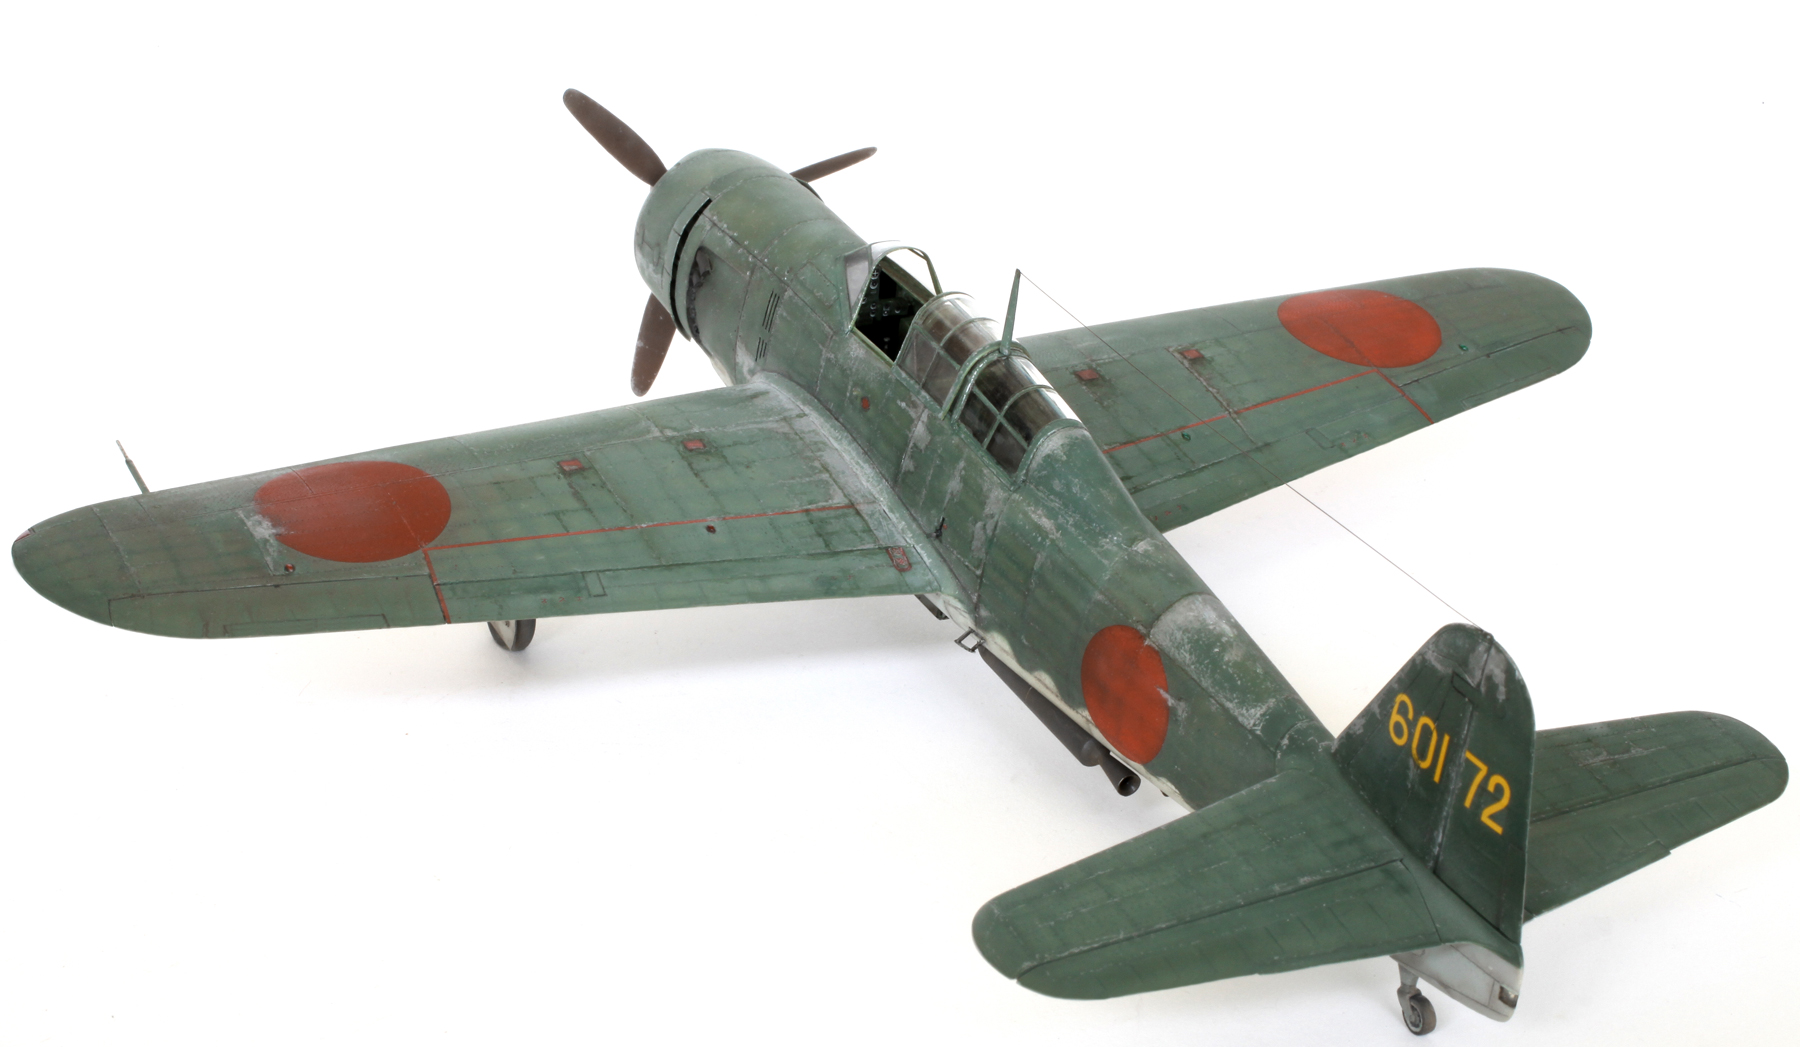
FineMolds 1/48 KUGISHO (Yokosuka) D4Y4 Suisei ‘Judy’
KAMIKAZE

Kugisho D4Y4 Suisei of the 601st ‘Special Attack’ FG, Japan 1945

Some extra detail was added to the cockpit interior. This included seat belts from lead foil and various knobs, handles and placards from Evergreen plastic card and rod.

Most of the gear in the rear cockpit has been removed to reduce weight for its one-way mission. An empty radio box was added, instrument housings were drilled out and some loose wiring was added.

After the extra head armour with its support braces and rudder pedal toe straps were added, the interior was given a coat of Tamiya XF-71 Cockpit Green.

Some weathering was done with my red brown/black mix and a Prismacolor silver pencil.

Wiring was added to the cockpit sidewalls using fine wire. A perforated strip was glued to the side of the bomb bay opening after the doors had been removed. The kit’s closed engine cowl cooling fins were cut out and replaced with scratch-built opened ones. Some internal detail, which may be visible, was added. The back of this added detail can be seen here.

Painted and weathered.

Ignition harness and wiring were added to the very basic kit engine.

Detailed and painted. Luckily not much will be visible once it’s behind the big prop spinner.

Detail behind open cooling fins.

Cooling fins glued in place. Exhaust pipe ends have also been hollowed out.

Rivet detail was added to the exterior surfaces using the MDC 1/48th Rivet making tool.

Upper wing rivet detail.
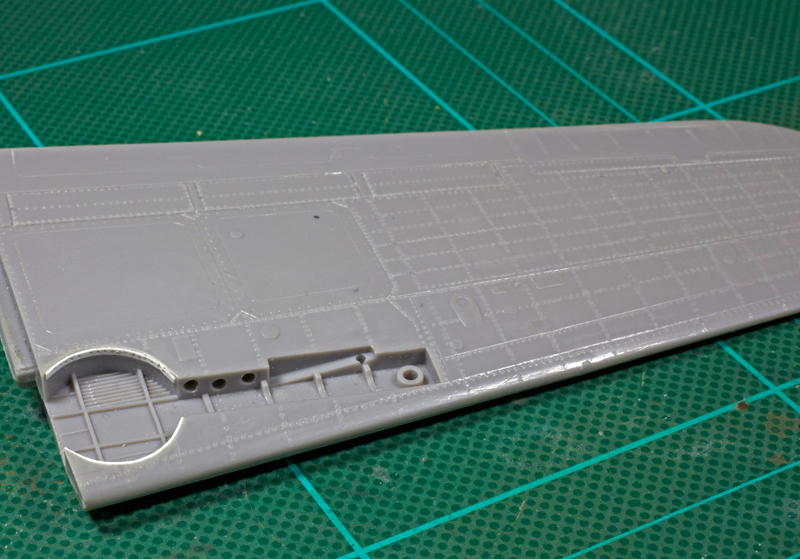
Lower wing rivets. Also three large weight holes were drilled through the rear wheel well wall and small perforated strips were added to the front and rear of the round wheel housing.
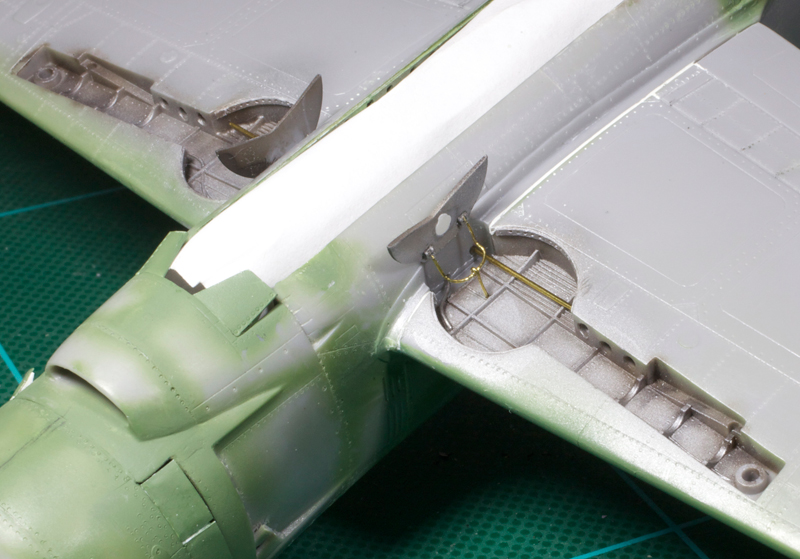
Wheel wells and inner gear doors had extra detail added using fine brass and solder wire.
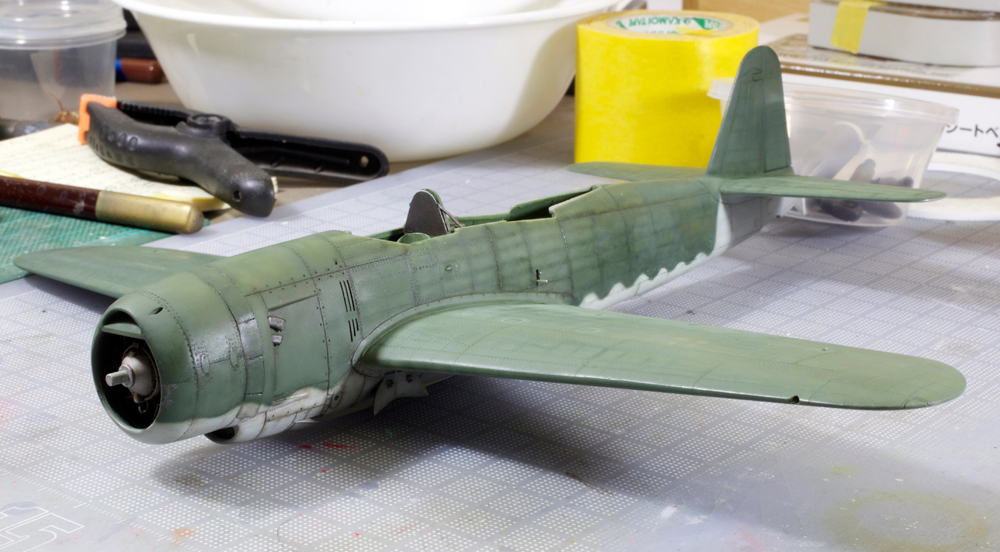
In this shot basic painting is complete and weathering has begun. Undersurface colour is Gunze Sangyo Mr Hobby H61 IJN Gray. Upper surfaces are a mix of Tamiya XF-11 J.N. Green with a dash of XF-12 J.N. Grey added to lighten it up a bit. Selected panel and rivet lines were then carefully sprayed with a very thin mix of straight XF-11 J.N. Green.

All the markings were masked and sprayed before the weathering was added. The main weathering is complete in this shot. The paint chipping was achieved with the use of a very sharp Prismacolor silver pencil. The windscreen and opened sliding section of the canopy were replaced using the vac-form offering from Squadron.
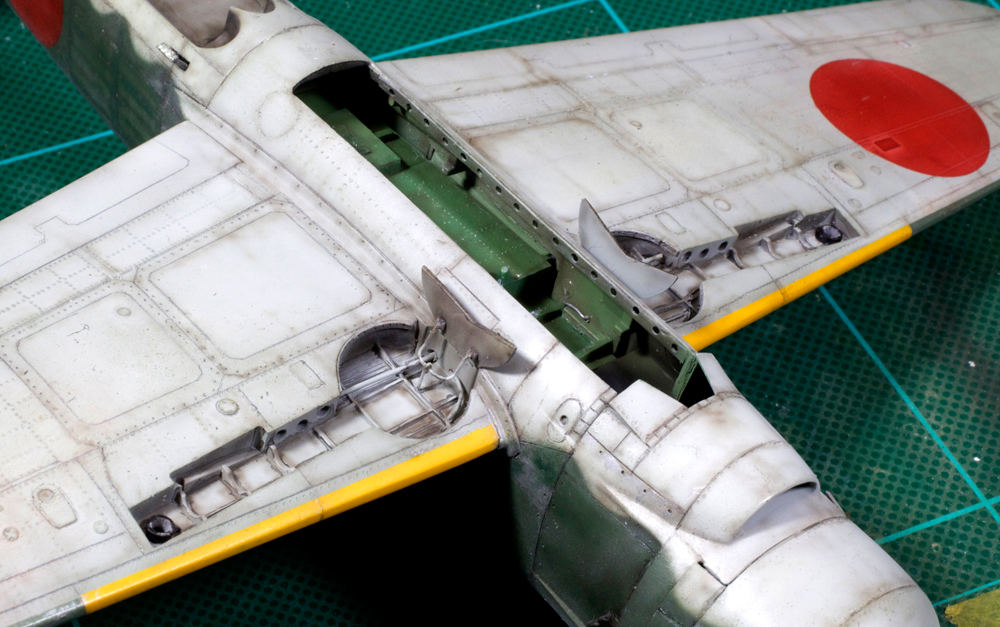
Undersurfaces painted and weathered. This shot was taken mainly to show the finished wheel well detail.

The kit 800kg bomb had extra detail added which included fin braces and a P/E fuse arming prop from the spares box. Not sure what the device strapped to the centre of the bomb is but I made it out of Evergreen plastic and Albion Alloys brass tube to look as close as I could to my reference. A detonation pin was also added to the tip of the nose.

Painted and lightly weathered. The red stripe is pure conjecture on my part.
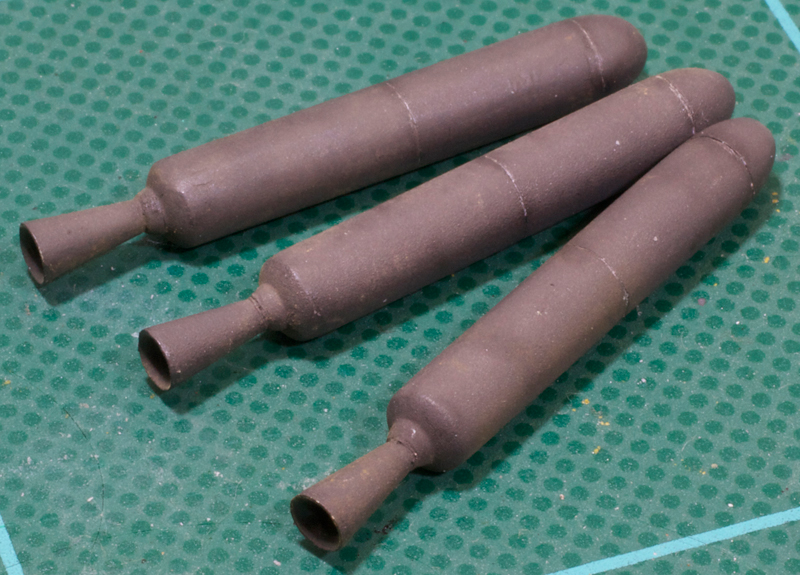
Rocket motors were painted with a 50/50 mix of dark grey and red brown. The inner walls of the exhaust nozzles were thinned by hollowing them out with a motor tool.
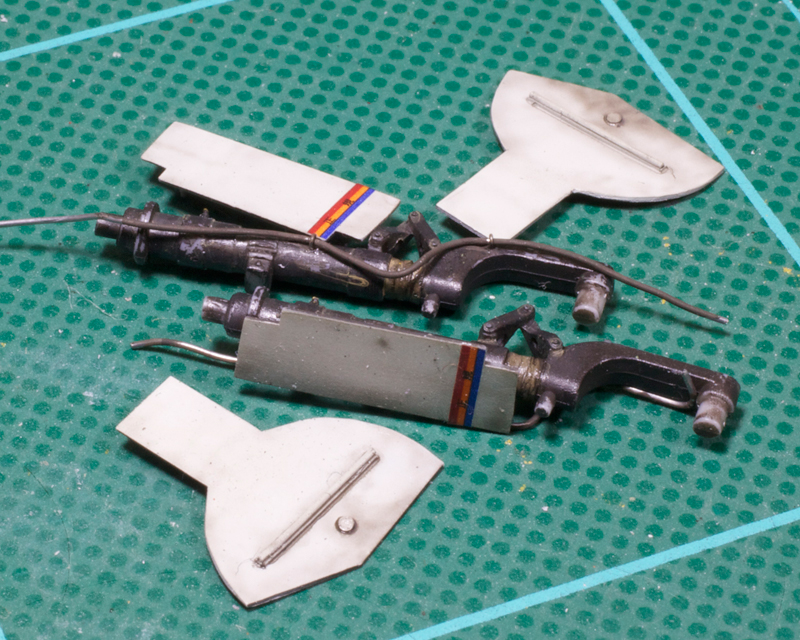
Main undercarriage parts detailed, painted, decaled and weathered. Note that the main legs have been shortened by cutting a couple of mm’s from the oleo legs and closing the oleo scissors slightly. This was done to indicate the compression caused by the extra weight of the large bomb and rocket motors being carried. This alteration made it necessary to separate the lower wheel covers from the upper leg covers as in reality the wheel covers would slide up the outside of the leg covers. The kit gear covers were way too thick for this to look right, so the upper parts of the covers were sanded to a better scale thickness. It turned out to be easier to remake rather than to alter the lower wheel covers, so new parts were cut out of 0.25 mm plastic card. Detail was added to the outside of the new wheel covers using plastic strip and rod. Fine solder wire was also used to add brake lines to the undercarriage legs.

Bomb, rocket motors and undercarriage have been glued in place. Also note that the main gear tyres have been flat spotted.

Mounting step and handle were also added. Although they’re not seen in this shot, the plastic pitot tube was replaced with Albion Alloys sliding brass tube and the solid grey plastic tail navigation light was cut out and replaced by gradually building up layers of Testors clear parts cement.
GALLERY


Awesome Chris, you must have good eyes! Cheers Jules
LikeLike
Thanks Jules, and they’re not as good as they used to be.
LikeLike
Nicely done Mr Wauchop. A veritable silk purse from a sow’s ear!
LikeLike
Ya got that right brother!
LikeLike
Nice work Chris!
LikeLike
I love your style, it is a big inspiration for me.
This Judy looks simply awesome!
LikeLike
Chris, awesome work, very nice!
Congratulations!!!
LikeLike
You’re a masochist Chris, beautiful work
LikeLike
As always, excellent, nothing to add!
LikeLike
Very nice Chris! Love the worn finish and ”prismacolor treatment”. It looks very convincing.
LikeLike
Looks amazing.. Interested to know if the silver pencil is a watercolor pencil or a normal colored pencil?
LikeLike
Hi Richard, the Prismacolor pencils are not water colour but they do have more waxy consistency than a normal coloured pencil. This means you are able to rub it off with a damp cotton bud if not completely happy with way it looks.
LikeLike
What to say?…It’s such an inspiring piece of model making… and the most suprising thing is that i’m building a Hayate in 1/48 so the reference comes in such a good timing for a japanese weathered project that i just can’t believe it (: Thanks, and thatks again,… in my modelling club i’m spreading your prismacolor pencil gospel jejejeje… cheers from Argentina.
LikeLike
Really glad that I could be of help and some inspiration to you Ignasio. Wish I owned some shares in Prismacolor (ha, ha).
LikeLike
Hi Chris,
Didn’t have chance to write earlier as this winter season was killing me. I love all your work but the Japanese warplanes are especially superb. This one is no exception. Nice piece of work!
LikeLike
Thanks Tomasz, always appreciate your comments.
LikeLike
Love your way of painting models Chris… You are just prooving that you don’t have to spent a fortune to achieve a scale model looking close to the real thing.
You have my respect for that.
LikeLike
Thanks George.
LikeLike
Again, this is the benchmark for fine scale modelling. Wonderful piece Chris, every detail is executed with perfection.
LikeLike
Hardly perfection Rob and I’m glad the benchmark isn’t set too high.
LikeLike
Well fair enough, I guess that was a little over the top and awkward praise for you to respond to 🙂
What I meant to say was well done and thanks for the manner in which you present your work. It’s nice that you give insight into your technique and processes. Looking forward to your next piece- when will it be ready? 😆
LikeLike
I think you were right Rob, I was just being humble so you wouldn’t think I was too much of a dickhead (ha, ha). Next one is ready to be posted. Its basically a repaint of the FineMolds Kikka which I originally built in 2007. I didn’t take any build pics back then so this post is mainly shots of the finished model.
LikeLike
Great model, Chris!
I’ve missed “those old days” in Absolute Hobbies.
Regards!
Zigmeister
LikeLike
Hi Zig, I have to say that I don’t really miss running the shop but I do miss seeing all you guys. Well some of you guys anyway.
LikeLike
Bien ,estas deben de ser fotografías color de la época, y la maqueta ?.
La estraordinaria maqueta supera todo lo imaginable !!
LikeLike
I keep coming back to this page and to this build in particular over and over for inspiration. It just such a wonderfully well executed piece, Chris. I like it so much that I just bought the same kit and some aftermarket to see if I can somewhat mimic what you have done here. Hopefully I can make it justice.
LikeLike
Make sure you’ve got a Prismacolor silver pencil and a good pencil sharpener and have some fun!
LikeLike