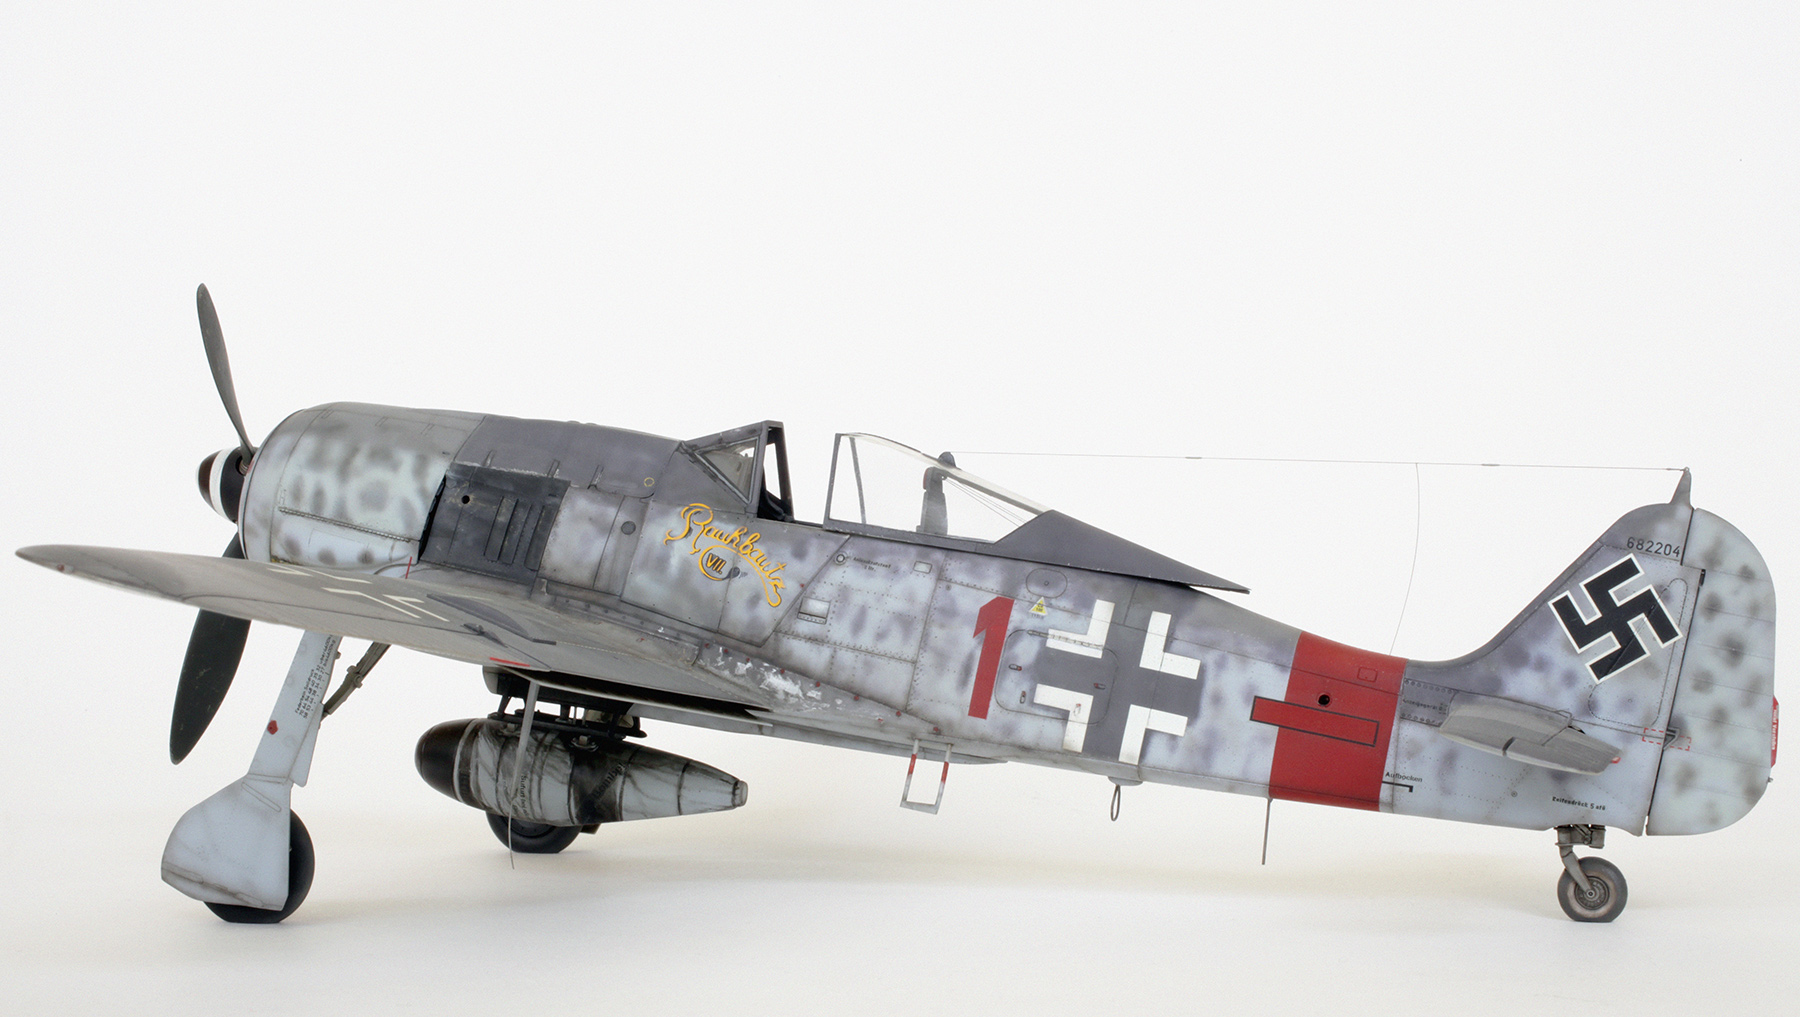
Hasegawa 1/32 Focke-Wulf Fw 190 A8 R2
RAMMJAEGER

Focke-Wulf Fw 190 A-8/R2 as flown by Leutnant Klaus Bretschneider, 5./JG 300, Erfurt, Germany, October 1944.

I made this model 18 years ago, and since it has only appeared on Brett’s web site (in relatively small format photos) I thought it was time to re-photograph it and post some much larger, more detailed images here. I have done a bit of a clean up of the model, and since more pics have come to my attention, I corrected some of the paint work and weathering. This includes a more accurate spinner spiral, paint chipping and dirt on the wing roots and under surfaces. Also in one photo of this plane I think it shows that the radio antenna wire retraction mechanism was disconnected and so, with the canopy open, the wire is just hanging slack. But as I had fixed the canopy so well, and I’m not 100% sure about this detail, I decided to leave it as is.

More dirt and chipping on the starboard wing root.

Extra soot around the shell ejection chutes and along selected panel lines on the belly.
GALLERY


ORIGINAL ADDITIONS AND ENHANCEMENTS
- Before construction commenced rivets were added to the exterior surfaces.
- The kit-supplied belly tank was replaced with the more correct part from Hasegawa’s Me 109 G6 kit. Plumbing, stability pins and braces were added to the tank and the mounting rack using brass wire, plastic rod and stretched sprue.
- The 30mm shell ejector chutes on the lower wing were cut open and the outer 20mm chutes were closed off.
- Brass tube was added to the wing leading edges to represent the 30mm cannon barrels. The tips of the kit’s plastic 20mm cannon barrels were hollowed out using the point of a new scalpel blade.
- All tyres were flat spotted and the tail wheel structure was modified so it would sit in a slightly more retracted position.
- Plumbing and wiring was added to the main undercarriage legs and actuator arms using lead wire and fine copper wire.
- The tailwheel retraction wire seen attached to the starboard undercarriage retraction arm was made from stretched sprue.
- Flaps were modified so they would sit in a more realistic 2/3rd closed position.
- The kit’s thick plastic D/F loop was replaced with a metal staple that was straightened and then bent to shape.
- The plastic FuG antenna mast was replaced with a piece of finer diameter brass wire cut to the appropriate length.
- The whip antenna wire at the end of the Morane mast was replaced with much finer brass wire.
- The pitot tube was replaced with Albion Alloys telescoping brass tube.
- Landing gear retraction indicators were added to the top of the wings using fine brass wire.
- Armour plates were added to the fuselage sides below the windshield and the cockpit. These were cut from .020″ plastic sheet and had all their edges bevelled as per my reference pics.
- The cowl gun troughs were filled with pieces of shaped plastic rod.
- Bracing wires were added to the back of the armoured headrest using black nylon mono filament (invisible mending thread).
- Finally the radio antenna wire was added. Before the rear canopy section was attached a small hole was drilled in front of the aerial pulley wheel housing and a longer than needed length of nylon mono filament was threaded through. The end was then fed through a hole that had been drilled in the centre of the bracket plate at the rear of the canopy combing and glued in place. A tiny hole was drilled down into the top of the aerial attachment spigot on the vertical tail fin and a small loop fashioned from very fine wire was super glued into it. After the rear canopy was firmly fixed in place the thread was pulled tight through this loop, tied off and permanently fixed with a drop of super glue.

Masterfully done! as always:) great result, with the modifications/additions to the kit and all:)
‘WOWed’ me again:)
LikeLike
Hi Chris,
After your FB post I was waiting to see it here, and here it is! 18 years or not, it still looks great and as close to the real thing as a modeler can make it!
Cheers, Tomasz
LikeLike
Thanks for reposting this build Chris. Your base color and weathering work is very pleasing to the eye. Not too much, not too little. Just about right.
Cheers
Collin
LikeLike
Nice update on an already superb build, Chris. Regarding the soot staining around the shell ejection chutes, could you provide details on your method? I’m trying to master this as well as exhaust stains and could use more info on your technique. What paint brand/color/thinner, thinning ratio, air pressure, and spray distance from the surface? And do you streak in one pass or build up slowly?
As always, your photography is top drawer stuff. Have you ever considered getting on the You Tube bandwagon and producing demonstration videos of your painting and weathering techniques? Your work is some of the best of our generation and we all could learn a great deal from watching you in action.
Thanks,
Scott
LikeLike
Hi Scott, the paints I use are Tamiya Acrylic XF-1 Flat Black and XF-64 Red Brown.These are mixed 75% brown to 25% black. This mix is thinned using about 90% Iso Propyl Alcohol to 10% paint. My air brush is fitted with a fine needle head and my compressor is set to between 25 and 30 PSI. The air brush needle is then set to the finest spray pattern it can achieve (which with my old Aztek is around 0.5mm if the airbrush gods are smiling at the time). The airbrush has to be held quite close to the surface to achieve the finest line and if spidering occurs the air pressure may need to be wound down bit. Before committing paint to the model lots of testing and practise on a clean sheet of white paper is necessary (and fun). This is where you might need to adjust the paint mixture and/or air pressure. And yes, I do build up the colour slowly with as many passes that are needed. With this very thin mix you will see that the first light passes have a brown tinge which will become darker and blacker as the paint builds up. The final effect should be black in centre with dirty brown feathered edges.
I hope this helpful Scott. If not don’t hesitate to ask more questions.
Cheers,
Chris.
LikeLike
Outstanding rundown, Chris. Just what I was looking for, thanks very much for the info.
LikeLike
MARVELOUS!!. THE GREATEST PLANE MODELER.
LikeLike
Goodness Chris, there’s are no words to describe how good this work is!!! I’m speechless
LikeLike
Nice Wurger Chris !
LikeLike
Thanks Jim !
LikeLike
Hey Chris,
Nice Fw-190 hope with this Covid19 thing…hope things are well where you are.
Not much plastic on my end of the world cuz of to many things here.
Best of luck.
Phil.
LikeLike
Hi Chris, your work is so inspiring! I always know that my work, when compared to your work, didn’t go that extra mile (or two!). ‘makes a big difference! I’ll keep looking, learning and trying! Thanks, Ron
LikeLike
Hi Chis , it looks better than ever ! I always loved this model its so inspirational ! I’ll have to go back and check out the original pics on HS to spot the changes. The weathering on the underside looks fantastic and I love the opening close up pics looking from the trailing edge of the wing towards the nose.
What a great idea to do it up. Any chance you’ll be doing any more 190’s soon? …I hope so !
I’m in a bit of a modelling slump at the moment so hopefully I can change my mood and get my creative juices flowing again soon.
All the best Chris and bye for now,
Cheers Peter
LikeLike
Hi Pete, really glad you like this one. The only other 190 that might get a spruce up is the first D-9 that I built about 20 years ago. The one I am cleaning up at the moment is a 1/32 109 g-6. I will take some pics and post them here soon and then maybe the D-9.
Hope that this will get you out of your slump and give you a bit of momentum to get modelling again soon.
Cheers and stay well,
Chris.
LikeLike
Hi Chris , what I meant was will you be building any new 190’s, I should have been clearer there.
I’ll look forward to the 109, it should be great.
All the best cheers,
Pete
LikeLike
I’ve got an Eduard 1/48 190 A-8 waiting to get started at the moment. Could take a while though.
LikeLike
Chris, you will love the new tool Eduard 190’s they’re lovely little kits. I’d love to send you some pics of mine but I don’t have your email
Cheers
Pete.
LikeLike
Chris, like nice wino, you get better and better in modeling with age…hahaha!
Superb Foka!
Check that:
https://www.themodellingnews.com/2020/07/dry-fit-review-132nd-scale-junkers-ef.html#more
You may spread your wings there.
Funny thing, that Aztec, I got in your shop 25y ago, is still working, they don’t make them like that anymore.
Zig
LikeLike
Chris, do you remember how you painted the drop tank on this wurger? Looks so great! I mean the fuel streaking and grime. It’s so realistic. Was it done with the airbrush or painted with paint brushes? Or both maybe? Oil paints? Acrylics? Can you recall?
Cheers,
Tomasz
LikeLike
I sort of remember Tomasz. I’m sure it was done by carefully painting streaks of Tamiya X-18 with a fine paint brush followed by some careful airbrushing of my black/brown mix. Or it might have been the other way around. Sorry mate but that’s the best my old ‘self isolated’ brain can do. I’m pretty sure that’s right though.
LikeLike
That’s fine Chris. I’m pretty sure the result would be similar, irrespective of the order of applying these two techniques. Thanks for the quick answer.
LikeLike